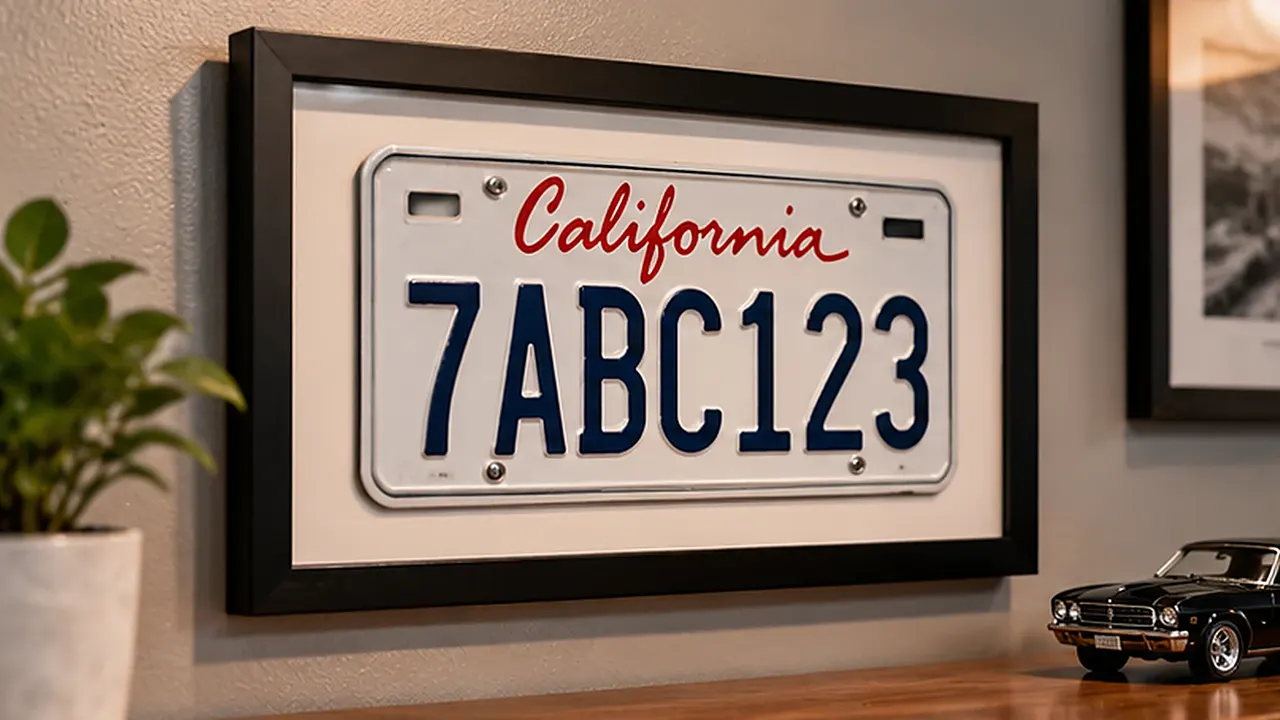
To frame a license plate for the wall, measure its full width, height, and raised depth, choose a frame with enough internal clearance, and secure the plate to a suitable backing without crushing it. Fit hanging hardware to the frame or supporting backboard, then use fixings appropriate to the wall and the finished weight. A decorative car frame can finish the edge, but it doesn’t replace the wall-hanging structure.
For an ordinary keepsake, a simple reversible mount can be enough. A rare plate with flaking paint, old labels, or corrosion deserves a professional framer or conservator before cleaning or fastening. The aim is to display the object you have, not reshape it to fit the first frame you find.
Confirm That the Plate Can Become a Keepsake
Resolve its registration status before making a display. A plate you have removed from a vehicle may still need to be returned, transferred, or handled through its issuing authority. Ownership of the vehicle doesn’t establish that every old plate can be kept permanently.
Check the instructions that apply to the particular plate and your situation. If it is a required return, take photographs for your memory rather than mounting the original on the wall. The decisions involved in keeping, returning, or recycling old plates come before choosing a frame.
For a purchased collectible, keep the seller’s description, provenance, and any relevant paperwork with your records. Avoid publishing a story about its previous owner as fact unless you can support it. A simple label with the issue location and known history can be more interesting than an embellished narrative.
Choose Between an Open Mount, Picture Frame, and Shadow Box
An open backboard exposes the plate and makes its original edge part of the display. A conventional picture frame adds a defined border, but its internal depth may be insufficient for raised characters or hardware. A shadow box provides more room around a three-dimensional object and can accommodate a separate photograph or caption.
Choose the arrangement around the plate’s condition and the place it will hang. An accessible garage display has different risks from an enclosed indoor keepsake. Consider dust, accidental contact, humidity, and whether you need to inspect or remove the plate later.
| Display type | Suitable starting point | Main check |
|---|---|---|
| Open backboard | Sound everyday keepsake | Plate support and exposed edges |
| Picture frame with added depth | Relatively flat plate and simple presentation | Internal clearance behind glazing |
| Shadow box | Raised details or related memorabilia | Independent support for each object |
| Decorative automotive surround on backing | Keeping a car-related visual style | Surround is not the wall fixing |
| Professionally made conservation mount | Fragile, rare, or valuable plate | Materials and reversible support |
Don’t buy a nominal picture size and assume the entire plate will show. The frame’s visible opening, internal recess, and usable depth are separate measurements.
Measure the Object Rather Than Assuming a Standard Size
Measure the actual plate, including bent corners and any projecting edge. Record its width and height at the widest points, then note how far the embossed characters or other features rise from the back. Place it on a clean, padded surface without pressing it flat.
Check the existing mounting holes and photograph their position. You may be able to use them for a reversible display mount, but torn or weakened holes may not be suitable for carrying the object. A long slot may need a different support arrangement from a small round hole.
Decide how much of the original edge you want visible. A narrow frame opening can hide a date, embossed border, or small historical mark even when it fits the outside dimensions. Measure those details before choosing the mat or surround.
Write down the proposed whole assembly: plate, supports, backing, spacers, glazing if used, frame, and hanging hardware. This simple list prevents a common mistake—choosing the frame depth around the metal alone and discovering that the mounting pieces won’t fit.
Select Backing and Contact Materials Carefully
The backing needs to support the plate without sagging and provide a secure connection to the frame or backboard assembly. Decorative paper or a thin dust cover is not a structural mounting panel. If you cannot establish how the load transfers to the frame, change the design before hanging it.
Choose contact materials suitable for the object. Products described casually as craft foam, felt, or acid-free board aren’t automatically suitable for every metal, coating, or enclosed display. For a valuable plate, ask a conservator or experienced framer to specify the materials rather than relying on a marketing label.
The Canadian Conservation Institute advises reviewing enclosure materials for harmful emissions and avoiding unsuitable direct contacts with metal objects. Apply that principle to the complete assembly, including hidden adhesives and coatings, not only the visible background color.
Keep an ordinary keepsake project simple. A neutral, compatible backing and a removable support method are usually easier to inspect than several layers of unknown fabric, glue, foam, and decorative finish. Don’t seal a plate inside an enclosure while components are still wet or curing.
Choose a Border That Lets the Plate Remain the Subject
Start with the plate’s existing colors, lettering, and age rather than matching every detail of the room. A simple dark or neutral surround can separate a busy plate design from the wall, while an already dark plate may need a lighter background to keep its edge visible. Test paper samples before buying decorative materials.
Keep the visible margin deliberate. A wide background can make one small plate feel intentional on a larger wall, but excessive empty space may weaken the connection between the plate and its caption. There is no required ratio; compare layouts from the distance at which you will normally see the display.
Avoid a shiny border that repeatedly reflects room lights across the lettering. Check the proposed frame at the actual wall angle, not only lying flat under workshop lighting. A finish that looks subtle on the bench can become the brightest part of the display once hung.
If the plate carries wear from a meaningful vehicle or journey, let that history remain visible. An ornate frame or artificially distressed background isn’t necessary to explain it. One clearly written caption and a restrained border often tell the story more directly.
Prepare a Clean Layout Before Any Fastening
Make a full-size paper template of the plate and proposed frame opening. Use it to test the position on the wall without handling the plate repeatedly. If you plan a caption or vehicle photograph, include a paper version of each in the layout.
Place the real plate on the prepared backing while everything is horizontal. Check the visible margins, alignment, and support points. A plate with an irregular shape may look better when centered visually rather than measured from one bent corner.
Photograph the arrangement and check it from normal viewing distance. Tiny labels and elaborate backgrounds may look attractive on the workbench but compete with the plate once it is on a wall. Leave enough visual space to recognize the object first.
Mark support positions on a separate template or the backing, not on the plate face. Check the back of the frame for room needed by screws, nuts, clips, or spacers. Hardware that projects too far can prevent the frame from closing or damage the wall.
Mount the Plate Without Altering It
Use Existing Holes Only When They Are Sound
Existing holes can provide a straightforward mount for a sound plate on a suitable backboard. Select hardware that fits without drilling or enlarging the original openings. Support the plate evenly and avoid tightening it until it bends against an uneven background.
Keep hard fastener edges from grinding into painted or reflective surfaces. Any washer, sleeve, or spacer touching the object needs to be appropriate for the finish and intended display. Do not assume that hardware used outdoors on a vehicle is automatically the right choice for a collectible.
Access matters too. Position the fastening so the plate can be removed without scraping its face or dismantling unrelated objects. If the proposed nut is trapped behind permanent backing, reconsider before closing the frame. Reversibility should be practical, not merely possible in theory.
Use Designed Edge Supports When Holes Are Unsuitable
An edge-supported mount can avoid loading weakened holes, but it needs to be designed around the object’s shape and condition. The supports should carry the plate without biting into paint, pressing on fragile lettering, or allowing it to slide out when the frame is lifted.
Don’t improvise a tight press fit and call it a support system. A plate squeezed between a frame lip and backing can distort, and a loose fit can move during handling. A framer can make discreet supports that account for depth and safe removal.
For a bent, corroded, or unusually thin plate, professional mounting is preferable to forcing it into a standard clip arrangement. The least visible mount is not necessarily the safest one. Choose support based on what the object can tolerate.
Keep Adhesive Off Original Finishes
Avoid gluing the original plate face or back directly to the backing. Adhesive can make later removal difficult, and the fact that it is sold as removable doesn’t establish compatibility with an aged paint or reflective layer.
If a display design needs adhesive for decorative materials, keep it separate from the plate and use materials appropriate to the enclosure. Don’t place fresh adhesive where it can squeeze onto the edge or contact the back when the frame closes.
A rare plate is not the right surface for an adhesive experiment. If mechanical support cannot be made discreetly enough for your intended appearance, ask a framer about a different arrangement rather than accepting permanent alteration as the price of a tidy display.
Add an Automotive Frame Only If It Helps
A license plate frame can give a keepsake the appearance it had on the vehicle. It may also provide a consistent visual border when the plate’s original edge is uneven. But a vehicle surround is not a picture frame with a tested wall-hanging system.
Check how the surround sits around your plate. Its border should not hide details you want to preserve, and its rear tabs or fastener locations should not press into fragile areas. Compare the actual opening and hole positions rather than assuming a regional label proves fit.
US-format license plate frames are one possible visual starting point for matching plates, not a substitute for measuring a historic or non-US example. Keep the plate and surround supported by the backboard or display mount; don’t hang the whole assembly from an ornamental edge.
If washers or spacers are part of the arrangement, check their contact points and how the finished thickness changes. The principles of washer and spacer selection help identify uneven clamping, but a display mount still needs its own suitable wall hardware.
Leave Space Between the Plate and Glazing
If you choose glass or acrylic, provide sufficient depth so the front doesn’t press on the plate’s raised characters, labels, or mount. Close the frame gently during a dry fit and inspect the gap rather than pushing until its retaining tabs engage.
A spacer or deeper frame may be needed. The correct answer is not to flatten the plate or remove a historical sticker to make the assembly fit. Change the frame or mounting design when the object needs more room.
Consider how the glazing will be cleaned without liquid reaching the object. Apply the cleaning method recommended for the glazing material and avoid spraying into gaps. Acrylic and glass have different care requirements; don’t use the same cleaner and cloth automatically.
For valuable objects, discuss light exposure and suitable glazing with the framer. A product label suggesting ultraviolet protection doesn’t remove the need to choose a sensible display location and limit direct sunlight.
Finish the Frame Without Hiding a Mounting Problem
Before closing the assembly, gently check that the plate is supported, level, and clear of the glazing. Hold the frame in a controlled, supported position to see whether anything shifts. If it rattles, find the unsupported point rather than stuffing extra material behind the object.
Inspect the back. Confirm that supports, frame retainers, hanging fittings, and any protective cover each have a clear role. A cover that keeps dust out shouldn’t be expected to hold the plate’s weight. Likewise, a thin frame tab may retain a backing without being appropriate for added hanging loads.
Don’t seal away unresolved moisture, loose paint, or active-looking corrosion. If the surface is changing or shedding material, stop and seek advice. An enclosure can conceal a developing issue just as easily as it can keep dust away.
Photograph the plate front and back before closing, and record the mounting method. Keep the record somewhere other than inside the sealed display so future access doesn’t require reopening the frame simply to identify what was used.
Choose Wall Hardware for the Complete Assembly
Weigh the finished frame with the plate, backing, glazing, supports, and hanging fittings. The plate alone may be a small part of the total. Use a hanging system intended for the actual frame and load, following its manufacturer’s requirements.
Identify the wall construction. Drywall, plaster, masonry, paneling, and a timber stud present different fixing conditions. A fastener suitable for one should not be assumed suitable for another. Check for concealed services before drilling; use a qualified installer if their location or the wall construction is uncertain.
Make sure the frame-side hanging hardware transfers load to a sound structural part of the frame or backboard. Don’t screw a hanger into a flimsy dust cover or hang the assembly from a decorative license plate screw cap.
For rented space, get any required permission before drilling. Removable wall products also have surface, application, load, and removal restrictions. Follow the exact product instructions and do not assume adding more strips makes an unsuitable surface or valuable object a safe application.
Hang the Frame and Check Its Final Position
Use the paper template to mark the intended location and the appropriate attachment points. Check door swings, moving garage equipment, nearby furniture, and where people pass. Avoid locations where a falling frame could injure someone or damage the plate.
Install the wall hardware as specified, then hang the complete assembly with support until you are satisfied it has engaged correctly. Level it without dragging the frame across the wall. Ask for help handling large or glazed assemblies rather than balancing them one-handed.
Look at the display from the entrance and normal seating or standing position. Check reflections, label legibility, and whether the frame projects into a walkway. Move the display when the location is wrong instead of tilting insecure hardware to improve the view.
Inspect the assembly periodically and after an accidental knock. Look for a changing gap, loose hardware, plate movement, condensation, or new surface deterioration. Taking a quick comparison photograph can help you notice gradual changes that are hard to remember.
Adapt the Display to the Room
A garage can expose the plate to dust, moisture, chemicals, vibration, and work activity. Keep it away from grinding, welding, battery-service areas, splash zones, and the path of a raised hood or moving door. A display above a workbench needs enough clearance for the work you actually perform.
Indoors, avoid direct sun and locations prone to leaks or condensation. An exterior wall with visible damp is not made suitable by putting glass over the plate. Solve the location problem first.
For a child’s room or busy public space, consider reach, projecting edges, glazing choice, and the consequence of accidental contact. The best-looking position isn’t necessarily the appropriate one for that setting.
If the plate has substantial sentimental value, choose a place where you can inspect it comfortably. A very high installation may be visually dramatic but makes changes and loose hardware harder to notice.
Keep Related Memorabilia Independently Supported
A vehicle photograph, key, event pass, or short ownership note can explain why the plate matters. Use copies of sensitive or irreplaceable documents where practical, and avoid displaying personal information unnecessarily.
Mount each object separately. A key should not hang from the plate or swing against its paint. A photo shouldn’t be trapped under an edge fastener, and a paper label shouldn’t carry any part of the plate’s weight.
Leave enough space for safe handling and visual separation. If the display needs too many objects to tell its story clearly, choose the most meaningful few. This is a single-object framing project, not a requirement to fill every available part of a shadow box.
Frequently Asked Questions
Can I use a normal picture frame?
Possibly, if its opening, usable depth, backing arrangement, and hanging system accommodate the complete object and mount. A nominal frame size alone doesn’t establish that. Raised lettering and plate fasteners often need extra clearance, so compare the real assembly before buying or closing the frame.
Should I straighten a bent plate first?
Not simply to make a display fit. Bending can affect an old finish or damage a collectible. Choose a deeper frame or a mount that supports its existing shape. Ask a conservator or specialist before altering a valuable or fragile plate.
Can I hang the plate with removable wall strips?
Follow the exact hanging product’s application and surface restrictions. Attach a suitable display assembly only where permitted; don’t assume the plate’s paint or irregular back is a suitable bonding surface. For a valuable or irreplaceable plate, choose a mounting approach appropriate to that risk rather than relying on a generic damage-free claim.
Does every wall display need glass?
No. An open display can be appropriate for a sound, accessible keepsake in a suitable location. Glazing may help manage dust and handling but adds weight and depth requirements. Choose it for the object and environment, not because a framed plate must look like a paper photograph.
What if the plate moves inside the frame?
Take the display down safely and inspect its supports. Don’t tighten a face screw until the plate bends or add random padding that presses it against the glazing. Movement means the support arrangement needs attention. Keep the object horizontal and protected while you correct it or consult a framer.