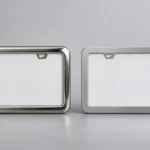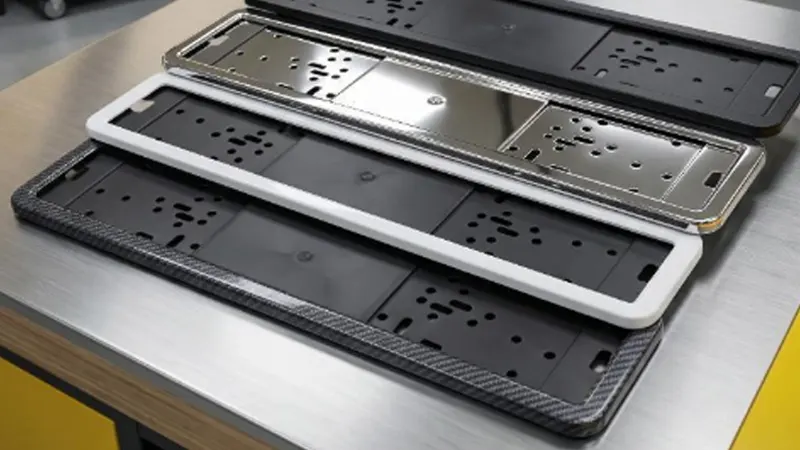
You can make a license plate frame by defining the plate opening and mounting pattern first, then choosing a material and production process that can hold those dimensions outdoors. The work does not end when the frame has the right shape. Edge safety, surface preparation, corrosion protection, decoration, hardware compatibility, and final fit checks determine whether the finished part is actually ready for a vehicle.
A handmade display frame and a repeatable production part are different projects. If you need one decorative piece, you can cut and finish a blank by hand. If you need retail, dealer, promotional, or OEM-style frames, you need controlled drawings, samples, tolerances, process records, and an inspection plan. The sequence below is written for a commercial product, while still showing what matters in a one-off build.
Start With the Plate, Vehicle, and Legal Opening
Do not begin with the logo. Begin with the plate that must remain visible. Record the plate width and height, the locations and shape of its mounting slots, the registration-sticker zones, the issuing-jurisdiction name, and the full character field. Then inspect the vehicle recess or bracket. A nominally compatible frame can still fail when its outer corners contact a molded recess, a camera, a lamp, a hatch handle, or a raised fastener boss.
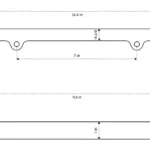
For a North American passenger-car frame, a 12 × 6 inch plate is the common design reference, but you should not treat that nominal size as the complete specification. Plate embossing, slots, vehicle bosses, screw heads, decorative borders, and state-specific information all consume space. Use the actual target plate and vehicle interface whenever possible. Our license plate frame size guide and 2-hole vs 4-hole comparison explain the two fit questions that should be closed before tooling.
| Design input | What to record | What can go wrong if it is missed |
|---|---|---|
| Visible opening | Minimum clear width and height around every required plate element | Characters, state name, registration tabs, or electronic readability may be impaired |
| Mounting pattern | Two or four holes, center distances, slot travel, screw diameter, and thread type | Forced alignment, cracked frames, loose screws, or a tilted plate |
| Vehicle envelope | Recess, camera, lamp, sensors, hatch handle, and corner clearance | Interference, incomplete seating, vibration, or camera obstruction |
| Environment | UV, salt, humidity, temperature swings, car-wash chemicals, and road debris | Fading, corrosion, peeling, warping, or brittle failure |
| Branding | Logo area, relief, print method, colors, and viewing distance | Unreadable artwork, thin edges, trapped process solution, or weak sections |
Choose a Material and the Process Together
The material name alone does not define performance. Stainless steel can be stamped, laser cut, etched, polished, brushed, painted, or coated. Aluminum can be stamped or machined and then anodized, powder-coated, painted, or printed. Zinc alloy is usually die cast when the design needs raised lettering, sculpted shapes, or recessed color. Plastic can be injection molded with ribs, snap features, drainage details, and broad decorated surfaces. Carbon-fiber products may be true laminated composites, a composite skin over a core, or a carbon-pattern decoration over plastic or metal; those constructions should never be described as equivalent.
| Construction | Good reasons to choose it | Production controls that matter | Typical watch-outs |
|---|---|---|---|
| Stamped stainless steel | Slim metallic appearance, rigidity, polished or brushed finish | Grade, sheet thickness, burr control, forming, passivation or coating, edge protection | Sharp edges, springback, scratched polish, mixed-metal hardware |
| Stamped aluminum | Low mass and wide finish options | Alloy and temper, flatness, anodizing or coating pretreatment, sealing | Bending, coating damage at edges, galvanic contact, color variation |
| Die-cast zinc alloy | Deep relief, detailed logos, substantial decorative form | Porosity, draft, trimming, polishing, copper/nickel/chrome or paint stack | Blisters, white corrosion, trapped solution, heavy borders |
| Injection-molded plastic | Integrated ribs, clips, drainage, texture, and color | Resin grade, UV package, gate and weld-line placement, shrinkage, warpage | Brittleness, fading, sink marks, distortion, vague “plastic” claims |
| Silicone surround | Soft contact, noise control, edge coverage | Material consistency, drainage, tear strength, fit, temperature and UV validation | Water retention, loose fit, torn holes, dirt trapped at the rear |
| Carbon composite | Distinctive real weave and low mass | Fiber architecture, resin, cure, trimmed-edge sealing, UV-stable clear coat | Cracking at holes, delamination, yellowing, misleading “carbon look” labels |
If you are comparing the four materials already used in many frame programs, see the license plate frame material guide. Your drawing should identify the exact construction—not simply “metal,” “plastic,” or “carbon fiber.”
Build the Drawing Before You Build the Tool
A production drawing should control the visible opening, outside envelope, mounting geometry, edge radii, thickness, flatness, decoration zone, logo orientation, rear-face contact points, drainage path, and any required spacers or screw caps. Put critical dimensions on the drawing and connect them to a test method. A dimension without a measurement point or fixture often creates arguments rather than control.
Keep decoration inside a safe branding zone. Wide top and bottom bars create more advertising space, but they also create the greatest risk of covering plate information. If a logo needs more height, reduce the artwork, change the relief, or choose a frame concept with a larger safe area; do not quietly reduce the clear opening.
Make the Blank or Molded Body
Metal frames
Sheet-metal production normally starts with blanking, stamping, laser cutting, or a combination of cutting and forming. The sequence must avoid stretching decorative surfaces or leaving burrs around the opening and holes. Check the first pieces for springback and flatness before committing to a long run. A frame that rocks on a flat plate will be difficult to install quietly, even if every length dimension is nominally correct.
Die-cast zinc frames require a tool that accounts for draft, material flow, ejector locations, shrinkage, and later polishing. Thick-to-thin transitions and blind recesses deserve special attention because they can create porosity, visible sink, and places where plating solution becomes trapped.
Plastic and silicone frames
Injection-molded plastic frames need balanced wall thickness, sensible rib proportions, controlled gate placement, and allowance for shrinkage. The mold should produce the finished geometry without forcing operators to bend the part into shape. For a silicone surround, the channel must grip the plate without excessive stretching, while drainage openings should allow water and road grit to leave instead of remaining against the plate.
Carbon-fiber frames
A real composite frame is laid up or molded, cured, trimmed, drilled, edge-sealed, and clear-coated. Holes and thin corners are stress concentrators, so the laminate design and washer area matter more than an impressive fiber name. If the product is actually ABS with a printed carbon pattern, label it that way. Honest construction language prevents returns and gives buyers a fair comparison.
Prepare the Surface Before You Add Color or Plating
Many finish failures begin under the visible layer. Oil, polishing compound, oxide, dust, release agent, and fingerprints can weaken adhesion or create pinholes. Cleaning and pretreatment must match the substrate and the finish system. A process that works on stainless steel is not automatically correct for aluminum, zinc alloy, or plastic.
Define the complete finish stack: substrate, pretreatment, primer if used, color or plating layers, print or emblem, and final protective coat. A phrase such as “black finish” is not a specification. It does not tell the supplier whether the surface is anodized, powder-coated, painted, plated, printed, or covered with film, and those systems age differently.
Add Branding Without Weakening the Frame
Artwork can be screen printed, pad printed, UV printed, laser marked, etched, embossed, molded, attached as an emblem, or created in plated relief. Select the process according to surface geometry, color count, expected abrasion, order quantity, and outdoor exposure. Very fine text may look sharp in a drawing and disappear after molding, plating, or clear coating. Approve a physical sample at normal viewing distance, not only a magnified photo.
For a branded program, lock the artwork revision, color reference, logo position, and acceptable registration tolerance. Our custom license plate frame options cover the common material and decoration routes you can discuss before sampling.
Select the Hardware as Part of the Product
The frame, plate, screws, washers, caps, spacers, and vehicle bracket form one assembly. Screw length must engage safely without bottoming out or contacting hidden components. The head must seat on a flat, supported area. Soft washers or pads can isolate vibration and protect paint, but they should not hold water against bare steel. If dissimilar metals are used, consider galvanic exposure and specify compatible materials or an isolating interface.
Do not publish a universal torque unless you control the vehicle interface and fastener specification. For consumer instructions, hand-tightening evenly until the assembly is secure is safer than an invented number. Power drivers make it easy to crack plastic or composite frames, deform the plate, strip inserts, and damage paint.
Inspect More Than Appearance
| Inspection stage | What to verify | Practical method |
|---|---|---|
| Incoming material | Grade or resin, thickness, color, surface condition, certificates where required | Approved specification, gauges, records, and incoming sampling |
| First article | Opening, outer profile, hole locations, flatness, edge radius, artwork position | Drawing-linked measurement report and fit on approved plates |
| Finish | Color, gloss, adhesion, coverage, scratches, exposed edges, plating defects | Controlled lighting, master sample, adhesion method, and coverage check |
| Assembly fit | Plate seating, hole alignment, screw-head clearance, camera and lamp clearance | Representative plate, bracket, hardware, and where possible a vehicle fixture |
| Durability | Corrosion, UV/color change, thermal cycling, chemical resistance, vibration | Agreed test standard with acceptance criteria tied to the real use case |
| Packaging | Part separation, film removal, hardware count, instructions, barcode and carton protection | Packing audit and transit simulation appropriate to the sales channel |
A test name is not an acceptance criterion. “Salt-spray tested” is incomplete unless the specification states the method, duration, specimen preparation, evaluation points, and allowed change. The same is true for UV exposure and adhesion. Use test results to compare a defined construction, not to make an unlimited “weatherproof” claim.
Pilot the Complete Pack, Not Just the Bare Frame
Run a pilot quantity with production-intent material, finish, artwork, hardware, and packaging. Install samples on the relevant plate and bracket, expose them to the intended environment, and record issues by defect type. A polished sample made by extra handwork is useful for appearance approval, but it does not prove the production process can repeat it.
When the pilot is approved, keep a signed master sample and freeze the drawing, bill of materials, finish stack, artwork revision, test plan, and packaging specification. Any later substitution should trigger a controlled review rather than an informal promise that the alternative is “the same.”
Common Mistakes That Create Returns
- Designing the border around a logo before establishing the legal visible opening.
- Calling out only a generic material and allowing unreviewed grade or resin changes.
- Approving finish color from a screen instead of a controlled physical sample.
- Checking the frame on a loose plate but not on the vehicle recess or bracket.
- Ignoring rear-face burrs, hard corners, and vibration contact points that can mark paint.
- Using long screws or power tools without checking the vehicle mounting depth.
- Describing a carbon-pattern film or molded texture as real carbon fiber.
- Shipping bright finished parts without separators, protective film, or hardware control.
What to Send a Manufacturer for an Accurate Quote
Send the target market, plate format, vehicle type, opening and outside dimensions, mounting pattern, preferred material, finish, artwork file, color references, quantity, packaging, test expectations, and required delivery schedule. Photos help, but a photo alone cannot control dimensions. If some inputs are still open, identify them as questions rather than allowing the supplier to guess.
For a new program, use the project inquiry form to share your plate format, drawing, artwork, material preference, quantity, and target market. That information is enough to recommend a realistic process and sample plan.
Frequently Asked Questions
Can I make a license plate frame at home?
Yes, you can decorate or cut a one-off frame, but use an exterior-capable material, smooth every edge, keep all plate information visible, and avoid brittle decorations that can detach. Do not assume a handmade sample represents a repeatable commercial product.
What is the easiest material for a custom production frame?
There is no universal easiest material. Plastic is efficient for integrated geometry at suitable volumes, stamped metal suits slim forms, zinc alloy supports detailed relief, and aluminum offers low mass with many finishes. Your geometry, quantity, appearance, tooling budget, and outdoor requirements decide the best route.
How thick should a license plate frame be?
Thickness depends on material, profile, forming, ribs, and mounting support. A single generic thickness can be stiff in one construction and weak in another. Specify functional targets—flatness, opening, pull-through resistance, vibration behavior, and vehicle clearance—then validate the chosen section.
How do you make a license plate frame rust resistant?
Start with a suitable substrate and control every exposed edge, coating layer, fastener, and water trap. Stainless steel, aluminum, zinc alloy, plastic, and silicone fail in different ways. The full assembly and finish system must be validated, not just the frame body.
Should a frame use two holes or four holes?
Match the frame to the mounting points available on the vehicle. Four supported points can reduce movement, but many vehicles provide only two usable upper mounts. A two-hole assembly can still be quiet when the frame is flat and its lower edge is isolated correctly.