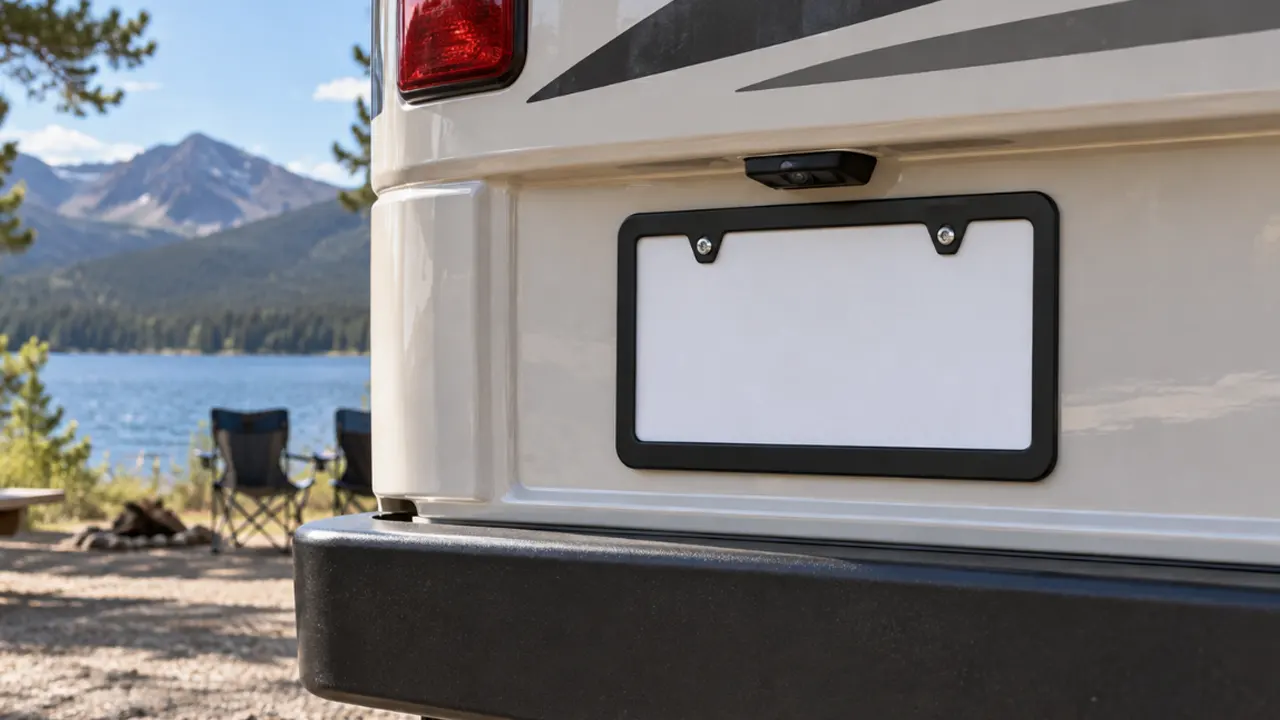
Choose an RV license plate frame by checking five things in order: the type of RV, the actual plate and hole measurements, the strength of the existing mount, clearance from the plate light and camera, and exposure during travel and storage. A motorhome and a travel trailer may use the same plate size, yet need very different mounting solutions.
The safest assumption is that the frame is decorative and supportive, not structural. If the rear wall has no sound bracket or threaded mounting points, solve that problem first rather than asking the frame to hold the plate by itself.
Motorhome or Towable RV: Why the Difference Matters
A motorhome usually places the plate on a rear body panel or molded recess. A travel trailer or fifth wheel may use a surface-mounted light-and-holder assembly. Truck campers, toy haulers, and converted vans introduce still more layouts.
| RV type | Likely mounting concern | What to check |
| Class A or Class C motorhome | Large rear cap, camera and lighting | Recess depth, camera view, wiring access |
| Class B camper van | Rear doors and factory plate recess | Door movement, handle clearance, factory fasteners |
| Travel trailer or fifth wheel | Surface-mounted holder and long-term weather | Backing support, light position, wall sealing |
| Truck camper | Tight space and removable body | Plate transfer process, clearance, removable mounting |
Knowing the configuration also prevents a terminology mistake. If you need something to bridge an uneven wall or carry an illuminated holder, you are selecting a bracket or holder first. A frame and holder perform different jobs.
Measure the Entire Mounting Stack
Measure more than the plate. Record the outer plate dimensions, hole spacing, opening available around the characters, recess depth, and distance to nearby lights or trim. Then look at the layers behind the plate: frame, plate, spacers, holder, RV skin, and any backing plate or threaded insert.
Long screws can bottom out in a shallow recess or touch hidden wiring. Short screws may engage only a few threads. If the rear wall uses thin fiberglass or a sandwich panel, do not assume a larger screw is automatically stronger. Follow the RV manufacturer’s mounting instructions or use established backing points.
The site’s frame size guide helps with plate and opening measurements, while the RV manual remains the authority for the wall construction and approved fastener locations.
Keep the Rear Camera’s View Clear
Many RVs have a backup or observation camera above the plate. A thick frame, raised decoration, or plate light added below the lens may enter the lower edge of the image, especially with a wide-angle camera. Temporarily hold the frame in position and check the monitor before tightening anything.
Also consider service access. You should not have to remove a sealed camera housing just to change a plate or registration sticker. Leave space for a screwdriver and make sure decorative elements cannot reflect the plate lamp into the camera at night.
Do Not Block the Plate Light
The rear plate must remain illuminated where applicable. RV assemblies may light from above, from the side, or through a lens built into the holder. Compare the new border with the light’s beam path. A top bar that sits directly under the lens can cast a shadow even when it does not touch the light.
After installation, test at night with the running lights on. Look for dark corners, glare from polished metal, and loose wiring. A frame is not a substitute for repairing a failed lamp or corroded connector.
Choose a Profile That Fits the Rear Wall
Recessed Plate Area
A slim, flat frame generally works best in a molded recess. Measure the outer dimensions carefully; a frame can fit the plate but still be too large for the recess. Confirm that screw caps, raised letters, and lower tabs do not hit the surrounding lip.
Flat Exterior Panel
On a flat rear cap, the frame should sit without rocking. If the panel curves, do not use screw tension to force a rigid frame against it. Appropriate spacers or a shaped holder can produce a cleaner load path.
Surface-Mounted Light and Holder
Inspect the molded holder before adding another layer. Some lightweight holders have limited screw length and edge clearance. A heavy frame can increase leverage on an already weathered plastic base.
Material Choices for Travel and Storage
Plastic frames keep weight down and isolate the plate from direct metal-to-metal rubbing, but they should be inspected for UV aging and cracks around the holes. Aluminum frames are light and can suit large rear panels, though finish and edge quality still matter. Stainless steel provides a firm appearance and edge, but the grade, polish, fasteners, and contact conditions determine how it behaves over time.
No material eliminates maintenance. An RV may spend months facing the same direction in strong sun, then see rain, road salt, campground dust, and pressure washing on a single trip. Choose a finish for the actual storage and travel pattern. The material comparisons for aluminum, stainless steel, and plastic frames can help narrow the tradeoffs.
Watch for Ladders, Spare Tires, Hitches, and Cargo
Walk around the rear of the RV with every travel accessory in place. A ladder should not make the plate hard to see from behind. A spare-tire cover should not sag over it. Bike racks and cargo carriers can change rear visibility, and a hitch-mounted accessory may place moving parts close to the plate.
The frame cannot correct a plate location that becomes obstructed by cargo. If an accessory changes the usable mounting area, consult the accessory and RV manufacturers and check the relevant display rules before relocating the plate or light.
Install Without Creating a Leak or Stress Point
Whenever possible, reuse sound factory mounting points. Adding holes to an RV wall is different from drilling an automotive bumper: the wall may contain insulation, wiring, laminate, or a structural member, and every penetration needs the correct sealing method. A cosmetic frame rarely justifies a new wall penetration.
- Remove the old frame while supporting the plate and holder.
- Clean the contact area and inspect holes, inserts, sealant, and the light.
- Dry-fit the new frame and confirm camera, trim, door, and light clearance.
- Use compatible fasteners and spacers without overtightening the RV panel.
- Test the plate light and camera, then recheck the fasteners after a trip.
Quick Buying Checklist
- The plate and frame opening match the exact registration plate.
- The outer frame fits the recess or holder.
- The existing mount can carry the combined frame and plate.
- The border leaves every required character and sticker visible.
- The camera view and plate-light beam remain clear.
- Fasteners suit the existing inserts and do not threaten hidden wiring.
- Ladders, doors, spare tires, and travel accessories do not interfere.
Frequently Asked Questions
Are RV license plate frames a different size from car frames?
Sometimes the plate is the same size, but the recess, holder, hole arrangement, and surrounding equipment may differ. Measure the RV rather than assuming a passenger-car frame will fit the whole installation.
Can I drill new holes for an RV license plate frame?
Only after confirming the wall construction, approved mounting area, hidden services, and sealing method with reliable RV information. Reusing sound factory points is usually the lower-risk choice for a decorative frame.
Can a metal frame crack an RV’s plastic holder?
It can contribute if the frame is heavy, misaligned, or overtightened against an aged holder. The holder’s condition and support matter more than material alone.
Should I remove the frame before storing the RV?
Normally no, provided it is secure and not trapping dirt or moisture. Include it in storage inspections, especially if the RV sits outdoors for long periods.
What if the frame reflects light into the backup camera?
Change the frame profile or finish, or adjust the approved mounting arrangement. Do not cover the lamp or camera to hide the reflection.