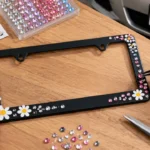
To install a license plate frame, remove the existing fasteners, clean the mounting area, place the plate into or behind the frame as its design requires, align the assembly with the vehicle’s existing mounting points, hand-start every screw, and tighten evenly until secure. To remove the frame, support the plate and loosen the fasteners gradually.
Do not drill new holes unless the vehicle manufacturer provides an approved procedure. Before you drive, confirm that the frame leaves the plate number, issuing jurisdiction, registration decals, light, camera, and sensors unobstructed.
Before you start: identify the frame, bracket, and hardware
A license plate frame is the visible border around the plate. A bracket or holder is the structural part that connects the plate to the bumper, grille, hatch, or body panel. Some vehicles use both; others attach the plate directly to factory inserts. Removing a decorative frame should not require removing a sound vehicle bracket.
| Part | Typical function | What to verify |
|---|---|---|
| License plate frame | Creates a border and may carry branding, space the plate, or support its edges | The opening leaves every required plate detail visible |
| Bracket or holder | Provides the mounting interface between the plate and vehicle | It matches the vehicle and does not obstruct cameras, sensors, lights, or air openings |
| Cover or shield | Places transparent, tinted, reflective, or other material over the plate face | Current local law and any effect on visibility, reflectivity, or electronic reading |
| Hardware kit | Connects the frame, plate, bracket, and vehicle | Screw pitch, diameter, length, head, washers, caps, nuts, clips, and intended layer order |
If the bumper has no existing plate location, threaded inserts, or approved bracket, stop before drilling. Wiring, parking sensors, radar modules, air ducts, reinforcement beams, and painted surfaces may sit behind the proposed location. Use the owner’s manual, a vehicle-specific service procedure, or a qualified installer.
Tools and parts you may need
| Item | Why it matters |
|---|---|
| Correct screwdriver, bit, hex key, or socket | A properly fitting tool reduces slipping and fastener-head damage |
| Vehicle-compatible fasteners | The wrong pitch, diameter, or length can strip an insert, bottom out, or contact parts behind the panel |
| Supplied washers, cap bases, nuts, clips, or spacers | These parts spread load, retain caps, or create the intended stack height |
| Nonabrasive cloth and mild cleaner | Removing trapped grit reduces scratching and finish wear |
| Vehicle-safe anti-rattle pads, when the design allows them | Thin pads can limit vibration and body-panel contact without replacing correct hardware |
| Penetrating oil for a corroded metal joint | Use sparingly and only where compatible; keep it away from plate graphics, adhesives, painted trim, and sensitive surfaces |
Do not assume that screws packaged with a generic accessory fit every vehicle. Compare them with the removed hardware or confirm the vehicle specification. Reuse old hardware only when its threads, head, corrosion condition, and length remain suitable.
How to remove a license plate frame safely
- Inspect the assembly. Count the fasteners, identify the tool, and check whether decorative caps hide the heads. Look for lower tabs, clips, pads, or nuts behind the plate.
- Support the plate and frame. Hold the assembly so it cannot swing into the paint after the first screw is removed.
- Release screw caps carefully. Use the cap’s designed opening point. Do not lever a metal blade against the plate, frame finish, or vehicle panel.
- Loosen each fastener gradually. Apply steady inward pressure with the correct tool. On a four-point mount, alternate between corners instead of fully removing one screw at a time.
- Stop if the fastener or insert fails. A rounded head, seized screw, spinning insert, or inaccessible rear nut needs a vehicle-appropriate repair method. More torque can enlarge the damage.
- Separate and record the layers. Remove the frame, plate, washers, pads, nuts, and bracket parts in order. Photograph the stack if you will reuse it.
- Clean and inspect. Remove dirt and moisture, then check the vehicle surface, bracket, threads, plate edges, frame coating, and hardware.
A penetrating oil may help a corroded metal-to-metal joint, but it is not appropriate for every plastic insert, painted surface, or adhesive-backed part. If a rivet nut spins or the fastener sits near electronic or painted components, professional repair is safer than improvisation.
How to install a license plate frame
- Check the plate and frame together. Place both on a clean, nonabrasive surface. Verify the opening, outer dimensions, border width, corner clearance, and hole positions. A standard full-size North American plate is nominally 12 × 6 inches (305 × 152 mm), but issued details, vehicle recesses, and mounting provisions still vary. Use the license plate frame size guide as a starting point, then measure the actual plate and vehicle.
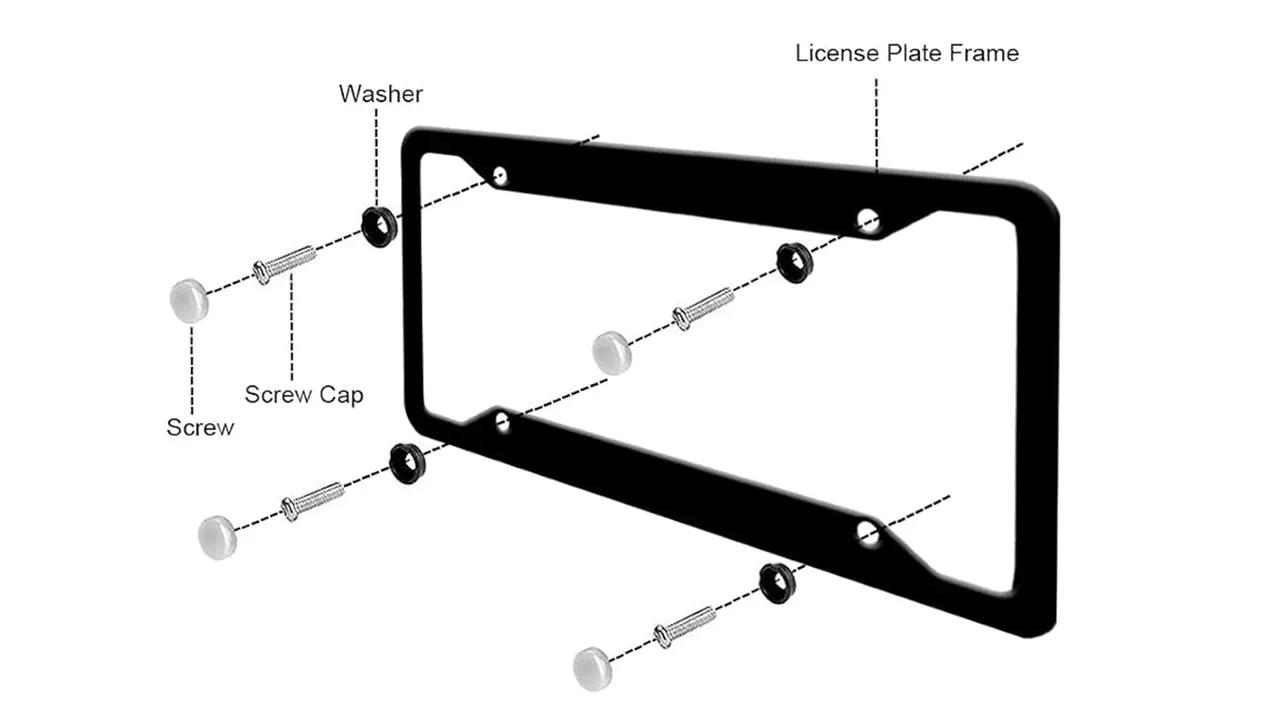
- Arrange the hardware stack. One common front-to-back sequence is screw head, cap base or washer, frame, license plate, optional thin pad, bracket, and vehicle insert. A frame with plate-retention tabs or rear nuts may use a different sequence. Follow the product drawing and vehicle instructions.
- Align the existing mounting points. Hold the plate and frame together and align the holes without forcing either part. If they do not line up, do not enlarge the issued plate, bend the frame, or drive a screw at an angle.
- Start every fastener by hand. Turn each screw several threads before using a tool. This exposes a wrong pitch or cross-thread before it damages the insert. Start all available screws while the assembly can still shift.
- Tighten evenly. Alternate between fasteners and bring the frame down against the intended washers, pads, or bracket. Stop when the assembly is secure under light hand pressure. Excess torque can crack plastic, distort a thin border, crush a cap base, strip an insert, or dimple the plate. Use a specified torque when the vehicle or hardware supplier provides one.
- Check visibility and vehicle functions. Read the plate number and issuing jurisdiction from straight behind and from normal approach angles. Confirm that registration decals remain visible, the plate lamp works, and the frame clears cameras, sensors, trunk releases, tow equipment, and ventilation openings.
- Check movement and rattle. Close the screw caps, press each corner, and close the trunk, hatch, or door. Recheck the fasteners after the first few drives and after a car wash. If a screw repeatedly loosens, correct the hardware or mounting interface instead of overtightening it.
The 2025 AAMVA policy position recommends that plates remain completely unobstructed and clearly visible to people and technological systems from at least 75 feet. State rules may be more specific. California Vehicle Code §5201, effective January 1, 2026 in its current amended form, prohibits a frame or border that obstructs or impairs electronic reading or recognition. Treat that as a current California example, not a nationwide legal conclusion.
How two-hole and four-hole mounting changes the installation
Use the mounting points the vehicle actually provides. A two-hole frame normally attaches at two upper anchors. A four-hole frame gains additional restraint only when the vehicle offers four compatible anchors and all four points align. Four holes in the frame or issued plate do not prove that four threaded points exist behind the bumper.
A supported two-point installation can remain stable when screw engagement is correct, the frame and plate have adequate stiffness, and designed tabs or thin pads control the lower edge. Unused lower holes do not add strength. Review US license plate frame options by intended format, then verify the target vehicle before ordering.
Common installation problems and the correct response
| Problem | Likely cause | Correct response |
|---|---|---|
| Screw will not start by hand | Wrong diameter or pitch, damaged threads, or misalignment | Remove it, inspect both sides of the joint, realign, and use confirmed hardware |
| Screw bottoms out but the frame remains loose | Fastener too long, missing spacer, or shallow blind insert | Use the specified screw length and layer stack; do not improvise without checking thread engagement |
| Plate or frame bows | Uneven tightening, incompatible recess, thick pad, or mismatched geometry | Loosen the assembly, correct the fit and stack, then retighten evenly |
| Lower edge rattles | Unsupported span, loose hardware, warped plate, or body-panel contact | Confirm the fit and fasteners, then use designed tabs or vehicle-safe pads when appropriate |
| Fastener turns without tightening | Stripped thread, spinning insert, or unsecured rear nut | Stop and repair the vehicle-side mounting point correctly |
| White residue or staining appears near a screw | Moisture, road salt, coating damage, trapped deposits, or dissimilar-metal interaction | Remove and clean the assembly, inspect the finish and hardware, improve drainage or isolation, and replace damaged parts |
| Plate details are partly hidden | Frame opening too small, wide caps, or shifted assembly | Remove the frame and select an opening that leaves required information visible |
Installation requirements for OEM, dealer, and wholesale programs
For repeat installation, the frame, hardware, instructions, and packaging should be approved as one system. Define the target plate format, assumed vehicle mounting patterns, screw specification, cap retention, washer stack, pad position, tool, tightening method, and final visibility check. Test the complete kit on representative vehicles instead of approving the decorative frame alone.
| Control item | Information to freeze before production |
|---|---|
| Fit drawing | Plate format, outside dimensions, visible opening, all hole centers and diameters, border width, corner clearances, formed section, and tolerances |
| Hardware bill of materials | Screw pitch, diameter, length, head, material, washers, caps, nuts, clips, pads, isolation parts, and intended stack |
| Installation instruction | Removal method, layer order, hand-start requirement, tightening sequence, no-drill boundary, visibility check, and recheck interval |
| Validation | Vehicle-representative fit, cap retention, rattle, finish rub, hardware corrosion interface, plate visibility, and packaging performance |
| Pack-out | Hardware separation, finish protection, variant identification, instruction placement, carton quantity, and labeling |
Packaging should prevent loose hardware from rubbing the finished face and make incompatible variants difficult to mix. A concise illustrated instruction card can reduce cross-threading, reversed cap bases, hidden decals, and unnecessary drilling. For a controlled frame, hardware set, artwork, and pack-out, use the custom license plate frame service and provide the target plate and vehicle mounting data with your RFQ.
Frequently asked questions
Can I install a license plate frame without removing the plate?
Usually no. The frame and plate commonly share fasteners, so you need to release the plate to place the parts in the correct order. Sliding a frame behind installed screws can scratch the finish or leave too little thread engagement.
How tight should license plate frame screws be?
Tighten them evenly until the assembly is secure, or use the torque specified by the vehicle or hardware supplier. There is no universal value because plastic inserts, metal threads, self-tapping screws, diameters, brackets, and washer stacks differ. More torque is not automatically safer.
Do I need four screws?
Only when the vehicle and frame are designed for four compatible mounting points. Two correct upper anchors can be sufficient for many installations. Four visible holes add restraint only when the additional points are genuinely anchored or intentionally used by the frame system.
Can a license plate frame cover part of the plate?
Do not use a frame that covers information your jurisdiction requires to remain visible and legible. Check the current law where the vehicle is registered and used. Remove or replace any frame that interferes with the plate number, issuing jurisdiction, registration decals, or electronic recognition.
Why does my new license plate frame rattle?
Common causes are loose or incorrect hardware, an unsupported lower edge, a warped plate, an incompatible vehicle recess, or direct body-panel contact. Correct the fit first. Designed tabs or thin vehicle-safe pads may help, but they should not block drainage or reduce safe thread engagement.
What should I do with a stripped or rusted screw?
Stop before damaging the screw head, insert, bracket, or surrounding panel. Use a repair method appropriate to the vehicle-side fastener. If an insert spins, a nut is inaccessible from behind, or the joint sits near painted or electronic components, use a qualified repair shop.
What should a commercial installation kit include?
Specify the frame, vehicle-compatible hardware variants, washers or cap bases, caps, any approved pads or clips, and a short illustrated instruction. Mark the assumed plate and mounting pattern clearly. Do not label the kit universal unless a defined compatibility range has been verified.