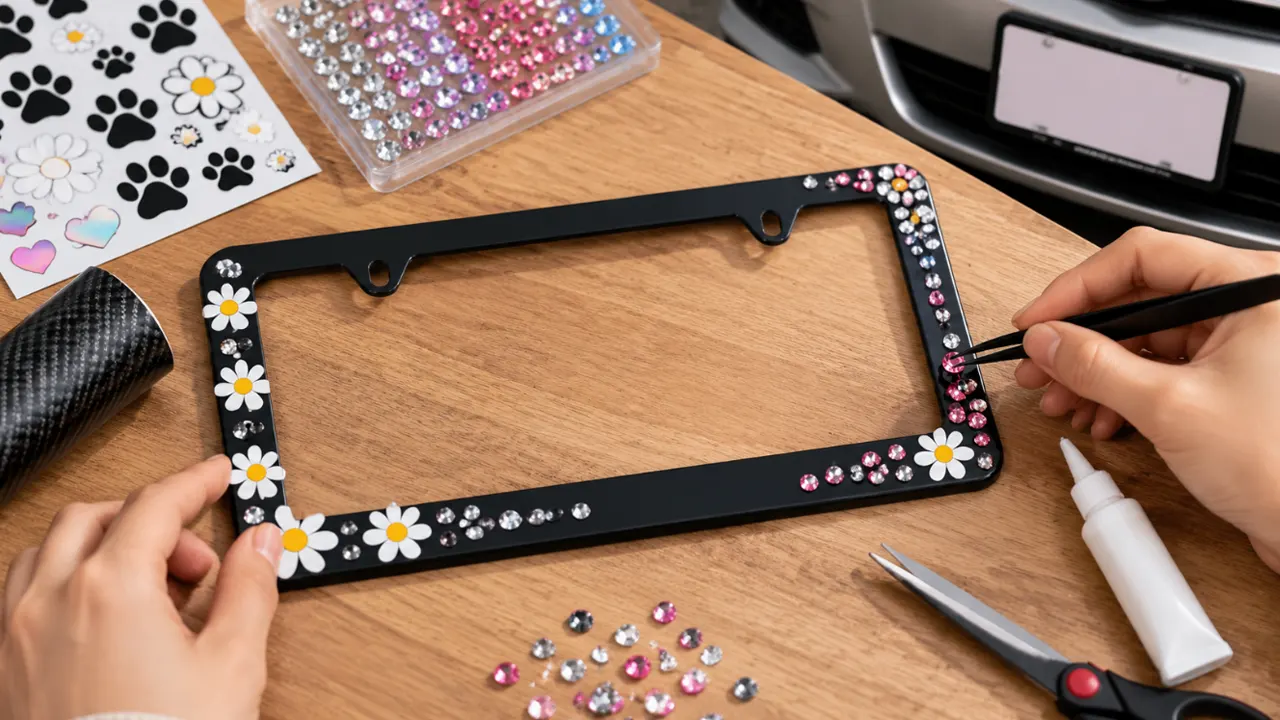
Decorate a license plate frame by removing it from the car, checking its fit, planning a layout on the frame rails, and using decorations and adhesive compatible with the exact surfaces. Keep the plate opening, screw seats, and necessary clearances untouched. Let the work cure fully before reinstalling it, then check visibility and retention.
The easiest project to live with is usually restrained: one neat row of small stones, a short original design, or a painted accent suited to the frame. Large charms, overhanging pieces, and thick layers of glue introduce problems that a pretty workbench photograph may not reveal.
Decorate the removable frame, not the official plate. The plate’s characters, reflective face, registration information, and stickers should not become part of the craft surface.
Choose a Design You Can Keep Within the Rails
Start with the appearance you want and the space actually available. A slim frame may support a small accent but leave too little width for several rows of stones. A wider lower rail can hold more decoration, but it must still leave the required plate information visible.
Lay a few proposed decorations on the frame without glue. Look for a balanced arrangement at normal viewing distance rather than trying to fill every millimeter. A repeating pattern is easier to keep neat when the stones are consistently sized and the gaps are planned.
Avoid pieces that hang below the frame, project into the opening, or swing against the car. A stationary accessory can still move once the vehicle vibrates, the trunk opens, or someone washes the area. Large raised pieces can also interfere with screw access and nearby equipment.
If you need inspiration, frame design ideas that preserve readability can help you choose a direction. Keep the final layout tied to your own plate and mounting position instead of copying the proportions of a frame photographed on another vehicle.
Start With a Sound Frame That Already Fits
Use a complete frame rather than trying to build a vehicle mount from craft materials. Inspect it for cracks, distorted holes, sharp edges, loose coating, and old adhesive. Decoration will not restore a broken rail or make a twisted frame sit flat.
Check the undecorated frame on the actual plate and mount before starting. Compare the opening, border width, holes, and assembled depth. Confirm that the frame clears the plate lamp, camera, trunk or tailgate, and surrounding recess. If the plain frame does not fit, decoration will not improve it.
A smooth blank frame can be easier to work with than one carrying raised lettering or a complex finish, but “blank” does not establish its material. Ask what the frame and coating are made from. Plastic is not automatically ABS, and a shiny surface is not necessarily bare metal.
If you are buying a base for the project, separate visual preference from technical suitability. The plate-frame size checks help with geometry; adhesive compatibility still depends on the selected material and finish.
Gather Materials Without Buying a Universal Glue Kit
You will normally need a suitable frame, a clean work surface, mild cleaning materials appropriate to the finish, small decorations, a paper layout, and a controlled way to position the pieces. Fine tweezers or a pickup tool can be more useful than trying to place small stones with glue-covered fingers.
Choose an adhesive only after identifying both surfaces. For a rhinestone project, those include the frame’s visible finish and the stone’s backing, not merely the frame’s underlying metal or plastic. A bond can fail at a coating or backing layer even when the glue sticks to the material underneath it.
Read the adhesive label, current technical instructions, and safety information before opening it. Check ventilation, protective equipment, storage, and cleanup requirements. Keep solvents and small decorations away from children and pets, and do not use the vehicle cabin as a curing space.
Set aside enough pieces for the planned pattern and a few spares from the same batch. Keep the package information so you can identify the material later. Mixing stones that look similar online can produce uneven sizes or a noticeable change in color halfway across the frame.
Check the Back of the Decoration, Not Just Its Sparkle
Look at the piece from the side and underneath. A pointed-back decoration intended for a setting will not sit like a flat-back piece on a narrow rail. Likewise, a supplied adhesive strip may be designed for a different surface or exposure. Identify what will actually touch the frame before choosing how to attach it.
Ask whether the stone is glass, acrylic, resin, or another material, and whether the back has a foil, paint, or separate adhesive layer. A crystal-like appearance does not identify the material. Keep that information with your adhesive choice because the bond may depend on the backing rather than the decorative face.
Reject pieces with visibly loose backing, chipped edges, or inconsistent dimensions that make the pattern difficult to align. Sort them before opening the glue. This gives you time to adjust the design or obtain replacements without trying to rescue a partly bonded row with unsuitable pieces.
There Is No Best Glue for Every Frame
A useful adhesive recommendation must account for substrate, coating, stone backing, outdoor exposure, and curing conditions. A product described as waterproof or strong does not automatically suit painted metal, plated plastic, or every flexible frame material.
One common online recommendation illustrates the problem. Eclectic Products says its standard E6000 industrial adhesive is not recommended for polystyrene, polyethylene, or polypropylene, and that clear E6000 is not formulated for sunlight exposure. The manufacturer also distinguishes initial setting from full cure. Do not extend those instructions to every product carrying a similar name.
If the frame’s resin or coating is unknown, ask the frame and adhesive suppliers before proceeding. For a finished or plated surface, ask whether the adhesive can damage the appearance and whether preparation would remove a protective layer. A compatible bond to bare metal does not settle a bond to a coated frame.
Do not improvise a solution by mixing glues, adding an unknown primer, or covering an unsuitable adhesive with clearcoat. Each added layer creates another compatibility question. If you cannot identify a suitable system, choose another decoration method or a purpose-made finished frame.
Make a Small Compatibility Test Before the Main Project
Test on a spare matching frame or a representative offcut when possible. A hidden spot can reveal a reaction, but it may not reproduce the same finish thickness, curvature, or load as the visible rail. Do not confuse a convenient test location with proof of a complete outdoor product.
Use the proposed preparation, adhesive amount, decoration, and curing conditions. Check for softened coating, color transfer, staining, cloudiness, distorted backing, or failure to set as instructed. Let the test reach the maker’s specified cure before judging the bond.
After curing, inspect the joint and apply gentle handling comparable to ordinary cleaning. Stop if the decoration shifts, the finish lifts with it, or the backing separates. More glue is not a useful answer when the weak layer is the frame coating or the stone itself.
A small test can identify obvious incompatibility, but it does not establish a guaranteed weather life. Sunlight, road contamination, washing, and repeated temperature changes introduce exposure that a short indoor test does not reproduce. Keep that limitation in mind when deciding whether the project belongs on a daily driver.
Remove the Frame and Protect the Work Area
Photograph the existing plate, frame, and hardware arrangement before removing anything. Support the plate while releasing the fasteners and keep screws, washers, and caps in a labeled container. Do not assume every visible screw uses the same thread or length.
If a fastener spins, seizes, or will not release with the correct tool, stop before damaging the vehicle mount. The frame removal sequence can help you distinguish a simple surround from the hardware behind it. A decorative project is not a reason to force an unfamiliar attachment.
Place the frame on a clean, flat work surface away from the car. Keep the official plate and vehicle paint clear of glue, grit, paint overspray, and tools. Removing the frame also lets you inspect its rear contact surfaces rather than decorating only what is visible while installed.
Do not leave the car in road use with required plates missing or unsecured. Plan the work period and storage so the frame can remain off the vehicle for the full preparation and curing process.
Map the Areas That Must Stay Clear
Before drawing the decorative pattern, mark the functional areas on paper. Include the complete plate opening, each mounting hole, the screw-head seating area, drainage or clip features, and any surfaces that must lie flat against the plate or bracket.
Do not decorate the rear contact face simply because it is hidden. Extra material there can change how the assembly sits, concentrate pressure, or rub against another surface. Keep adhesive away from threads, clips, and channels that need to remain functional.
Check clearance around the actual screw heads and any caps you plan to retain. The hole itself can be unobstructed while a nearby stone prevents the tool from seating correctly. Leave enough room for later removal, not just the first installation.
Use a paper representation of the plate to review the visible zone. Regulations differ, so check the requirements that apply to your plate. The practical target is a decoration contained on the frame that does not obscure required identifying information, stickers, illumination, or nearby vehicle equipment.
Prepare the Surface Without Destroying the Finish
Wash off ordinary dirt with a method appropriate to the frame and let it dry. Handle the cleaned area carefully so fingers do not immediately leave oils where you want the bond. Keep dust from the workbench and packaging away from the prepared surface.
Follow the chosen adhesive system’s surface-preparation instructions. Some materials may need specific preparation, but that does not justify sanding through a coating or applying a strong solvent indiscriminately. If the instructions conflict with the frame maker’s finish-care guidance, resolve the conflict before gluing.
Do not copy a cleanup solvent from an adhesive label and assume it is safe on the frame, official plate, or car paint. A solvent that removes uncured glue may also mark another material. Plan how you will avoid excess adhesive rather than depending on aggressive cleanup afterward.
Replace a badly peeling or corroded base instead of decorating over it. Adhesive attached to a loose layer can leave with that layer. Starting with a sound, known surface is more useful than choosing a supposedly stronger product for an unstable one.
Dry-Lay the Pattern at Actual Size
Use a paper strip or drawing to establish the center, corners, and spacing. Arrange the decorations without adhesive and check that the pattern ends neatly at both sides. A frame rail rarely divides perfectly into the width of a particular stone, so solve the spacing before gluing the first row.
If you want a symmetrical design, work outward from a reference point rather than discovering a large gap at the last corner. You can leave an intentional blank area instead of squeezing in a mismatched fragment. A clean gap usually looks better than crowding the mounting area.
Photograph the dry layout straight on and from the side. Check whether raised pieces project beyond the rail or reduce tool clearance. Look at the frame with the plate representation underneath, not as an isolated piece of jewelry.
When the arrangement works, record it and move loose pieces to a small tray. Keep the sequence simple enough that you can repeat it within the adhesive’s working time. Trying to invent the pattern while the glue is setting makes both alignment and cleanup harder.
Attach Small Decorations With Controlled Amounts
Apply the adhesive in the quantity and manner specified for the selected system. Work in manageable sections so you can position pieces accurately before the adhesive becomes difficult to adjust. Do not cover the entire frame with glue and then race to place a detailed pattern.
Place each decoration onto the intended contact area without pushing adhesive into the plate opening or mounting features. Check alignment as you progress. A narrow tool can help position a piece, but avoid scratching the frame or damaging a reflective stone backing.
Watch for squeeze-out. Excess adhesive can leave visible ridges, collect dirt, or reach functional surfaces. Follow the approved cleanup method while protecting the finish; do not scrape the frame with a sharp object to make an unsuitable application look neat.
If a piece will not sit securely because of a curved rail, unsuitable backing, or limited contact, redesign that area. A large mound of glue is not a reliable way to bridge every mismatch. Leave the space clear or use a smaller, better-fitting decoration.
Let the Adhesive Cure Before Handling or Installation
Support the frame in the orientation required by the adhesive and decoration method. Protect it from dust and accidental contact while maintaining the ventilation and other conditions specified by the manufacturer. Do not enclose a solvent-based project in a small sealed container to keep it clean.
Use the exact product’s full-cure instructions rather than the point at which the glue first feels tacky or a stone stops sliding. Temperature, humidity, layer thickness, and formulation can change the process. There is no single waiting time that safely applies to all craft adhesives.
Do not accelerate curing with an oven, heat gun, or direct concentrated heat unless the complete system expressly permits that method. The frame finish, adhesive, and decorations may respond differently. A faster-looking surface does not establish that the joint underneath has cured.
Keep the frame off the vehicle until it can be handled and installed without disturbing the work. If a piece shifts during inspection, remove or repair it according to the instructions and allow the required cure again. Do not count the original waiting period as automatically valid for a newly repaired joint.
Reinstall and Check More Than the Front View
Inspect the back, opening, and holes before fitting. Remove any loose debris and make sure no decoration or adhesive has changed the mounting surfaces. If a screw will not align, find the interference instead of drilling a new hole or pulling the frame into shape with the fastener.
Reassemble using hardware suitable for the vehicle’s mounting arrangement. Start fasteners carefully and tighten as specified for the mount; do not compress decoration to make an unsuitable stack fit. A heavier decorated frame does not justify improvising extra holes in the official plate or bumper.
Review the installation from straight ahead, from the sides, and with the trunk or tailgate open where relevant. Check plate information, stickers, the camera view, lamp illumination, and access for removing the screws later. A stone that clears the plate can still interfere with a nearby moving panel.
Make a gentle retention check after the full cure, then inspect again after ordinary driving and washing. If decorations loosen, remove the frame until the cause is resolved. Do not keep using a project that sheds pieces simply because the main frame remains attached.
Paint, Lettering, and Printed Alternatives
Rhinestones are only one way to decorate a frame. A small original graphic, restrained lettering, or a suitable painted accent may match the vehicle better and avoid a complicated pattern of separate pieces. Each method still needs a compatible surface and a protected functional area.
For paint, use a coating system expressly suitable for the base and existing finish. Follow its preparation, safety, and curing instructions. Do not paint the official plate, fill characters, or use the car as a convenient support for spraying the removed frame.
For lettering or film, check exterior suitability, edge placement, and removal instructions. Avoid wrapping material over clips, into holes, or around the rear contact face without a design that allows it. A smooth logo proof does not establish that an adhesive graphic will tolerate every curve and exposure.
If you want the appearance without doing the bonding work, finished bling frame styles are an alternative to compare. You still need to check fit and care instructions. For an original graphic rather than stones, custom printed frame options may suit the design more directly.
Care for the Decorated Surface and Know When to Retire It
Use the cleaning method allowed by the frame, decorations, and adhesive system. A soft cloth and compatible mild wash are a more sensible starting point than abrasive pads or strong solvents. Do not assume a product safe for bare metal is safe for a stone backing or decorative coating.
Avoid scraping around pieces or directing a close pressure-washer jet at their edges. Inspect after washing for movement, damaged backing, cloudy joints, and lifting finish. Keep spare decorations and the original product information, but do not patch repeatedly without identifying why pieces are coming loose.
Retire the project if the frame cracks, the coating separates extensively, or decorations repeatedly loosen. The time already spent on the design is not a reason to keep an unsuitable assembly on the car. A plain sound frame is preferable to a deteriorating decorative one.
Frequently Asked Questions
Can you decorate a flexible frame with rigid stones?
Do not assume it will work. Flexing can stress the bond or the stone backing, and the frame material may be difficult to bond. Choose a method specifically supported for that material or use a more suitable base.
Can you use leftover indoor craft stones?
Only if their material and backing are suitable for the intended adhesive and exposure. Indoor appearance does not establish outdoor retention or color stability. If the supplier cannot identify them, use known materials instead.
Should you seal the whole frame with clearcoat?
Not automatically. Clearcoat can change the sparkle, react with the glue or finish, and create another layer that can fail. Use it only as part of a compatible, documented system, not as a universal weatherproofing shortcut.
How do you replace one missing stone?
Remove the frame, inspect the surrounding joints and coating, and identify why the piece detached. Follow the adhesive maker’s preparation and repair instructions. If the base layer is failing, replacing a single stone will not solve the underlying problem.