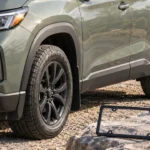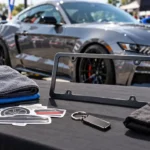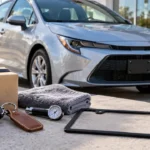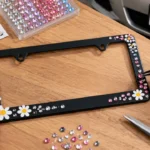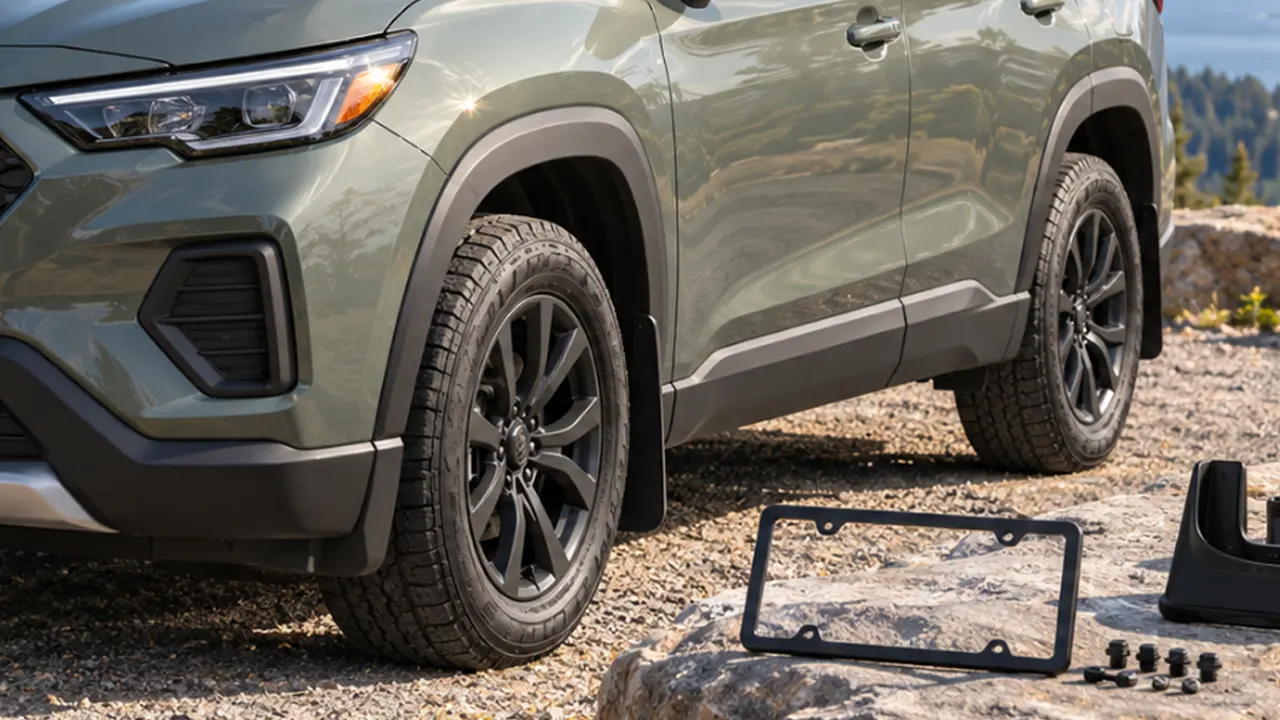
The best car exterior accessories for you are the ones that fit the vehicle, do a useful job, and remain easy to live with after installation. A license plate frame adds a small styling detail; a roof carrier solves a transport problem; mud flaps, protective films, and covers serve different purposes. Choose the job first, then check the exact product and mounting requirements.
An accessory that looks good on a similar car can still obstruct your camera, interfere with a panel, or create a cleaning problem on yours. Treat photographs as design references, not fitting instructions. You can make sensible choices without buying a complete matching set or changing every visible surface.
Sort Exterior Accessories by What They Do
Exterior accessories include practical equipment, protective additions, and decorative pieces. The boundaries sometimes overlap, but the product name alone does not tell you what to expect. A decorative spoiler should not be assumed to improve handling, and a frame around the plate is not a mounting bracket.
Begin with an ordinary use case: carrying bicycles, protecting a frequently used loading edge, reducing splash on a specific vehicle, or replacing a bulky advertising frame. A clear use case gives you something to check when comparing products.
For styling alone, decide how much change you want. A small finish change is a different commitment from a body kit requiring paint and new attachments. If you mainly want ideas for a consistent appearance, the planning approach to personalizing your car helps you choose a direction before buying parts.
Keep mechanical repairs separate. A broken factory trim clip, failed lamp, or insecure bracket needs a proper repair. Another accessory should not hide a problem that will be harder to inspect later.
Compare the Main Categories
| Category | Typical purpose | Check before buying |
|---|---|---|
| Plate frames and decorative trim | Finish an edge or coordinate appearance | Opening, attachment, required information, clearance |
| Mud flaps and splash guards | Manage splash around an intended wheel area | Body style, wheel clearance, supplied fixings |
| Protective film and guards | Protect a specified contact or exposed area | Surface condition, material compatibility, edge placement |
| Roof bars and carriers | Carry equipment outside the cabin | Vehicle-specific system, loading instructions, access |
| Car covers | Cover a parked vehicle in suitable conditions | Storage environment, fit, cleanliness, securing method |
| Spoilers, splitters, and body pieces | Change exterior shape or appearance | Mounting design, ground clearance, professional work |
| Deflectors and add-on moldings | Alter a particular edge or airflow path | Window movement, seals, clips, visibility |
A category can help you search, but it cannot confirm fit. Two products sold under the same name may attach in completely different ways. Read the installation information for the exact item rather than assuming every splash guard or trim cover works alike.
License Plate Frames: A Small Detail With Specific Fit Requirements
A frame is the border around a license plate. It can add a plain finish, color, short message, or original graphic without replacing the official plate. It should not be confused with a transparent plate cover or the bracket that attaches the plate assembly to the vehicle.
Measure the plate and compare the frame opening, mounting holes, border width, and assembled depth. Check registration stickers and other required information under the rules that apply to the vehicle. A nominal country size does not prove that every local plate design will remain unobstructed.
Check the recess, lamp, camera, trunk or tailgate movement, and the contact between the frame and surrounding surfaces. The screws must suit the mounting system and added thickness. Tightening an unsuitable screw harder is not a fitting method.
For a restrained look, slimline frames may be worth comparing with standard borders. A narrow appearance still needs the same measurements. If you want lettering or artwork, custom frame options should follow the confirmed fit, not determine it.
Mud Flaps and Splash Guards: Check Around the Wheel
Splash guards are shaped for particular positions and bodywork. Compare the vehicle year, body style, trim, wheel arrangement, and any existing accessories before choosing a set. A listing that names your model family may not cover every bumper or wheel-arch variation.
Look at how the guard attaches. Some products use existing locations; others call for additional fastening or modification. Read that information before checkout, especially if you lease the car or want a reversible installation. “No drilling” does not mean no need to inspect clips and clearance.
Check movement where the instructions require it, including steering clearance at the front. A piece that clears the tire while parked straight ahead may not do so in another position. Do not cut a product or drill the body to solve an unexpected mismatch without appropriate guidance.
Think about cleaning access. Mud can accumulate around an added piece, so you need a way to inspect the fixings and remove trapped debris. A practical splash accessory should not become a hidden area you can no longer maintain.
Protective Film, Door Guards, and Loading-Edge Protectors
These products have different contact areas and limits. A small guard may cover a known loading edge, while film can be intended for a broader exposed surface. Neither should be advertised as preventing every scratch or compensating for damaged paint underneath.
Identify the surface before applying adhesive material. Sound original paint, repaired paint, textured plastic, existing film, and a ceramic-treated finish can behave differently. Follow the product maker’s compatibility and preparation instructions and seek advice for uncertain or deteriorating finishes.
Plan the edges. Material should not bridge a moving gap, obstruct a drain, or prevent a seal from sitting properly. Check how a door, hatch, or loading surface actually works rather than positioning the accessory solely for symmetry.
Ask about removal and care before installation. Some products need a specific cleaning method or professional removal. Keeping a protective-looking item in place after its edges lift or its surface deteriorates is not a good maintenance strategy.
Roof Bars, Boxes, and Carriers Are Complete Systems
Treat roof equipment as carrying equipment, not merely styling. The feet, bars, fit kit, carrier, vehicle attachment, and load have to work together. Roof rails do not automatically mean that any crossbar set will fit, and a roof box listing does not establish the roof’s permitted load.
Use the current vehicle and carrier instructions for the exact combination. Thule’s guidance, for example, directs owners to vehicle-specific information and the maximum load in the assembly instructions. It is not a universal load figure for every roof or product.
Include the system’s own weight and follow the applicable instructions when calculating the load. Check access to a rear hatch, roof opening, antenna, and other equipment. Also consider the extra height when approaching garages and other restricted spaces.
Make removal, storage, and regular inspection part of the decision. If the equipment will be used only occasionally, find out how it comes off and where you will keep it. Do not buy a carrying system purely because it suits an adventure-themed photograph.
Car Covers: Match the Storage Conditions
Choose a cover around where the vehicle is parked and how often you will use it. An indoor dust-covering job is different from outdoor exposure. Compare the material’s stated use, fit, fastening, ventilation information, and the maker’s care instructions.
Check that the car and cover are suitably clean before use. Dirt trapped between surfaces is a different problem from rain falling onto an uncovered car. Do not assume that putting any cover on any dusty vehicle always improves protection.
Account for protruding parts, antennas, mirrors, and other fitted accessories. A cover stretched over an unintended shape may fit poorly or put pressure on particular points. Use the appropriate design rather than treating a larger generic size as a guaranteed solution.
Consider the daily routine. You need space to remove, dry where instructed, fold, and store the cover without dragging it across a dirty floor. A product that is difficult to handle in your parking arrangement may be used less often than expected.
Deflectors, Mirror Caps, and Decorative Moldings
Small trim accessories can change the outline of the vehicle without a large bodywork project. Their value depends on exact shape and mounting. Compare the contact surface, clips, adhesive areas, and any moving parts before choosing a design.
For a window-area accessory, check the vehicle and product instructions for window operation, sealing, and installation. Do not assume that a piece advertised for your model can be forced into place if the window catches it or a seal no longer sits correctly.
A mirror cap or cover must not obstruct a lamp, camera, moving mirror, or other feature. The shape of a similar-looking mirror can change between equipment packages and model years. Confirm the actual unit rather than matching the car’s badge alone.
Keep expectations realistic. Decorative moldings do not automatically improve aerodynamics, and a dark cover does not establish the base material. If the aim is to change bright trim, a planned chrome-delete project may be more coherent than several unrelated stick-on covers.
Spoilers, Splitters, and Body Kits Need More Than a Style Match
These pieces can affect dimensions, access, and attachment loads. Decide whether you are choosing a decorative part, replacing a damaged original component, or pursuing a technical performance change. Those are different projects with different evidence needs.
Check the mounting design and the work it requires. A body piece may need paint, drilling, fasteners, or professional fitting even when the product photograph shows a simple finished result. Ask what is included and what must be supplied separately.
Ground clearance matters for everyday use. Consider ramps, driveways, curbs, and the way the car is normally loaded. A splitter that is easy to damage in your regular parking location may be an inconvenient choice even if it looks right from the front.
Do not assume a performance benefit without evidence for the specific product and installation. If the proposed change affects vehicle systems, structural parts, or safety functions, use qualified help. Appearance alone cannot establish a sound engineering result.
Weather-Related Additions Must Preserve Visibility
Exterior-accessory catalogs sometimes include wipers and weather-related products alongside styling pieces. Keep replacement functional parts in a separate decision from decoration. A wiper should match the vehicle’s specified application, connector, and operating area rather than simply sharing the length of a blade on a similar car.
Before buying an add-on around glass, identify any existing tint, film, camera area, heating feature, or coating. Follow the relevant instructions for cleaning and compatibility. Do not assume a water-repellent treatment, visor, or deflector belongs on every glass surface, and do not cover a camera area to achieve a continuous visual line.
Check the accessory from the driver’s normal seating position and in the lighting conditions in which you use the car. A piece that seems unobtrusive from outside may create an unwanted reflection or hide part of the view from inside. Inspect these effects while stationary before normal use.
If the real problem is poor visibility, repair or clean the relevant original equipment first. An extra decorative piece is not an answer to a worn blade, damaged glass, or failed lamp. Choose the suitable functional replacement before deciding whether any additional styling accessory is useful.
Keep Lighting, Plates, and Sensors in View
Exterior accessories share space with functional equipment. Lamps, reflectors, cameras, sensors, vents, and required plate information need their intended operating space. Look around the attachment area before deciding it is simply an unused patch of bodywork.
Treat original lighting and decorative lighting as separate categories. A styling accessory is not a substitute for repairing a failed original lamp. Check the current road-use and installation requirements for any lighting change in the jurisdiction where the car is used.
Modern equipment can be less obvious than a visible camera lens. A trim area may have vehicle-specific restrictions because equipment sits behind it. Consult the owner’s or service information and the accessory instructions instead of guessing from the outside.
After installation, check the relevant views and functions while parked. If a warning appears or a camera view changes, investigate rather than accepting it as the price of the appearance change. A successful attachment is not the same as a successful complete installation.
Read the Mounting Method Before the Marketing Description
Existing-point fasteners, clips, adhesive, clamps, and newly drilled attachments involve different commitments. Find out which method the exact product uses and whether access from behind the panel is necessary. An installation photograph often hides that part of the work.
For adhesive products, identify the required surface condition and later removal process. For mechanical fasteners, check what hardware is supplied and whether it is appropriate to the vehicle. Avoid substituting random screws merely because they pass through the accessory’s holes.
Dry-fit where the instructions allow it before committing to adhesive or modification. Check alignment, moving clearances, and the position of seals and nearby equipment. Stop when the product differs from the drawing or the instructed mounting points are not present.
Keep the instructions and original parts. If the vehicle needs service later, those records help another person understand the installation. They are also useful if you decide to remove the accessory or transfer ownership.
Compare Upkeep as Carefully as Appearance
Look for places where dirt and water can collect: the back of a frame, a guard edge, an adhesive seam, or a carrier attachment. Ask whether those locations remain accessible for cleaning and inspection after installation.
Use care instructions for the actual finish. Painted metal, polished metal, textured plastic, printed decoration, and wrap film do not all accept the same products. A stronger cleaner is not a sensible default when the material is unknown.
Film manufacturers publish their own maintenance restrictions. For example, 3M’s wrap-care resources distinguish product-specific care rather than treating every dark exterior surface as ordinary painted metal. Keep those instructions with the accessory record instead of relying on a general car-wash routine.
Check for looseness, lifting edges, new contact marks, and trapped debris during ordinary washing. An item that repeatedly moves or marks the vehicle may need a different fitting method or removal, not just another round of tightening.
Build a Buying Shortlist With Useful Evidence
Save the exact vehicle details, photographs of the intended mounting area, and the relevant measurements. Note any existing aftermarket parts. They can change the fit even when a listing otherwise matches the year and body style.
Ask the seller for an installation guide, dimensional information, contents list, and finish-care guidance. A sentence saying “fits most cars” should not replace those details. If you cannot establish how an item attaches, leave it off the shortlist until the question is answered.
Check photographs for the actual product version. A catalog can show a painted or decorated example while supplying a different base item. Confirm whether finishing, hardware, adapters, or professional work are still needed.
For personalized items, settle fit before approving the name or artwork. Customized stock may have different return conditions, and a proof of the lettering does not establish vehicle compatibility. Keep the approved record and inspect the delivery before installation.
Budget for the Installed Item, Not Just the Box
Add necessary hardware, fitting, paint or surface preparation where applicable, delivery, and later removal. Include storage if you are buying equipment used only occasionally. The advertised price can be only the starting point for a bodywork or carrying project.
Do not order a collection of accessories before confirming how they interact. A new carrier, cover, and decorative trim can each fit alone yet interfere when combined. Make one change, inspect it, and then decide whether the next addition still serves a useful purpose.
Compare like-for-like quotations. An unfinished body piece is not the same purchase as a fitted and painted part. A frame supplied without suitable mounting hardware may need another decision before it can be used.
Set aside money for ordinary maintenance first. Exterior accessories are optional additions, and they should not consume the funds needed to address worn tires, failed lights, or a broken original mount. A sound vehicle gives you a better base for every cosmetic choice.
Choose a Starter Set Around Your Actual Driving
For a daily commuter, a suitable plain frame and a well-chosen protective detail may meet the goal without creating a complex project. The useful result is a cleaner finish and manageable upkeep, not the largest number of changes.
For a driver carrying outdoor equipment, begin with the approved carrying system and load plan. Styling can follow once the transport job works. A roof-mounted object bought mainly for appearance can add handling and storage tasks without solving a real need.
For a show-focused car, distinguish static display equipment from items intended to stay on during road use. Plan removal, storage, and travel arrangements for display-only pieces. A show photograph should not become the only basis for an on-road installation.
If you mainly want an understated appearance, use the finishes already present on the car. A plain black, silver, or body-related accent can be enough. There is no need to repeat the same material or color on every panel to make one accessory feel deliberate.
Frequently Asked Questions
What exterior accessory is easiest to choose without major modification?
An item that uses existing suitable mounting points and has clear fit information is a sensible place to start. A plate frame can meet that description, but still check its opening, hardware, and vehicle clearance before choosing it.
Are expensive accessories always better made?
Price alone cannot establish fit, material, finish, or attachment quality. Compare the actual construction, instructions, support information, and installed cost. A simple correctly specified part may suit the job better than an elaborate one.
Can you use one accessory on several cars?
Only when its instructions and fit information support each installation. This is particularly important for carriers and brackets. Similar exterior dimensions do not establish identical mounting points or permitted loads.
Should you choose carbon-fiber styling for a coordinated look?
You can choose the appearance, but identify what the item is made from. A carbon-fiber-pattern finish on plastic or metal is not the same as a carbon-fiber composite part. Compare construction and care needs separately from the pattern.
What should you do when an accessory does not fit as expected?
Stop before making irreversible changes. Compare the supplied item with the order, instructions, and vehicle details, then contact the seller. Do not cut original trim or enlarge holes merely to accommodate an unexpected product.