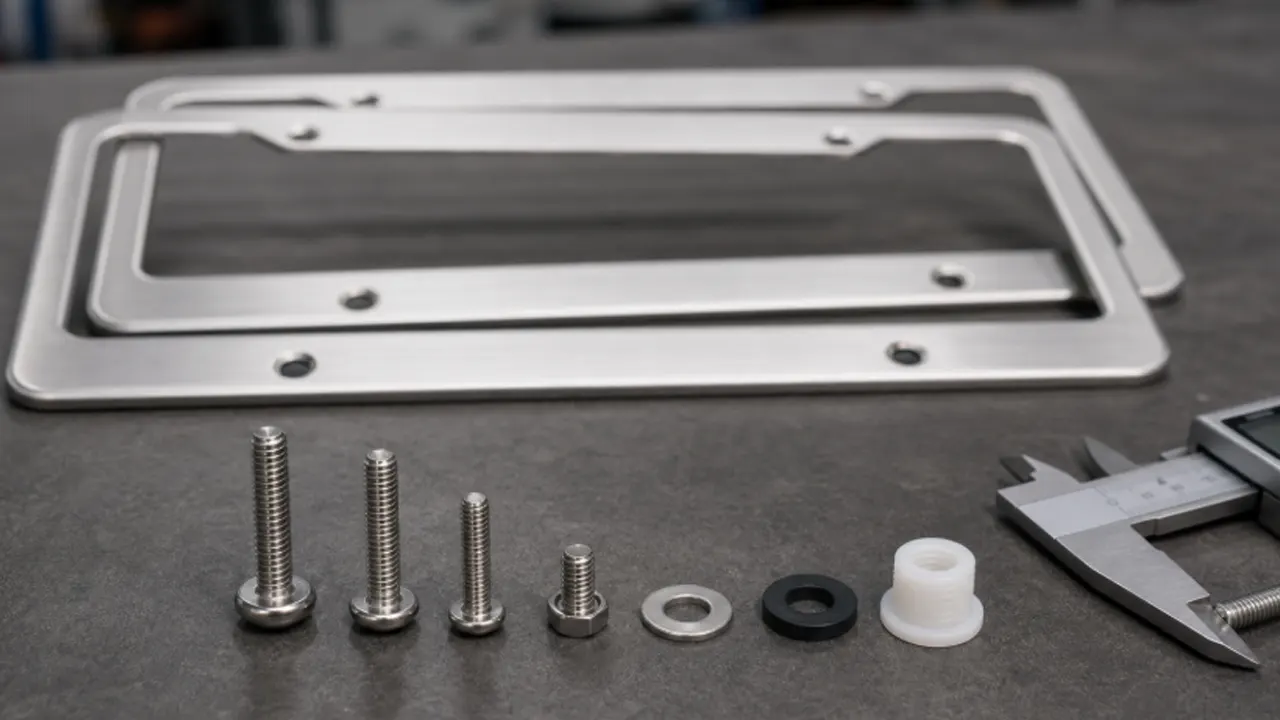
There is no universal license plate frame screw size. The correct fastener depends on the vehicle’s mounting point, whether it uses a threaded insert or a plastic grommet, the combined thickness of the plate and frame, and the clearance behind the mounting hole.
If you still have one undamaged original screw, use it as your reference. Match its diameter, thread pitch, length, and head style before you buy decorative or anti-theft replacements. Do not force a screw that starts tightly; one wrong turn can strip a plastic insert or damage a captive nut behind the bumper.
The four specifications that have to match
| Specification | What it controls | What goes wrong when it is wrong |
|---|---|---|
| Diameter | Whether the screw enters the mounting point | An oversized screw damages the insert; an undersized screw stays loose |
| Thread pitch or threads per inch | How the threads engage | A mismatched pitch can cross-thread or strip a metal insert |
| Length under the head | How much thread engages after the plate and frame are added | Too short pulls out; too long bottoms out or damages material behind the hole |
| Head style and diameter | Tool fit, frame recess fit, and clamping area | The head may not seat, may crack a cap base, or may be impossible to remove later |
“M6” is not a complete specification, and neither is “quarter inch.” You still need the pitch and length. Head type matters too: Phillips, slotted, hex, Torx, and security heads require the correct tool, while some frames need a low-profile head so the decorative cap can close.
Common sizes are clues, not guarantees
You will often see M6 × 1.0, 1/4-20, and self-tapping screws in license plate hardware listings. They are common enough to help you begin the search, but vehicle make alone does not prove the answer. The front and rear mounting points on the same vehicle can use different hardware, and a replacement bracket may not use the factory thread.
| Fastener description | Where you may encounter it | What to verify |
|---|---|---|
| M6 × 1.0 machine screw | Many metric threaded inserts and brackets | Confirm 1.0 mm pitch, usable depth, and required length |
| 1/4-20 machine screw | Some inch-threaded brackets and captive nuts | Do not confuse it with a self-tapping 1/4-inch screw |
| Self-tapping or thread-forming screw | Plastic grommets or holes without a machine-thread insert | Match the original root diameter, thread shape, and anchor condition |
| Vehicle-specific bolt or screw | Factory brackets, European mounts, camera brackets, and tailgate assemblies | Use the parts catalog or service information for the exact year and model |
Audi’s technical service bulletin for a specific mounting application shows why blanket charts are risky. That bulletin lists M6 × 8 mm without a decorative frame and M6 × 10 mm with a 2 mm frame. It is a useful example of thickness changing length—not proof that every Audi, European vehicle, or M6 mount uses those lengths.
Identify the mounting point before measuring the screw
Remove one fastener and look into the mounting hole with a flashlight. A metal threaded insert needs a matching machine screw. A square or round plastic grommet usually accepts a thread-forming screw. A through-hole with a nut behind it needs access to the rear and may require a washer. An aftermarket bracket can introduce its own hardware even when the vehicle body has a different factory thread.
If the screw spins without backing out, the insert may be rotating. Stop before it enlarges the hole. Put gentle outward pressure behind the plate while turning by hand, or hold the rear nut if it is accessible. A damaged insert should be repaired or replaced rather than hidden under a longer screw.
Choose length from the full stack
The screw has to pass through the head recess, frame, plate, any gasket or anti-rattle pad, and then engage the mounting point. Measure that complete stack. The frame can add several millimeters, and a thick cap base can add more than the visible border suggests.
- Measure the original screw from the bearing surface under the head to the tip.
- Measure the added thickness of the new frame, gasket, spacer, and cap base at the screw hole.
- Check the usable depth of the threaded insert or clearance behind the bracket.
- Choose a length that preserves adequate engagement without bottoming out.
- Start the screw by hand for several turns. If it binds early, stop and recheck the thread.
- Tighten evenly with a hand tool. Do not use an impact driver on an unknown insert.
More length is not extra security. A screw that bottoms out can feel tight while the plate is still loose, or it can crack a plastic bracket and pull a captive insert out of place.
Head style has to fit the frame
A decorative cap normally snaps over a separate cap base or into a recess around the screw head. If the head is too wide or tall, the cap may not seat. If the head is too small, it may pull through the frame hole instead of clamping the assembly.
For thin metal frames, use a head or washer that spreads load without crushing the finish. For plastic frames, tighten only enough to remove movement. Overtightening can dish the rail, crack the hole, or make the plate bow and rattle at the unsupported edge.
A five-minute test before buying a full hardware set
- Take one original screw to a hardware counter or compare it with a thread gauge.
- Record the vehicle year, make, model, and whether the mount is front or rear.
- Photograph the mounting insert and measure the original screw.
- Add the frame at one location first and check that the screw clamps before it reaches the end of the hole.
- Remove it once to confirm that the insert and threads remain undamaged.
If you are installing a new assembly, follow the license plate frame installation steps and compare two-hole and four-hole mounting. A correct thread will not prevent movement when the frame lacks lower support, and an anti-rattle pad will not repair stripped threads.
Hardware choices for fleet and private-label programs
Do not publish one screw kit as “universal” unless the supported mounting systems are defined. A useful bill of materials states the screw diameter, pitch, length, head, material or finish, driver bit, washer or cap base, and the vehicle or bracket scope.
For a mixed-vehicle program, separate hardware packs by verified fit and label them clearly. Include a short hand-installation instruction and a warning not to force the fastener. If anti-theft screws are offered, supply the matching key and decide how replacement keys will be handled before retail packaging is approved.
Frequently asked questions
What is the most common license plate frame screw size?
M6 × 1.0 and several 1/4-inch fasteners are common, but there is no safe universal answer. Verify the original screw and mounting insert for the exact vehicle and location.
Can I use a longer screw after adding a frame?
Sometimes, but only after checking the added stack thickness and clearance behind the mounting point. A longer screw can bottom out or damage a bracket.
Are front and rear plate screws the same?
Not always. A front plate may attach to a plastic bracket while the rear plate uses metal inserts in a trunk lid or tailgate.
Can I replace a self-tapping screw with a machine screw?
Only if the mounting point has the correct machine thread or is properly converted with a suitable insert. Do not force a machine screw into an unthreaded plastic or sheet-metal hole.
How tight should license plate screws be?
Tighten by hand until the plate and frame stop moving, then stop. Exact torque depends on the fastener and insert; high torque can strip or crack the mount.
What to send with a frame and hardware inquiry
Provide the vehicle year, make and model, front or rear location, a photo of the mounting point, the original screw specification, frame thickness at the holes, hole count, and any cap or anti-theft requirement. For a custom supply program, add quantity, packaging, labeling, and destination through the contact form.