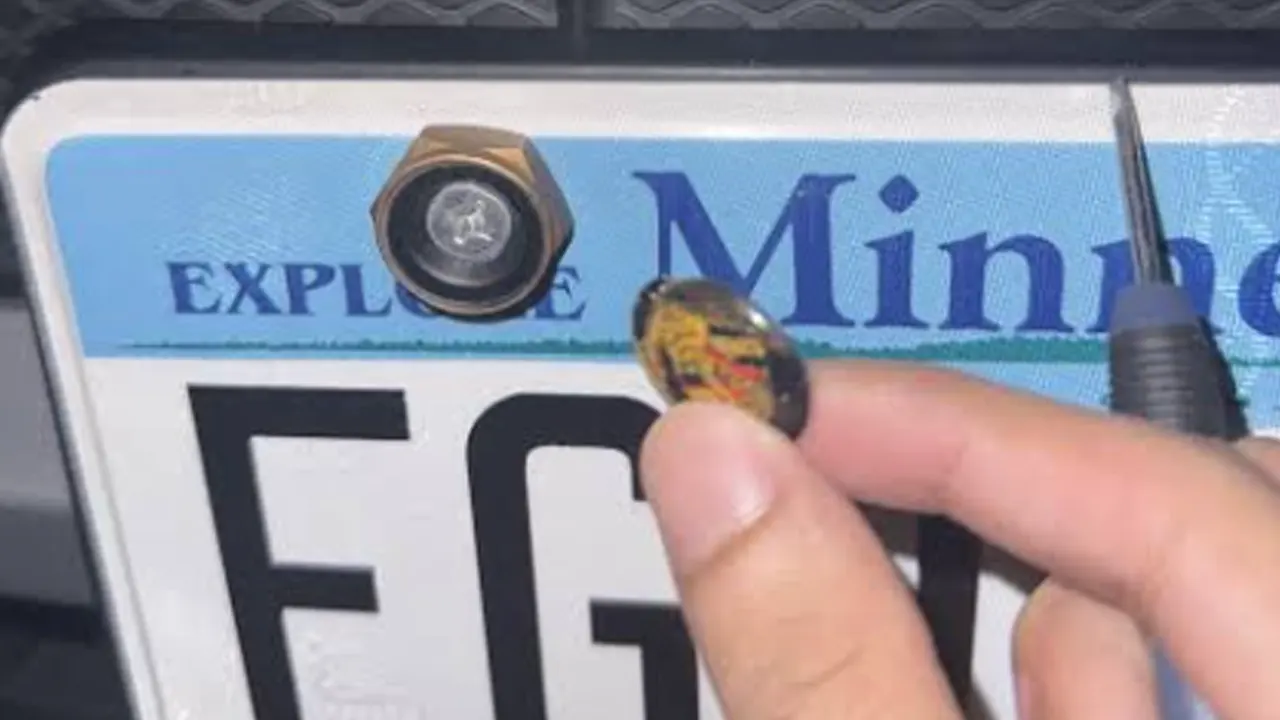
Start by identifying the cap. Most license plate screw caps either snap onto a plastic base, press into the frame opening, or thread onto a small retainer. Protect the paint and frame, then lift or turn the cap with light, even pressure. Do not drive a screwdriver deep enough to contact the vehicle.
If the cap will not move, stop and inspect it from the side. Pulling harder is how a reusable cap becomes a broken cap—or a small job becomes a scratch in the trunk lid.
First, work out which cap you have
| Cap type | How it is held | Normal removal |
|---|---|---|
| Two-piece snap cap | Decorative cap snaps over a base under the screw head | Lift the cap edge; leave the base until the screw is removed |
| Press-in cap | Tabs grip a recess in the frame | Push from the back if accessible, or pry evenly at the front edge |
| Threaded decorative cap | Cap screws onto a stud or retainer | Turn counterclockwise while supporting the frame |
| Security cover | Special retainer, key, or destructible shell | Use the supplied key or the manufacturer’s removal method |
| Not a cap | Rivet, push pin, or unusual fastener head | Identify the fastener before applying force |
A smooth chrome or black circle is not proof that it pops off. Look for a hairline seam between the cap and base, a tiny notch for a tool, flats for turning, or an identical unused cap from the hardware kit.
Tools that protect the finish
- Plastic trim tool, guitar pick, or nylon spudger
- Painter’s tape
- Microfiber cloth
- Small flat-blade screwdriver for caps that provide a pry point
- Fine hook or pick used only with controlled pressure
- Pliers with taped or padded jaws for a cap designed to turn
- Hand screwdriver or socket that matches the fastener beneath the cap
Put metal tools last in the order, not first. A plastic pick often reaches the seam without chipping a painted frame or marking the vehicle. If you must use a flat screwdriver, cover the nearby surface with tape and a folded microfiber cloth.
Remove a snap cap step by step
- Park on a level surface and switch the vehicle off. Clean loose grit from the cap and frame so it cannot be dragged across the finish.
- Tape the surrounding edge. Place painter’s tape on the frame and any exposed paint near the tool path.
- Support the frame. Hold the rail with one hand so prying force does not bend it toward the body panel.
- Find the cap seam or notch. Slide a plastic pick only far enough to catch the decorative cap, not the screw head or vehicle surface.
- Lift a little, then move around the cap. Work in small increments instead of levering from one point until the cap bends.
- Catch the cap. Cup your hand over it so it does not fly away when the last tab releases.
- Remove the screw with the correct tool. Press the driver firmly into the head and turn by hand while supporting the plate.
Some press-in caps are designed to be pushed out from the back of the frame. If the rear of the hole is accessible, that is usually cleaner than front-side prying. Griot’s Garage instructions for one sealed frame, for example, tell the user to push snap caps out from the back or use a small standard screwdriver from the front. That method applies to that cap design, not to every decorative cover.
If the cap turns but does not lift
It may be a threaded cap, or the cap base may be rotating with the screw. Stop prying. Try turning the cap counterclockwise with your fingers. If it is too smooth, use a piece of rubber for grip or padded pliers with very light pressure.
When the whole base rotates, press the frame gently toward the vehicle while turning the cap, or hold the base with a second tool if the design exposes it. Do not squeeze hard enough to deform a thin metal rail or crack a plastic recess.
If the cap is flush and there is no gap
Warm the cap gently with a hair dryer on low for a short period, keeping the air moving. Mild warmth can make some plastic caps a little more flexible. Do not use a heat gun, open flame, or concentrated high heat near paint, plastic trim, cameras, wiring, or a plate cover.
After warming, press the frame down with a protected plastic tool while sliding a second thin plastic pick under the cap edge. Twist the pick slightly; do not use the vehicle body as a fulcrum.
What to do with dirt, corrosion, or adhesive
Road salt and dried cleaner can lock a cap into its recess. Wash the area with warm water and automotive-safe soap, dry it, and try again. If the cap is threaded onto metal and corrosion is visible, a small amount of penetrating oil applied precisely at the cap joint may help. Keep oil off the plate face, painted surfaces, and plastic parts unless the product is confirmed safe for them.
Adhesive-backed decorative plugs are different. Warm them gently and lift with plastic line or a plastic edge. Remove residue with a paint-safe automotive adhesive remover, following the product instructions. Do not use acetone or an unknown solvent on the frame or vehicle finish.
Know when the cap is sacrificial
Some anti-theft shells are designed to resist non-destructive removal. Others become brittle after years of sun exposure and will crack even with careful handling. If replacement caps are available, sacrificing the cap may be safer than bending the frame or scratching the vehicle.
Do not drill near the body panel while the frame is still mounted unless you have the access, shielding, and experience to protect the screw, plate, wiring, camera, and paint behind it. For a seized security assembly or a spinning hidden insert, a repair shop is the sensible next step.
Remove the frame without creating the next problem
Once the caps are off, photograph the screw heads and choose the exact driver. Hold the plate and frame while loosening the final screw so they do not fall against the paint. If a screw resists, apply steady hand pressure rather than an impact driver.
After removal, inspect the holes for cracked plastic inserts, rust, stripped threads, and trapped grit. Clean the contact area and replace damaged hardware before reinstalling. The installation guide covers correct reassembly, and the two-hole vs four-hole guide helps you decide whether the frame needs lower support.
Frequently asked questions
Can I pry a screw cap off with a screwdriver?
Yes, if the cap is designed to snap off and you use only the shallow edge of a small flat screwdriver. Protect the finish and avoid using the vehicle panel as the leverage point.
Why does the cap spin without coming off?
It may be threaded, or the cap base and screw may be rotating together. Try counterclockwise turning and support the base before applying more upward force.
Can I reuse license plate screw caps?
Usually, if the retaining tabs and finish are undamaged. Replace caps that are cracked, loose, distorted, or no longer snap firmly onto the base.
Should I use WD-40 on a plastic cap?
Not as a first step. Clean with soap and water and identify the cap type. If corrosion affects a metal threaded joint, use a compatible penetrating product sparingly and keep it away from sensitive finishes.
What if there is no visible screw under the cap?
Check whether you are looking at a rivet, push pin, threaded decorative nut, or security fastener. Do not drill or cut until the fastener and the clearance behind it are known.
For replacement caps or custom hardware
Match the cap to the screw-head diameter, cap base, frame recess, finish, and removal method. For a custom program, send the frame drawing, hole detail, screw specification, cap sample or photo, quantity, finish, and packaging requirement through the contact form.