License plate frame security screws make a plate harder to remove with an ordinary screwdriver. They are useful against quick, opportunistic tampering, but they do not make the plate theft-proof. The right screw still has to match your vehicle’s thread, mounting insert, required length, and frame geometry.
If you are choosing hardware for one vehicle, start with an original screw. If you are specifying a retail or dealer kit, start with the vehicles and mounting systems the kit must support. A special drive head cannot compensate for a cross-threaded insert, a screw that bottoms out, or a frame that prevents the driver bit from seating fully.
What Makes a License Plate Screw “Secure”?
A standard Phillips or slotted screw can be removed with a tool found in almost any toolbox. A tamper-resistant screw changes the drive interface so that a matching bit or key is required. That extra step discourages someone looking for the easiest plate to remove.
The more accurate term is tamper-resistant, not tamper-proof. A determined person may still grip an exposed head, drill it, cut a slot, damage the frame, or attack the vehicle’s mounting bracket. Think of the screw as one layer in the assembly, not a guarantee.
Common Security Drive Types
| Drive type | How it deters removal | Service trade-off | Good fit for |
|---|---|---|---|
| Pin-in-Torx | A center pin blocks a standard Torx bit. | The matching hollow bit must be retained. | Retail kits that need reasonable torque transfer and repeatable servicing. |
| Pin-in-hex | A center pin prevents a normal hex key from seating. | Low-quality sockets can strip if the bit is not fully engaged. | Low-profile hardware and coordinated cosmetic kits. |
| Spanner or two-hole | Two small holes require a matching spanner bit. | Bit alignment is less forgiving, especially in a recessed frame. | Light-duty deterrence where appearance matters. |
| One-way slotted | Ramped slots accept installation torque but resist reverse rotation. | Routine removal can require extraction or destructive work. | Installations that are not expected to be serviced often. |
| Proprietary keyed head | An uncommon pattern reduces compatibility with generic security-bit sets. | A lost key can delay plate replacement or vehicle service. | Managed fleets or premium kits with replacement-key support. |
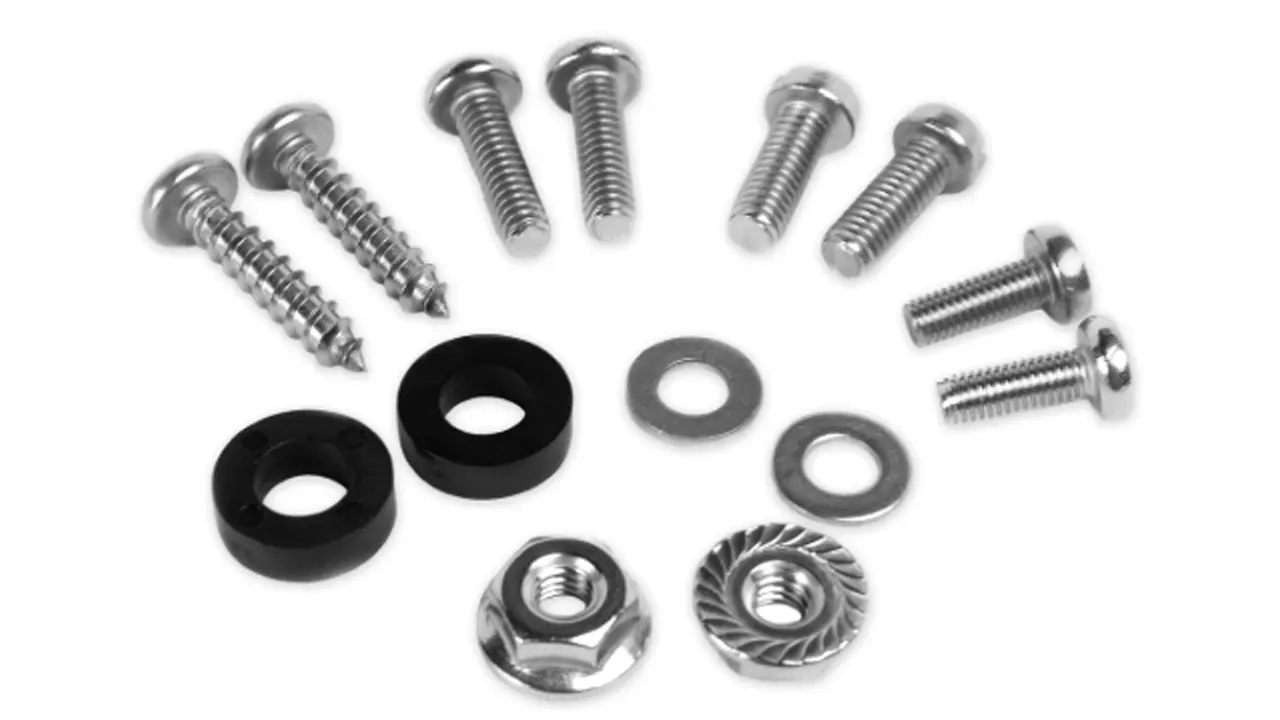
Do not choose by drive shape alone. Head diameter, head height, recess depth, bit access, thread form, length, material, and washer arrangement all affect whether the fastener works with the frame.
Fit Comes Before the Security Pattern
License plate screws are not universal. One vehicle may use a metric machine screw in a threaded insert, another may use an inch-series screw, and another may rely on a self-tapping fastener in a plastic retainer. Front and rear mounting points can also differ on the same vehicle.
Use the existing fastener or the vehicle manufacturer’s information to confirm five details:
- Thread diameter and pitch. A screw with the right diameter but the wrong pitch can start, bind, and damage the insert.
- Usable length under the head. Add the plate, frame, washer, bracket, and any spacer to the stack. Extra length is not automatically safer.
- Mounting-point type. Identify whether the screw enters metal threads, a plastic insert, a clip nut, or an unthreaded mounting boss.
- Head and washer fit. The head must cover the frame slot without interfering with a cap, recess, or decorative surface.
- Driver clearance. The security bit needs to enter straight and fully. A deep or narrow frame recess can make an otherwise correct screw unusable.
For a closer look at thread and length selection, use our license plate frame screw size guide. It is worth checking before you order security hardware, because forcing the wrong screw can damage a mounting point that costs far more to repair than the frame.
How to Install License Plate Frame Security Screws
- Park safely and gather both tools. You need the driver for the existing screws and the matching bit or key for the new security screws.
- Remove the old hardware without prying the frame. Support the plate so it does not drag across paint or bend when the last screw comes out.
- Inspect and clean the mounting points. Stop if an insert spins, threads are damaged, or corrosion is severe. A security screw should not be used as a repair fastener.
- Dry-fit the complete stack. Position the vehicle bracket, plate, frame, washers, and any pads exactly as they will be installed. Confirm that the frame does not cover required plate information.
- Start every screw by hand. Turn it several threads with light finger pressure. If it binds, back it out and recheck the thread instead of using more force.
- Tighten evenly with a hand tool. Bring the screws down gradually and stop when the assembly is secure. Excess torque can distort a thin frame, crack a plastic insert, strip threads, or make future removal difficult.
- Check the final assembly. Confirm that the plate is flat, the frame does not rattle, all required characters and stickers remain visible, and the driver bit can still be fully seated.
Our detailed license plate frame installation guide covers the rest of the assembly sequence. Vehicle-specific instructions take priority whenever they state a fastener size or tightening requirement.
Where Security Screws Still Fail
The head remains accessible. If the head stands proud of the frame, locking pliers or cutting tools may still reach it. A low-profile head can reduce access, but it must still provide enough bearing area and driver engagement.
The frame becomes the weak link. A thin frame can be bent or cut even when the screws stay in place. A brittle decorative coating may also crack if the head is over-tightened.
The key disappears. A lost bit turns a routine plate change into an extraction job. Keep one key with the vehicle and, for a fleet or retail program, define how replacement keys will be supplied.
The fastener seizes or strips. Road water, salt, contamination, mixed materials, and excessive tightening can make removal difficult. Do not promise “rust-proof” performance from the word stainless alone; the exact alloy, mating materials, surface condition, and exposure all matter.
The screw is too long. A longer screw may be needed after adding a frame, but a screw that bottoms out can damage the insert even though the head still looks loose. Audi service guidance, for example, ties required screw length to the combined plate-and-frame thickness and warns against applying more torque when a screw bottoms out.
How to Specify a Retail, Dealer, or Fleet Kit
If you are sourcing in volume, “security screws included” is not a complete specification. Ask the supplier to document the hardware as carefully as the frame.
| Specify | Why it matters |
|---|---|
| Target makes, models, years, and front/rear positions | Defines the mounting interfaces the kit is expected to support. |
| Thread diameter, pitch, and usable length | Prevents cross-threading and bottoming-out complaints. |
| Drive pattern and matching bit | Sets the deterrence level and future service method. |
| Head diameter, height, and washer stack | Controls clamping area, recess fit, and cosmetic appearance. |
| Fastener material and surface finish | Allows corrosion claims to be tied to an actual specification. |
| Bit quantity and replacement policy | Reduces service problems after sale. |
| Packaging and labeling | Keeps similar-looking thread variants from being mixed at fulfillment. |
For mixed vehicle coverage, one “universal” kit usually creates more returns than it prevents. Separate clearly labeled variants are easier for customers, dealers, and warehouse teams to use correctly.
Choosing a Frame Around the Hardware
A slim opening, accessible mounting slots, and enough flat bearing area make security hardware easier to install correctly. When comparing US license plate frames, check the opening and hole geometry together with the hardware stack rather than treating the screws as an afterthought.
For a private-label project, send the target plate format, vehicle coverage, two-hole or four-hole layout, frame material and finish, desired drive type, kit quantity, and packaging requirements. Our custom license plate frame team can review the frame and hardware interface without assuming one screw fits every application.
Frequently Asked Questions
Are license plate frame security screws universal?
No. Drive style does not determine fit. You still need the correct thread diameter, pitch, length, head geometry, and mounting-point type for the vehicle.
Can security screws stop license plate theft?
They can deter quick removal with common tools, but they cannot stop every attack. The plate, frame, bracket, and exposed screw head remain possible points of attack.
Are screw caps the same as security screws?
No. Ordinary snap-on caps mainly hide the head and improve appearance. A locking cap may add deterrence, but its security depends on the cap design and how it attaches.
Should I use an impact driver?
A hand driver is the safer default unless the vehicle or fastener manufacturer gives a specific controlled-torque procedure. Impact tools can cross-thread inserts, damage plastic mounting points, distort the frame, or strip a small security recess.
What happens if I lose the security bit?
Look for the kit’s replacement-key information before attempting extraction. If the drive is proprietary or the head is damaged, a dealer or qualified repair shop may be the safest option. Avoid improvised cutting near painted vehicle surfaces.
How many security screws should a frame use?
Use the mounting points supported by the vehicle and frame. Two correctly fitted screws can be better than four mismatched fasteners. Unused lower frame holes should not be drilled into the vehicle unless the manufacturer’s instructions specifically permit it.
Plan the Hardware Before You Approve the Frame
Security starts with correct fit. Choose the vehicle interface first, then the drive type, material, head profile, bit, and packaging. If you need a coordinated frame-and-hardware review for a wholesale or private-label program, send us your application details and we will identify the information needed for a buildable specification.