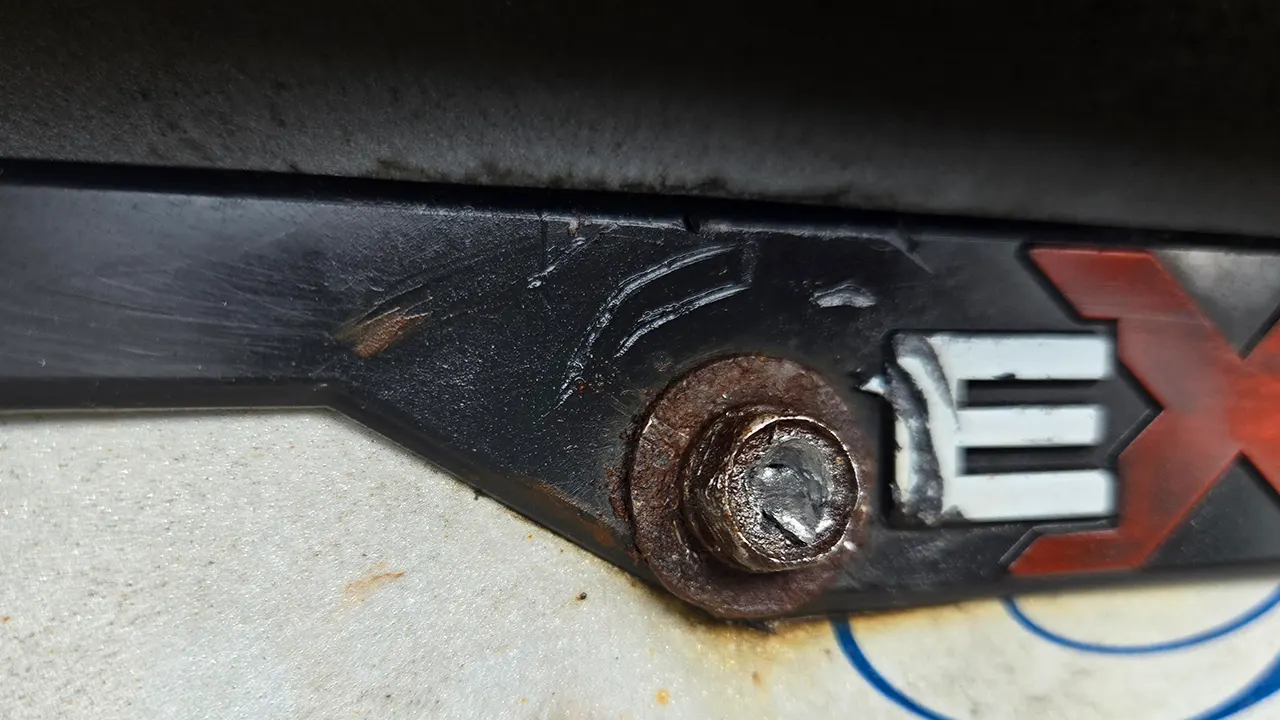
A seized license plate frame screw needs patience before torque. Clean the exposed area, protect nearby paint and plastic, apply a compatible penetrating oil at the thread path, allow it to work, then use the correct hand tool with small back-and-forth movement. If the insert begins to spin or the head starts to strip, stop and change methods.
Seized is different from stripped
A seized screw still has usable drive engagement but will not rotate because corrosion, contamination, damaged threads, galling, or an incompatible fastener-and-insert combination is resisting movement. A stripped screw has lost its drive shape. Heavy force can turn the first problem into the second.
| Observation | Likely condition | Action |
| Head is intact; screw does not move | Seized threads | Clean, penetrate, wait, then apply controlled torque |
| Bit slips in the recess | Drive is beginning to strip | Stop and restore grip |
| Whole insert rotates in the bracket | Captive insert has broken free | Seek rear access or plan bracket replacement |
| Head turns but screw does not rise | Damaged thread or spinning retainer | Add gentle outward tension; do not pry against paint |
Prepare for a controlled removal
- Use eye protection and work in a ventilated area.
- Mask the paint and cover the plate edge with a nonmetallic shield.
- Brush away loose dirt and rust so the product can reach the joint.
- Confirm the bit or socket fits fully and squarely.
- Check for a camera, lamp wiring, plastic trim, or a fuel-system component behind the mounting area.
Read the penetrant label and safety data. Test compatibility when overspray could reach an unknown plastic, coating, adhesive, or finished surface. Keep aerosols away from ignition sources and wipe away excess.
Use this escalation sequence
- Try the correct hand tool once. Apply firm inward pressure and modest loosening torque. Stop immediately if the bit begins to cam out.
- Apply penetrating oil precisely. Aim at the screw-to-insert interface, not across the bumper. Let capillary action and dwell time do the work; repeat only as directed by the product maker.
- Work the screw in both directions. A tiny tightening movement followed by loosening can help break the bond. Keep the tool aligned and increase force gradually.
- Use controlled shock only on a suitable mount. A manual impact driver may help when there is solid support behind the fastener. It can damage a plastic bracket, loose insert, lamp housing, or thin panel, so don’t use it blindly.
- Expose the back of the mount if practical. On some vehicles, removing an interior trim panel provides access to a clip, nut, or insert. Follow vehicle service instructions to avoid breaking trim fasteners or wiring.
- Extract or replace the bracket. If the head strips, the screw breaks, or the insert spins, use a properly centered extractor or replace the affected bracket. A body or repair shop is the sensible stop when access and backing structure are uncertain.
Why heat is usually a poor first choice here
Heat is common in heavy mechanical fastener work, but a license plate mount may sit beside paint, plastic, adhesive, wiring, a camera, lamps, or trim. Open flame also conflicts with many aerosol penetrants. Unless the vehicle manufacturer provides a specific repair procedure and the surrounding components can be protected, skip heat and use a professional repair method.
After the screw comes out
Inspect the fastener and insert before reassembly. Replace heavily corroded or damaged hardware. Clean the contact area and verify the replacement thread, diameter, usable length, and head style with the vehicle documentation or existing intact fastener.
Don’t assume stainless hardware and a metal insert are automatically a safe pairing; material combination, finish, moisture, road salt, and assembly practice all influence seizure. Apply anti-seize or threadlocker only when the vehicle or fastener guidance permits it. These products do different jobs, and both can change tightening behavior.
The loose-screw prevention article explains retention choices, while the screw size guide helps you avoid wrong-thread and excess-length replacements.
What dealerships and fleets should standardize
If seized plate screws are appearing across returned vehicles, record the vehicle, bracket material, insert type, fastener specification, exposure, removal method, and damaged parts. Standardize compatible replacement hardware and an approved corrosion-control procedure by application. A small service record is more useful than applying one chemical or torque practice to every vehicle.
Frequently asked questions
How long should penetrating oil soak?
Follow the product label. Some products specify minutes; severe corrosion may need repeated application. More force during the wait does not improve penetration.
Can I use regular lubricant instead of penetrating oil?
A general lubricant may not be formulated to travel into a rusted thread joint. Use a labeled penetrant and follow its surface-compatibility and safety instructions.
What if the screw head is now damaged?
Stop the seized-screw sequence and switch to a stripped-screw removal method. Continuing with a slipping bit removes the remaining drive engagement.