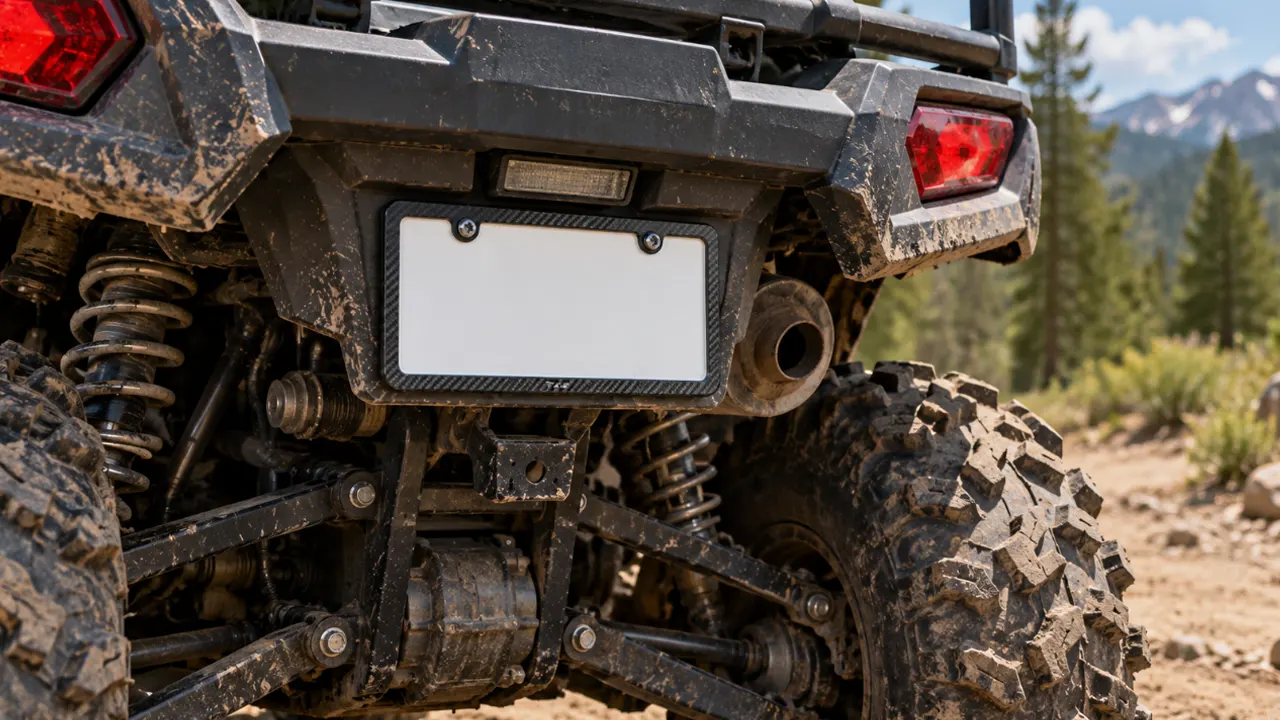
Before choosing an ATV license plate frame, confirm that your ATV is actually issued a plate rather than only a registration decal. Then measure that exact plate, inspect the mounting location, and check clearance through the suspension and steering range. ATV registration and road-use rules vary sharply by state and sometimes by local jurisdiction, so there is no single plate size or mounting solution that works for every machine.
If your ATV has no solid mounting surface, you need a bracket or holder first. A frame borders the plate; it should not be expected to bridge a cargo rack, clamp itself to tubing, or carry the plate through trail impacts.
Confirm Whether Your ATV Uses a Plate, Decal, or Both
Some jurisdictions issue off-highway decals, some offer or require a small plate for certain road use, and others treat ATVs differently depending on the route. Texas, for example, describes an optional off-highway vehicle plate and limited situations in which plated ATVs may operate on authorized roads. That does not establish a rule for another state.
Check the current instructions from the agency that issued your registration. Record where the plate or decal must be displayed, whether it must be illuminated, and what information must remain visible. Do this before buying a frame; otherwise, you may be measuring for a passenger plate when the machine uses a smaller format—or buying a frame when no plate is issued.
A Frame Is Not the Same as an ATV Mount
ATV search results often use “frame,” “holder,” “bracket,” and “mount” as if they mean the same thing. They do not.
| Part | Main job | Typical selection question |
| License plate frame | Borders the plate and may support its edges | Does the opening preserve all readable information? |
| Plate holder | Supports the plate from behind | Does it match the plate and fastener pattern? |
| ATV bracket or clamp mount | Connects the assembly to the rack, body, or tube | Can it handle the mounting geometry and movement? |
| Plate light | Illuminates the plate where required | Is it positioned, wired, and protected correctly? |
If the ATV already has a sound holder, a frame may be the only missing part. If it has only rack tubing or plastic bodywork, solve the structural mount first. The general frame-versus-holder distinction helps keep those decisions separate.
Measure the Issued Plate and the Available Space
Measure plate width, height, thickness, and hole spacing. Then measure the outside space available for the frame. A small ATV plate can have proportions that do not match motorcycle or passenger-car frames, even when a product listing calls itself “universal.”
Check the visible opening against every character, state identifier, and sticker. On a compact plate, a border that looks slim in a product photo may cover a large share of the usable area. Compare the proposed frame with the license plate frame opening-size method instead of relying on the outer dimensions alone.
Choose a Mounting Location That Survives Real Movement
ATVs move more than the parked machine suggests. Suspension compresses, tires throw debris, racks carry cargo, and the rider shifts position. Before drilling or tightening anything, check:
- Tire clearance: Compress the suspension safely according to manufacturer service guidance and account for mud buildup.
- Steering clearance: For a front or side location, turn fully in both directions.
- Exhaust heat: Keep the plate, plastic frame, wiring, and fasteners away from hot components.
- Cargo access: Make sure straps, boxes, and rack loads cannot bend or hide the plate.
- Departure angle: A low plate can be the first part to contact a bank, log, or trailer ramp.
A frame cannot rescue a poor mounting location. Moving the entire assembly to a more protected, authorized position often helps more than choosing a thicker border.
Plan for Vibration Without Overtightening
Single-cylinder engines, rough terrain, and rack-mounted accessories can create persistent vibration. Use the correct bolt diameter, washers where the supporting surface needs load distribution, and a retention method suitable for the assembly. Tighten evenly and leave the plate flat.
Overtightening a plastic frame or thin plate can start cracks around the holes. Undertightening allows fretting and enlarges the holes. After the first ride, inspect the screws and look for bright rub marks, which show that parts are moving against each other. The practical steps for keeping frame screws tight are especially important on an ATV.
Pick Material and Shape for Mud, Water, and Impacts
Plastic Frames
A lightweight plastic frame adds little load to a rack or molded holder and cannot form red rust. It may flex during minor contact. Inspect UV-exposed edges and screw bosses, since resin, thickness, temperature, and aging all affect cracking behavior.
Aluminum Frames
Aluminum is light and can give the plate a firmer edge. A thin frame can still bend, and its finish can be scratched by grit trapped behind it. Clean contact areas periodically rather than allowing dried mud to act as an abrasive.
Stainless or Coated Metal Frames
A metal frame may feel robust, but extra stiffness can transfer an impact into the holder or body panel. Finish quality, material grade, edges, and fasteners determine how it behaves in wet and dirty service. Avoid sharp corners near tires, boots, or cargo straps.
Keep Mud Off Without Hiding the Plate
Do not treat a clear cover as a maintenance shortcut. Covers may create glare, trap dirt, or be restricted by local law. A readable open frame with a location that is reasonably protected from the tire’s direct spray is usually easier to inspect and clean.
Rinse loose grit before wiping. Clean around the screw heads and behind the frame after muddy rides. If the border repeatedly packs with debris, choose a simpler profile with drainage rather than adding more seals or trim.
Think About Lighting and Wiring Separately
If your registration or road-use rules require plate illumination, choose a proper light and route its wiring away from suspension, steering, exhaust, and sharp edges. A lighted frame is only useful when its dimensions match the plate and its wiring can be protected.
Do not assume a lamp marketed for a trailer or motorcycle automatically suits an ATV electrical system. Confirm voltage, current, grounding, connection method, water exposure, and any manufacturer instructions. After installation, check that the light makes the plate readable without shining into the rider’s view.
ATV Frame Selection Checklist
- Verify whether the issuing authority provides a plate, decal, or both.
- Record display and lighting requirements for the routes you use.
- Measure the plate, hole spacing, opening, and available mounting envelope.
- Identify the structural bracket or holder; do not ask the frame to replace it.
- Check suspension, tire, steering, exhaust, rack, and cargo clearance.
- Select material, profile, hardware, and wiring for the actual riding conditions.
- Inspect the complete assembly after the first ride and after hard impacts.
Frequently Asked Questions
Can I use a motorcycle license plate frame on an ATV?
Only if the actual plate size, hole spacing, visible opening, and mount match. Motorcycle and ATV plate formats can differ by jurisdiction, so the category name is not enough.
Where is the best place to mount an ATV plate?
Use the location required or permitted by the issuing authority and supported by the ATV or mount manufacturer. It should remain visible while staying clear of tires, exhaust, cargo, and moving parts.
Is a flexible frame better for trail riding?
Flexibility can help with minor contact, but it does not correct weak fasteners or a poorly placed bracket. Balance low mass and smooth edges with enough support to keep the plate readable.
Do ATV license plates need lights?
Requirements depend on jurisdiction and permitted road use. Check the current rule that applies to your registration and route rather than applying passenger-car rules automatically.
How often should I inspect the frame?
Check it after the first ride, after impacts or deep mud, and during routine pre-ride inspections. Loose hardware, cracked holes, trapped debris, and damaged wiring are easier to fix early.