A boat trailer license plate frame has to do more than look tidy. It must fit the plate and bracket, stay clear of the tail-light beam, drain after launching, and avoid turning a small mounting problem into a corrosion or vibration problem. Begin with the existing holder: if it is cracked, rusted through, or hanging by one fastener, replace the structural part before adding a frame.
Boat trailers deserve their own selection process because the plate area may be repeatedly immersed, then exposed to highway airflow, salt, grit, and long periods of storage. A solution that works on a dry utility trailer may not age the same way at the ramp.
Separate the Frame, Bracket, and Light
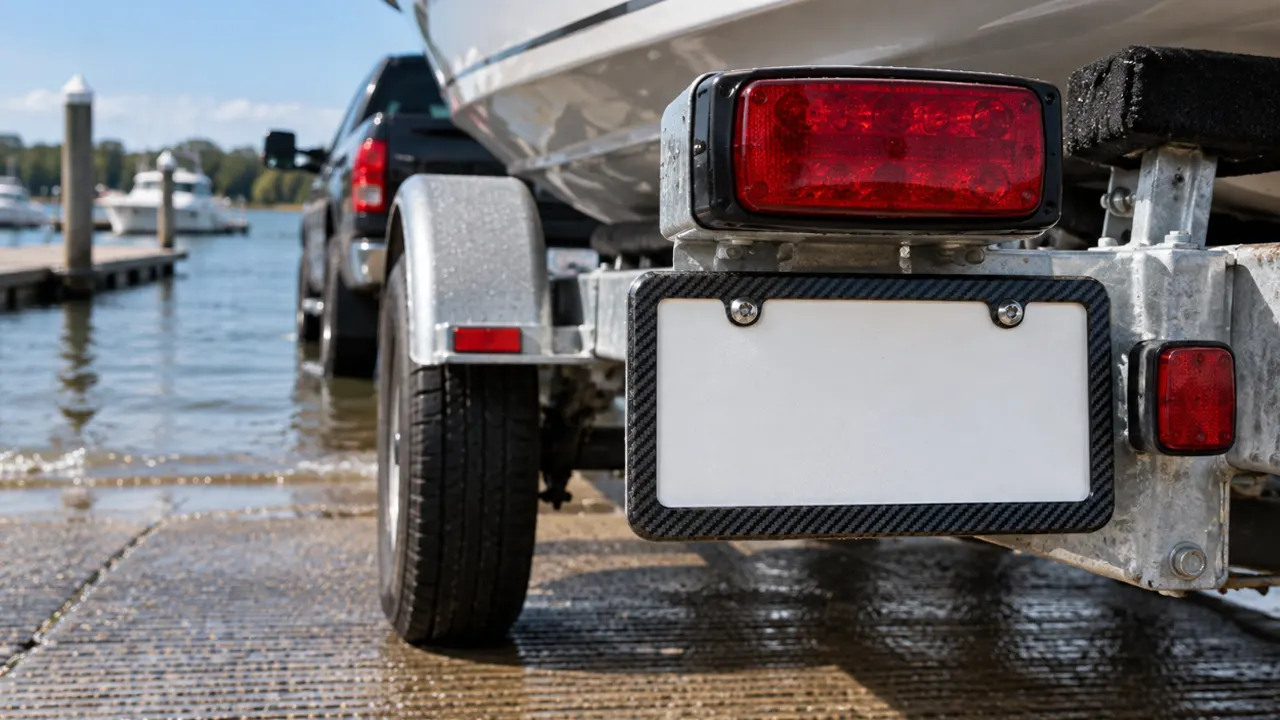
Many boat trailers carry the plate on a bracket below the left tail light. The tail light may include a clear lens that illuminates the plate. In that arrangement:
- The bracket attaches the plate assembly to the trailer or lamp studs.
- The frame borders the plate and may support its edges.
- The lamp provides required illumination.
Some products combine all three, but do not judge them as one decorative piece. A strong frame cannot compensate for a cracked lamp housing or a bracket whose mounting holes have corroded away. Review the difference between a frame and holder if the product descriptions are ambiguous.
Measure Both Sides of the Installation
Record the plate width and height, plate-hole spacing, frame opening, outer frame dimensions, and distance between the tail-light mounting studs or bracket holes. Then look behind the plate for nut access and wiring clearance.
Measurement matters because the frame may align with the plate while the supporting bracket uses a different pattern. Slots can allow adjustment, but they should not leave the assembly free to slide. If you need a repeatable method, start with the mounting-hole spacing reference.
Decide Whether the Mount Should Be Rigid or Flexible
A low-hanging boat-trailer plate may brush a ramp, curb, tie-down strap, or floating debris. A rigid bracket holds the plate steady but can bend or transfer impact into the light mount. A flexible bracket can yield during minor contact, although too much movement may fatigue wiring or let the plate strike the trailer.
The decorative frame should suit that behavior. A heavy rigid frame on a thin flexible tab can increase swinging mass. A frame with sharp corners can catch straps or injure hands during launch preparation. Keep the assembly compact and within the trailer’s rear profile where the authorized mounting arrangement permits.
Choose Materials as a Complete Contact System
“Corrosion resistant” is not a complete specification. The frame, bracket, plate, screws, washers, nuts, coating, and trailer structure can all be different materials. Water—especially salt water—makes dissimilar-metal contact and damaged finishes more important.
| Material option | Potential advantage | What still needs checking |
| Plastic frame | Low weight and no red rust | UV aging, cracking, screw load, and impact shape |
| Aluminum frame | Lightweight metal border | Finish damage, bending, oxidation, and contact with other metals |
| Stainless steel frame | Firm border and metal appearance | Actual grade, crevices, fasteners, weight, and mixed-metal contact |
| Coated steel frame | Stiff and economical in some designs | Chips, cut edges, holes, and coating condition |
Do not assume matching every visible part to one metal automatically solves the problem. Use compatible components and isolation methods supported by the trailer or hardware manufacturer, then inspect the contact points. Surface condition often tells you more than the marketing label.
Make Drainage and Rinsing Easy
Water should not sit in a deep lower channel or between a tight decorative cover and the plate. Look for open edges or drainage paths. Avoid foam or fabric backing that stays wet unless it is specifically designed for that environment and can be inspected.
After saltwater launching, rinse the plate assembly with fresh water along with the rest of the trailer. Let it drain and dry. Periodically remove trapped sand, plant material, and salt deposits, paying attention to screw heads, washers, the lower edge of the frame, and the bracket behind the plate.
Protect the Light and Wiring
United States federal vehicle lighting rules include rear registration-plate illumination requirements for trailers. Many boat-trailer lamps are designed for wet service, but the frame can still block their beam or crowd the wiring.
Turn on the running lights and view the plate in darkness after installation. Check that the entire surface is illuminated, not just the top edge. Keep wiring supported and away from sharp frame edges. A corroded ground, damaged connector, or water-filled lamp needs repair; a lighted frame should not be used to disguise an unreliable circuit.
Account for Launching and Loading Hazards
Watch the plate area during a normal launch when it is safe to do so. Depending on trailer geometry, the plate may approach the ramp, enter the water before the tail lights, or sit near guide posts and transom tie-downs. Also check the winch strap, safety chains, and boat overhang during loading.
At home, move folding tongues, removable lights, or storage stands through their full range. The right frame is one you can leave in place without it becoming the lowest, widest, or easiest-to-snag part of the trailer.
Use Hardware That Can Be Inspected and Serviced
Select fasteners with the correct diameter and enough thread engagement for the chosen nut or insert. Washers may help distribute load over a plastic or thin-metal bracket. Retention methods should resist vibration while still allowing plate renewal and lamp service.
Do not mix random leftover hardware solely because it fits through the hole. Confirm material compatibility and avoid overtightening, which can crack plastic holders or deform the plate. Recheck the assembly after the first tow and after the first immersion.
Boat Trailer Frame Checklist
- Inspect the bracket, tail light, and wiring before choosing the frame.
- Measure plate size, hole spacing, opening, lamp-stud pattern, and rear clearance.
- Confirm the border will not cover plate information or block illumination.
- Choose frame weight and stiffness to match the supporting bracket.
- Review every material and contact point, not just the visible frame.
- Provide drainage and a practical path for fresh-water rinsing.
- Check ramp, waterline, tie-down, boat, and road clearance.
- Test the light and inspect hardware after towing and launching.
Frequently Asked Questions
Is stainless steel always the best material for a boat trailer frame?
No. The actual grade, finish, fasteners, bracket, trailer material, crevices, and water exposure all influence the result. A lighter plastic or aluminum frame may be more suitable for some flexible mounts.
Can a boat-trailer plate frame go underwater?
The complete assembly must be chosen for the trailer’s real immersion pattern. A frame may tolerate water while its screws, bracket, lamp, or wiring do not. Follow component ratings and inspect after launching.
Why is my plate corroding around the screws?
Damaged coatings, trapped salt and moisture, movement, and contact between different metals can all contribute. Remove deposits, replace damaged compatible hardware as needed, and correct any loose or water-trapping stack.
Should the plate mount flex?
Some low mounts use flexibility to survive minor contact, but excessive swinging can damage the plate and wiring. The correct balance depends on bracket design and location.
Can I move the plate higher on the trailer?
Only after confirming the new position complies with applicable display and illumination rules and does not conflict with the trailer or lighting design. Moving the plate often means moving or changing the lamp as well.