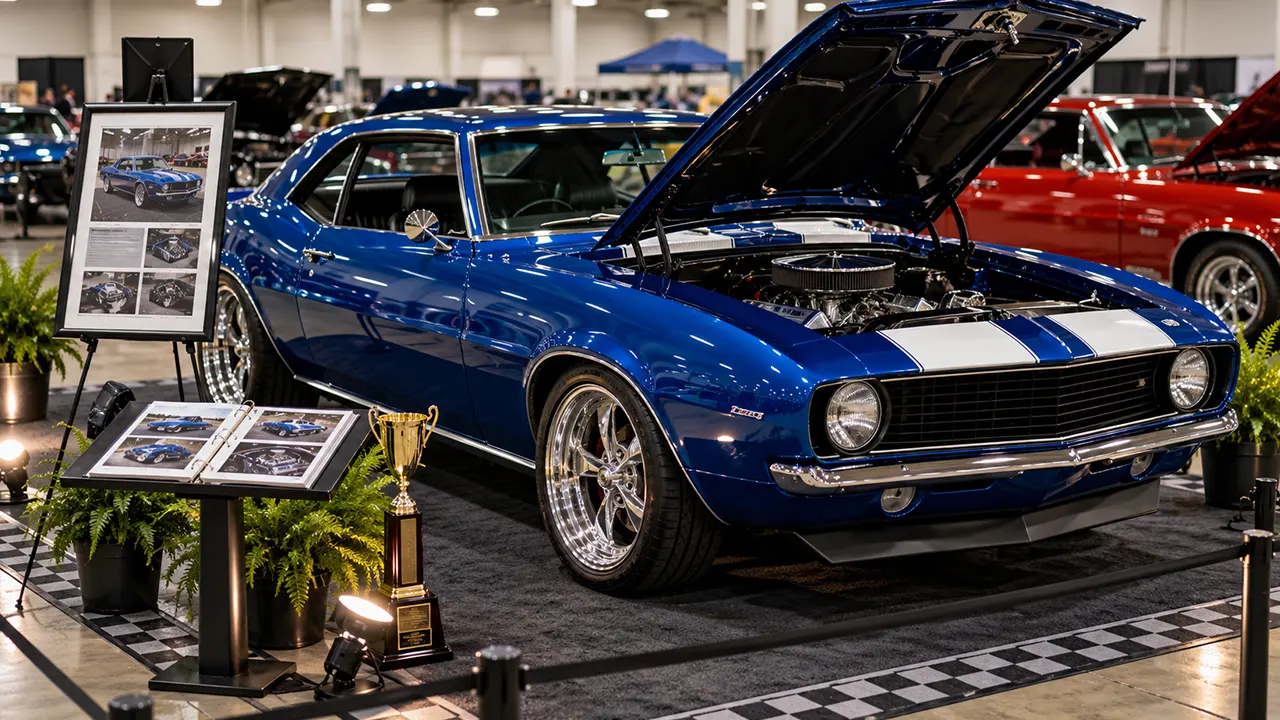
Useful car show display ideas help visitors see the vehicle, understand what makes it interesting, and move around it comfortably. Start with one readable information board, a clear view of the car, and a few details tied to its story. Add restoration photographs, a period reference, or coordinated trim only when it gives people something worth noticing. The amount of decoration matters less than whether the display makes sense.
A first-time owner at a local outdoor show needs a different setup from a restoration specialist at a judged event or an exhibitor in an indoor booth. Plan for the space and the audience you actually have. A display should be simple enough to transport, set up, supervise, and remove without becoming the main job of the day.
Begin With the Event and the Space You Have
Read the entry instructions before ordering a board, canopy, or floor covering. Find out your allocated space, arrival time, vehicle movement rules, judging class, and whether stands, lights, promotional material, or shelters are allowed.
A commercial trade show may have specific display and electrical requirements. A local club event may have a smaller space and different expectations. A judged preservation event may care about authenticity rather than elaborate presentation. None of these formats can be treated as a universal model for every show.
Ask where visitors will approach. A car parked along a row needs a readable sign near the natural viewing side. A booth with access from two aisles may need information visible from both directions. Do not assume people will walk around a stand to find its front.
Check the ground and likely conditions. Grass, gravel, uneven pavement, and polished indoor flooring affect stands and traffic. Outdoor wind and rain also change what is practical. A display that works in a garage may not remain tidy in a busy car park.
Make a rough layout before buying anything. Mark the car, permitted display area, information stand, and space for people to pass. If the plan only works when visitors stand in the neighboring space, simplify it.
Idea 1: Make One Clear Vehicle Information Board
An information board is often the most useful display item because it answers questions while you are speaking to someone else. Put the year, make, model, and a short description where they can be read easily. Then select a few details that explain why this particular car is worth a closer look.
Separate confirmed specifications from personal history. An engine output claim should identify a reliable basis if you include it; an unsupported number adds less than an honest description of the build. If a component is modified, avoid describing it as original.
Keep the main text short enough for a standing visitor. A few sentences about ownership, restoration, or a special feature are easier to absorb than a page of tiny type. Longer information can live in a binder or an optional digital link.
Test a printed sample at the distance people are likely to stand. Check contrast, glare, text size, and the direction the board faces. A layout that looks clear on a laptop may be unreadable outside.
Use one consistent type style and a restrained color palette. You can echo the car’s paint or trim, but do not sacrifice contrast. The sign should introduce the vehicle rather than compete with it.
Idea 2: Tell a Restoration Story With Before-and-After Images
A restoration is easier to understand when people can see where it began. Choose a small number of photographs that show meaningful changes: the original condition, a difficult stage, and the finished result.
Arrange them in a clear order and write captions that identify what changed. “Floor repair before paint” tells the visitor more than a date alone. Avoid showing several nearly identical angles just because you have many images available.
A compact photo book can hold additional detail without crowding the stand. Make it clear whether visitors may handle it, and use a format that can tolerate normal browsing. Keep irreplaceable original photographs at home.
If several people contributed, give accurate credit with their permission. Restoration stories often involve family members, previous owners, or specialist shops. A short acknowledgment can make the presentation warmer without turning the sign into an advertisement.
Keep personal addresses, invoices, phone numbers, and registration details out of photographs or binder pages that visitors can inspect. Show the work, not information that was never intended for public display.
Idea 3: Build a Small Timeline Around the Car
A timeline suits a vehicle with a long ownership story, a significant restoration, or several clearly documented stages. Use a few milestones rather than recording every maintenance visit.
The timeline might show when the car was built, when the family acquired it, when work began, and when it returned to the road. Add one image or short note for each important point. Leave enough space for visitors to follow the sequence without reading closely.
Be careful with uncertain dates. If a previous owner’s account is unverified, label it as an account or leave it out. You do not need a dramatic history for the display to be interesting.
A personal timeline also works for a modern car. A first track day, a long trip, or a carefully planned build can provide a story. Present it honestly as your experience rather than borrowing the language of a factory heritage display.
Idea 4: Use a Period Reference Without Creating Clutter
A reproduction brochure, period advertisement, map, or photograph can show how the car fitted into its original setting. Choose something connected to the exact model, year, location, or use.
Display the reference on a stand or protected board rather than laying loose paper on paint, upholstery, or the ground. Keep valuable originals protected from sunlight, moisture, and handling. A good scan or reproduction is often more practical for an event.
One well-chosen object usually communicates more than a collection of unrelated vintage props. A luggage item, workshop photograph, or sales illustration should have a reason to be there. If you need a long explanation for why an object belongs beside the car, reconsider it.
At a judged event, check how accessories and presentation are treated in the applicable class. The AACA’s current judging guidelines are one example of a published event-specific framework. An attractive period-looking accessory is not automatically correct for every class or vehicle.
Idea 5: Help Visitors Notice One Technical Detail
If the engine, suspension, interior, or fabrication is the car’s main feature, explain the detail clearly. A labeled photograph or simple illustration can point out a component without requiring visitors to lean over paint or reach into the car.
Choose a feature that has a useful story: an unusual factory mechanism, a carefully repaired panel, a packaging challenge, or a specific design choice. Explain what it does and why it matters in ordinary language.
Avoid covering the board with unexplained abbreviations. A knowledgeable visitor may understand them, but someone new to the hobby should still be able to follow the point. You can include exact terminology alongside a plain explanation.
Keep opened panels within the event’s instructions and the vehicle’s normal supported positions. Do not improvise a prop for a hood or trunk lid. A display that requires visitors to stand beneath an uncertain support is not worth the extra view.
Idea 6: Choose a Minimal Display for a Visually Strong Car
Some cars need very little around them. A clean vehicle, one modest information stand, and consistent details can create a calm presentation in a busy row.
Position the stand where it can be read without covering the front corner or blocking photographs. Check the view from the aisle before settling on a spot. If the sign hides the feature people are trying to photograph, move it within the permitted space.
A minimal layout still needs a story. Use a short note about the car’s purpose, history, or key specification. Simplicity should remove distraction, not leave visitors guessing what they are seeing.
Keep cleaning supplies, drinks, packaging, and spare chairs out of the main viewing area where practical. You do not need to pretend the car arrived without being driven, but a tidy surrounding area makes the intentional parts of the display easier to see.
Idea 7: Coordinate the Plate Frame With the Display
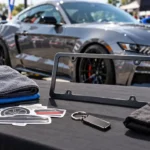
A license plate frame can connect the vehicle’s small details with the information board. A plain dark border can suit a restrained layout; a metallic appearance can echo trim; short custom wording can identify a club or build name.
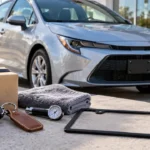
Start with the correct plate format and opening. Check that the frame leaves the required information visible and does not interfere with the plate lamp, camera, bracket, or vehicle recess. The license plate frame size guide explains why plate format and mounting need separate checks.
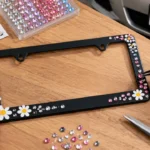
If you want a coordinated design, custom license plate frames can carry a short approved message or artwork. Use the same wording and color direction as the board rather than introducing another slogan.
A plate frame is a border, while a show plaque or decorative plate may cover or replace the plate face. They need different handling. Use display-only material only where the organizer and applicable rules permit it, and restore the required road plate display before leaving the event.
You do not need to add branding to make a frame useful. A plain frame can finish the plate area without turning the rear of the car into another sign.
Idea 8: Present a Club Row as One Connected Display
For a group attending together, consistency can help visitors understand the connection. Agree on a basic information-card format, shared club sign, or coordinated order of vehicles.
Let individual cars keep their own stories. A shared layout can identify the club and event, while each vehicle’s card explains its year, owner-approved details, and distinctive feature. Avoid making every sign a copy of the same generic club description.
Confirm group parking and arrival arrangements with the organizer. Do not reserve neighboring spaces using chairs or equipment unless that is permitted. A group display still needs to fit the event’s traffic plan.
A shared photograph, short history panel, or route map can add context. Keep contact details to a club-approved channel instead of publishing each member’s personal information.
Match the Setup to the Vehicle’s Story
A family-owned car may work best with a photograph and a brief ownership timeline. A technical build may need one useful component illustration. A preservation car may need factual history and careful presentation rather than decorative additions.
A daily driver can have a worthwhile story too: a major trip, long ownership, or a thoughtful set of reversible changes. You do not need exaggerated performance claims or a fictional “rare” specification to justify displaying it.
For a modern custom build, a consistent visual theme can connect the board, frame, and selected detail photographs. Use accurate descriptions of finishes and materials. A carbon-fiber pattern should not be described as genuine carbon fiber without evidence.
For an unusual vehicle that visitors may not recognize, prioritize a clear name and explanation of its intended use. A short, accessible account can start better conversations than an unexplained list of components.
| Display direction | Useful centerpiece | What to leave out |
|---|---|---|
| Family history | One photograph and a short timeline | Private documents and lengthy personal records |
| Restoration | A small before-and-after sequence | Repetitive work-in-progress images |
| Technical build | A labeled component image | Unsupported power figures and dense jargon |
| Preservation | Verified history and appropriate documentation | Unchecked period-style additions |
| Club display | Shared sign plus individual vehicle cards | Competing slogans and inconsistent information |
| Minimal presentation | Clear view and one readable stand | Props that hide the vehicle |
Layout: Leave Room for People and Photographs
Visitors need somewhere to stand while reading without blocking everyone else. Keep the sign within your allotted space and allow a clear route around it. Think about a visitor using a mobility aid or pushing a stroller as well as someone taking photographs.
Look at the car from the likely approach direction. Place information where it can be found naturally rather than where it is convenient to unload the stand. Avoid placing several objects around every corner of the vehicle.
Chairs and tables should not interrupt the main viewing route. If space is tight, reduce the number of display items. Moving a board into an aisle to preserve an elaborate setup is not a good solution.
Photographs also benefit from restraint. Stands, canopies, and tall props can cast shadows or hide the car’s outline. Test the view at normal eye level and from the position visitors are likely to use.
Do not use ropes, chains, or barriers that extend beyond the permitted space. If you need protection around a particularly delicate display, discuss an acceptable arrangement with the organizer.
Lighting for Indoor and Evening Events
Use lighting to reveal a feature rather than create a bright obstacle. Check the venue’s power arrangements, permitted equipment, and cable-management rules before buying fixtures.
A small light aimed at an information board may be more useful than decorative lighting around the whole vehicle. Avoid directing light into visitors’ eyes or creating glare on a glossy sign. Test the layout at the relevant light level if possible.
Do not run unprotected cords across a walkway or improvise power from an unknown source. Follow the event’s electrical requirements and use the approved provider where required. Battery-powered equipment also needs a secure location and a plan for charging.
Indoor display vehicles may be subject to fuel, battery, alarm, and other venue conditions. The 2026 SEMA Show display regulations, for example, specify vehicle and electrical arrangements. Those requirements apply to that event; check your own organizer’s current instructions.
For hybrids, electric vehicles, or cars with unusual electrical systems, arrange any required isolation through appropriate vehicle guidance and qualified personnel. An exhibition rule is not a universal instruction to disconnect unfamiliar components yourself.
Outdoor Displays: Plan for Wind, Rain, and Sun
A lightweight board can become unstable outdoors. Use a stand intended for the surface and conditions, and follow the manufacturer’s setup and weighting instructions along with the organizer’s rules.
Check whether canopies are permitted and what anchoring method is allowed. Do not attach a shelter or sign to the car as a shortcut. If the event prohibits stakes, find an approved alternative rather than improvising around the restriction.
Protect printed information from moisture and glare. A glossy sleeve may resist light rain but make text hard to read in sun. Test the actual print and cover together, and keep a spare copy packed flat.
Secure small objects and remove anything that could blow into neighboring vehicles. A few robust items are easier to manage than many loose props. Be ready to simplify or pack away the display if conditions change.
The car is more valuable than the setup. If a stand becomes unstable or weather makes the arrangement impractical, put it away rather than trying to preserve the original layout at all costs.
Digital Extras Should Add Detail, Not Be Required
A QR code can link to a restoration album, club information, or a longer build story. Keep the essential vehicle information on the physical sign so visitors do not need a phone or a data connection.
Use a stable destination you control or are authorized to share. Test the printed code on more than one device and check that the destination works without an account if public access is intended.
Avoid publishing a folder containing invoices, addresses, registration documents, or photographs you do not have permission to distribute. Create a separate public album with only the material intended for visitors.
Keep the digital destination useful after the event if the printed board will be reused. A broken or unrelated link undermines an otherwise thoughtful presentation. Review it before the next show.
Pack and Rehearse the Setup Before Show Day
Lay out the display at home within a space comparable to the allocated area. Check the board from the approach direction, confirm that stands fit around the vehicle, and photograph the arrangement for reference.
Pack the sign in a protective sleeve and keep its hardware together. Label removable parts if the stand has several similar pieces. Bring the event paperwork and arrival instructions where you can access them without unloading everything.
Keep a small cleanup kit appropriate to the car’s finish, plus a bag for used towels and rubbish. Avoid last-minute aggressive polishing or unfamiliar chemicals simply because you want the car to look perfect.
Plan the order of setup. Park as instructed, make any approved display arrangements, then position signs and personal equipment. Leave enough time to check the view and remove unnecessary items before visitors arrive.
Packing down deserves the same attention. Put props and signs away, secure loose items, and restore all road-use equipment before moving the vehicle. A memorable static display should not leave you with something unsecured for the journey home.
Frequently Asked Questions
Do I need a professional display board for a local car show?
No. A clear, accurately printed board on a stable permitted stand can work well. Readability and useful information matter more than an elaborate design.
How much information should I put on a car show sign?
Include the vehicle identity and a few details that explain its interest. Keep longer history in a binder or optional digital link. Test the sign with someone who has not heard the story before.
Can I use a decorative plate at a show?
Check the organizer’s rules and applicable requirements. A static display allowance does not automatically apply on public roads. Restore the required plate display before driving.
Should the hood stay open?
Follow the event and class instructions, and use the vehicle’s proper support arrangement. An open hood is useful when it reveals something relevant, but it is not a requirement you should assume for every show.
Can a license plate frame be part of the theme?
Yes. A correctly fitted frame can coordinate with trim, a club name, or a build identity. Keep required plate information and lighting unobstructed.
How can I make the display interesting on a small budget?
Use accurate information, a few good photographs, and a tidy layout. A clear ownership or restoration story usually adds more than buying several unrelated props.