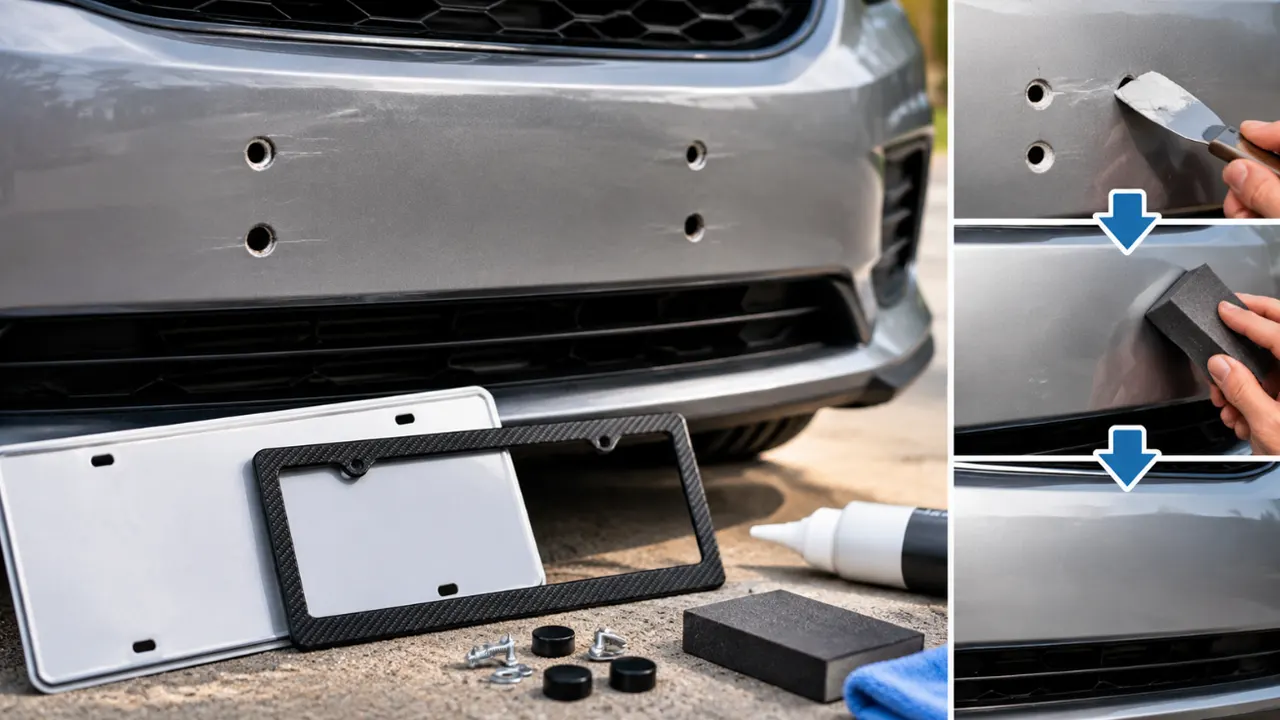
You can deal with license plate holes in a bumper in three main ways: cover sound openings with correctly fitted plugs, have the panel professionally repaired and refinished, or restore a suitable plate bracket if the front plate still needs to be displayed. The right choice depends on the panel material, the condition around the holes, and whether you want a removable cover or a continuous painted surface.
A plug hides an opening; it does not recreate an undrilled bumper. Filling and painting is a different job, and a decorative license plate frame does not repair a damaged mounting point. Keeping those distinctions clear will save you from buying a quick fix for the wrong problem.
First Decide Whether the Front Plate Is Staying
Before removing a bracket or filling its holes, check the current plate requirements for the vehicle and jurisdiction. If a front plate is required, plan its suitable mounting position first. Closing the original holes only to discover that you need them again creates extra work without improving the installation.
Do not assume that moving the plate to the dashboard or hanging it behind the windshield is an acceptable alternative. Check the applicable rules for display, position, visibility, and fastening. Those requirements vary, and a product seller’s photograph is not an official approval.
If the plate is staying in the same place, you may not need a cosmetic hole repair at all. The actual problem could be the wrong bracket, missing retainers, or a damaged mounting feature. That needs a mounting repair, not merely a cap over the opening.
For a vehicle that may move between jurisdictions, be sold, or returned at lease end, reversibility can matter. Save usable original parts and photograph the mounting arrangement before changing it. A temporary appearance preference should not accidentally remove a useful factory attachment.
Identify What You Are Looking At
The visible painted surface on many modern vehicles is a plastic bumper cover, but other vehicles use metal bumpers, separate trim panels, or a combination of materials. Do not choose a filler or repair method until the actual part has been identified.
Look closely at the openings with the area clean and dry. A small round screw hole, a rectangular clip opening, and a threaded insert are different features. The insert may be a sound attachment point worth preserving rather than a damaged hole to be removed.
Check the surrounding finish. Raised plastic, chipped paint, cracking, rust-colored marks, or an elongated opening can change the repair choice. A cap large enough to hide the damage may still fail to retain securely in the remaining material.
Also check whether the problem is cosmetic or functional. If the plate shakes because its screws no longer hold, concentrate on restoring the correct mounting system. A cosmetic plug is not a load-bearing insert, and glue added to a loose screw is not automatically an appropriate repair.
Separate Open Holes From Bracket Marks
After a bracket comes off, the area can show more than the fastener openings. You may see a rectangular outline, a darker patch of paint, adhesive residue, or shallow impressions where the bracket contacted the cover. Those marks do not all need filling, and treating the entire area as missing material can turn a modest cleanup into unnecessary bodywork.
Wash the surface before judging the damage. Look at the dry panel in diffuse daylight, then from an angle. A shadow that seemed like a deep opening may be a raised edge or old adhesive. Do not push a sharp tool into it to find out. If the surface condition remains unclear, photograph it and ask a technician to identify the feature.
Keep adhesive removal separate from hole repair. Use only a method suitable for the known paint and substrate, and stop if color transfers, the coating softens, or an edge starts lifting. Stronger solvent is not a better diagnostic tool. A body shop may be able to clean residue while preserving the surrounding finish, after which the true repair area becomes easier to assess.
A sound factory recess or molded position mark may also be intentional. Do not drill it open merely to make several features look symmetrical, and do not remove an intact insert because it stands slightly proud. Confirm what the feature does before deciding it should disappear.
This distinction is especially helpful when requesting an estimate remotely. Mark the actual open holes on a copy of the photograph and describe other visible marks separately. The shop can then distinguish closure, paint correction, adhesive removal, and mounting work instead of pricing an undefined request to “fix the whole plate area.”
Compare the Three Main Options
| Option | When it can make sense | Main limitation |
|---|---|---|
| Removable hole plugs | Sound openings where a small visible cap is acceptable | A cap edge remains visible; fit and retention must suit the hole |
| Professional repair and refinishing | You want a continuous surface or have damaged edges and paint | More involved; repair method depends on the panel and nearby equipment |
| Suitable bracket reinstallation | The plate still needs a secure, approved display position | Bracket and mounting points must be sound; a frame cannot replace them |
There is no need to choose the most involved repair simply because it can look cleaner. If the bumper is otherwise sound and you value reversibility, a discreet plug may meet your goal. If you dislike visible caps and want the finish restored, get a body-shop assessment before buying materials.
A fourth possibility is leaving the original sound mounting hardware in place until you have a settled plan. An unfinished cosmetic change is rarely a good reason to rush into drilling, sanding, or dismantling a bumper.
When a Plug Is a Sensible Cosmetic Solution
A plug is most useful when the opening has enough sound material to retain the selected design and the visible head can sit properly on the surface. Round holes with clean edges are generally easier to assess than torn slots, cracks, or overlapping old drill patterns.
Match more than the advertised diameter. The retaining shape, supported panel thickness, stem depth, head coverage, and rear clearance all matter. A plug with a large head may hide a poor fit temporarily without solving it.
Look at the color and shape in ordinary daylight. A paint-matched cap can be discreet, but its edge, gloss, curvature, or aging may still differ from the surrounding finish. Treat that as an appearance choice rather than expecting an invisible result.
Do not enlarge a good hole simply because the first plug you found needs a larger one. Look for an appropriate existing-hole solution or discuss the options with a technician. Once you drill the opening wider, restoring the earlier mounting arrangement may become harder.
A Careful Plug-Fitting Sequence
Start by washing the area with a mild automotive wash product, rinsing, and drying it. Remove loose grit before handling the edge. Avoid aggressive solvents or scraping around a painted opening just to make it look cleaner for a plug.
Measure the opening in more than one direction. An oval hole can give very different readings depending on where you measure it. Record each opening separately if the bumper has several previous mounting patterns.
Check the plug manufacturer’s fit dimensions and removal method. Confirm that the retaining feature has room to engage behind the panel and that the stem will not contact wiring, a sensor, or another component. If you cannot see or establish the clearance safely, stop rather than probing blindly.
Fit the part with controlled hand pressure as instructed. It should not require hammering or substantial bumper flex. Stop if paint lifts, the head distorts, or the plug will not retain. Recheck the fit after ordinary use and washing, and remove a loose cap instead of hiding the problem with random adhesive.
When Professional Filling and Refinishing Makes More Sense
Choose a body-shop assessment when you want the cap-free appearance of a continuous surface, or when the hole has surrounding damage. Torn plastic, cracks, loose paint, corrosion, and several overlapping openings are not simply plug-selection problems.
A proper repair needs to suit the substrate and the finish system. The technician may need access to the back of the panel, a compatible reinforcement or repair material, surface preparation, and the appropriate coating process. The work is not necessarily limited to the visible diameter of the original screw hole.
Manufacturer repair guidance matters. For example, 3M describes plastic repair processes involving preparation on the relevant surfaces and compatible repair materials. That supports treating bumper repair as a system, not assuming a dab of general-purpose filler will work on any plastic.
The exact process should come from the vehicle and repair-product instructions. Do not copy a sanding grade, drilling size, or cure time from an unrelated online repair. A method used for a cracked bumper edge may not be the method for two small plate holes in another material.
What a Plastic Bumper Repair Usually Involves
The useful sequence is assessment, substrate identification, compatible repair, surface restoration, and inspection. A shop first checks whether the panel can be repaired in the affected area and whether the damage extends beyond the visible hole. Existing repairs or hidden cracking can change the plan.
Next, the technician selects a method for the actual plastic and damage. Different repair systems may use backing material, adhesive, filler, or other approved techniques. Preparation and adhesion treatment are product-specific; more promoter or stronger glue is not automatically better.
The repair then needs shaping and a suitable coating system if the panel is painted. Filling an opening alone does not reproduce the surrounding color, texture, and gloss. Poorly matched materials can leave a visible outline or a finish that changes as the repair ages.
This is why a home recipe that jumps directly from “add filler” to “spray paint” leaves important decisions unanswered. If you are considering DIY bodywork, use a complete system explicitly suited to the panel and follow its safety instructions. For an uncertain substrate, existing paint damage, or a prominent finish, professional repair is the more controlled route.
Painted Metal and Textured Trim Need Different Decisions
A metal bumper or panel needs attention to any exposed substrate and corrosion, not just a decorative surface covering. If the edge is rusty or the coating is lifting, covering it with a cap can conceal the condition without addressing it. Have the underlying damage assessed before deciding how to close the opening.
Do not apply a plastic bumper recipe to metal. Repair materials, preparation, and coating requirements differ. A sound threaded mounting point in a metal part may also deserve preservation for future use rather than removal in pursuit of a smooth appearance.
Textured unpainted trim creates another problem: a repair may close the hole but leave a smooth patch where the original surface had molded texture. Ordinary paint matching does not recreate that texture. Depending on the part, a discreet closure or replacement trim piece may look more consistent.
Ask the shop what the finished result is expected to look like at normal viewing distance and close up. Discuss texture as well as color. “The hole will be filled” is not the same agreement as “the surrounding finish will be restored.”
Check for Sensors and Restricted Repair Areas
A bumper can conceal wiring, absorbers, brackets, and driver-assistance equipment. The position of a hole on the visible cover does not tell you what is behind it. This matters before drilling, adding a long plug stem, applying a thick repair, or changing a bracket position.
Vehicle-specific restrictions can also affect refinishing. Tesla’s front-fascia repair guidance, for example, distinguishes vehicles with and without radar and gives conditions for the radar area. It is an example of why the exact model and equipment matter, not a repair rule for every brand.
Ask the repairer to check the manufacturer’s current procedure for your vehicle and the affected location. Do not assume that a small repair is automatically outside every sensor-related limitation. Equally, do not assume every bumper repair requires the same calibration procedure; that depends on the work and vehicle requirements.
If a warning appears after repair or reinstallation, do not ignore it as a cosmetic side effect. Have the cause checked using the appropriate service information. A cleaner-looking bumper is not a successful result if a component has been disturbed or obstructed.
If the Plate Is Going Back, Repair the Mounting System
Inspect the bracket and its attachment points before ordering replacement hardware. A cracked bracket, missing clip, spinning insert, or damaged bumper hole can each produce similar movement at the plate. Replacing only the visible screw may leave the actual fault untouched.
Use the correct vehicle-specific attachment method. A larger self-tapping screw can remove more material and may not be a durable or approved answer. Household adhesive, filler, and a cosmetic cap should not be treated as substitutes for a proper mounting feature.
If removal is still needed to expose the area, identify how the bracket is held before applying force. The distinctions between screws, rivets, clips, and adhesive in front bracket removal help you avoid creating more damage while trying to inspect the first holes.
After repair, check the assembled plate position and fastening. The plate should not depend on a decorative surround to compensate for an insecure bracket. Make sure no new attachment interferes with a lamp, camera, sensor, moving panel, or other vehicle function.
Where a License Plate Frame Helps—and Where It Does Not
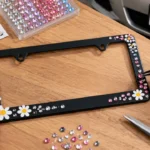
A license plate frame can finish the edge of a correctly mounted plate and add a restrained personal detail. It does not close bumper holes behind a removed bracket, restore torn plastic, or provide a new vehicle attachment by itself.
If the plate stays, choose the frame only after the bracket and plate are secure. Compare the frame opening, hole arrangement, border, and assembled depth. The plate-frame size checks are useful here because plate fit and bumper mounting are separate measurements.
A narrow or plain frame may give you the cleaner appearance you wanted without removing the plate at all. That can be worth considering when the original motivation was simply to replace a bulky advertising surround rather than eliminate the front mounting system.
Do not use a wider border to hide required plate information or assume it solves an incorrectly located bracket. US-format frame options still need to be checked against the specific plate and vehicle; the market label is only a starting point.
Ask for a Quote That Describes the Finished Job
Send clear photographs of the full bumper, the mounting area, and the individual holes. Include the vehicle year, model, body style, known repair history, and whether the plate will remain. Mention visible cracks, sensors, previous paint work, or hardware that will not release.
Ask whether the estimate covers bracket removal, necessary panel access, repair material, preparation, refinishing, reassembly, and any vehicle-specific checks. Those are different tasks, and two estimates can look far apart because they cover different scopes rather than because one shop is simply expensive.
Discuss paint expectations. A paint code is useful, but the existing finish can vary through age, previous repairs, and the appearance of metallic or textured coatings. Ask how the shop plans to match or blend the repaired area rather than assuming one small drop of paint will disappear.
There is no dependable universal price for license plate hole repair. The number and condition of the holes, material, access, finish, and local labor all affect the work. Compare written scopes and expected results, not an internet number detached from the vehicle.
Inspect the Result Before Calling the Job Finished
For plugs, check that each cap sits evenly, covers the intended edge, and retains without obvious looseness. Look from several angles rather than only straight ahead. A cap that rocks on a curved panel may not be the correct shape even if the stem enters the hole.
For a painted repair, inspect the surface in daylight from normal viewing distance and at an oblique angle. Look for visible edges, sink marks, texture mismatch, overspray, or an obvious color difference. Ask the repairer to explain any agreed limitation rather than trying to correct fresh paint yourself.
Follow the coating or repairer’s instructions about washing, polishing, and other care. A surface being dry to the touch does not establish that every later cleaning or adhesive application is suitable. Keep the repair record if the vehicle may need future paint or bumper work.
If a plate has been refitted, check its visibility, fastening, and nearby equipment. Keep original parts that remain useful and identify any replaced hardware. The finished decision includes how the vehicle works and can be maintained, not just how the holes look in a photograph.
Frequently Asked Questions
Can you cover the holes with a decal?
A decal may hide an opening temporarily, but it does not repair the substrate and can make later inspection less straightforward. Do not apply it over lifting paint, corrosion, or a crack. A suitable plug or assessed repair gives you a clearer solution.
Can you use ordinary body filler on a plastic bumper?
Do not assume a filler intended for another substrate is suitable. The repair system must match the plastic and the job, including any required preparation and backing. Ask the product manufacturer or a qualified body technician when the material is uncertain.
Will touch-up paint alone close the holes?
No. Paint is a coating, not a replacement for missing panel material. It may be part of a suitable finishing process, but it does not create secure backing or restore the shape of an opening by itself.
Should you replace the entire bumper cover?
Not automatically. A technician should assess repairability, finish expectations, damage extent, and vehicle-specific restrictions first. Replacement may be appropriate for some conditions, but two small holes do not by themselves establish that conclusion.
What should you do if a filled hole becomes visible again?
Return to the repairer with photographs and the repair record. A visible outline, crack, or sinking area needs assessment of the substrate and repair system. Adding more paint without finding the cause may simply conceal the symptom briefly.