To make your car look sporty, start with a clean, well-kept body, choose a consistent finish for the wheels and trim, and add a few details that suit the car’s shape. A restrained spoiler or properly fitted wheels can change the overall appearance; a slim license plate frame can finish the smaller details. You don’t have to lower the car or fit a full body kit.
Appearance changes don’t automatically improve acceleration, handling, or aerodynamics. Treat the look as a design project, and treat changes to wheels, tires, suspension, and lighting as technical decisions as well. That distinction helps you spend where the result will actually matter.
Decide What “Sporty” Means for Your Car
A sporty appearance usually comes from proportion and consistency: wheels that suit the body, an uncluttered outline, coordinated trim, and details that look intentional. There is no single finish or accessory that works on every vehicle.
Choose a direction before shopping. An OEM+ style keeps the original character and adds restrained details that could look at home on a higher trim level. A more visible motorsport-inspired style might use graphics and stronger contrasts. Mixing both without a plan can leave a small commuter car carrying several unrelated themes.
Take front, rear, side, and three-quarter photographs in ordinary daylight. Mark what interrupts the shape: mismatched trim, a damaged wheel cover, peeling decoration, or a large dealer frame. Fixing those distractions may help more than adding another part.
Use the existing car as your starting point. A white body with dark window trim might suit dark wheels and a small black rear detail. A darker car may need a lighter wheel finish to keep the wheel shape visible. These are design options, not rules about which colors are faster or more aggressive.
Pick a few visual priorities and keep the rest quiet. If the wheels are the main feature, they don’t need competition from bright mirror caps, several stripes, and oversized lettering. Leave room in the budget to change your mind after seeing the first upgrade in place.
15 Ways to Give Your Car a Sportier Appearance
1. Clean and Restore the Finish You Already Have
Before buying a styling part, wash the car and wheels, clean the glass, and look at it again in daylight. Dirt around the lower bumper and dull wheel faces can hide the shape you are trying to improve. A fresh set of accessories will still sit beside those unfinished areas.
Work out which marks are ordinary grime and which are damage. Washing, polishing, and repairing failed paint are different jobs. Peeling clear coat needs assessment; repeatedly polishing it or covering it with film does not fix the underlying surface.
Take a second set of photographs after the cleanup. You may find the original wheels or trim look good enough to keep, leaving more of the budget for one change you actually want.
2. Choose Wheels for the Shape, Then Verify the Fit
Wheels can change how the whole car reads from the side. Open spokes leave more visual space; a denser design can give a fuller appearance. On a small hatchback, an intricate wheel pattern may compete with an already busy body shape. A simpler design is worth comparing.
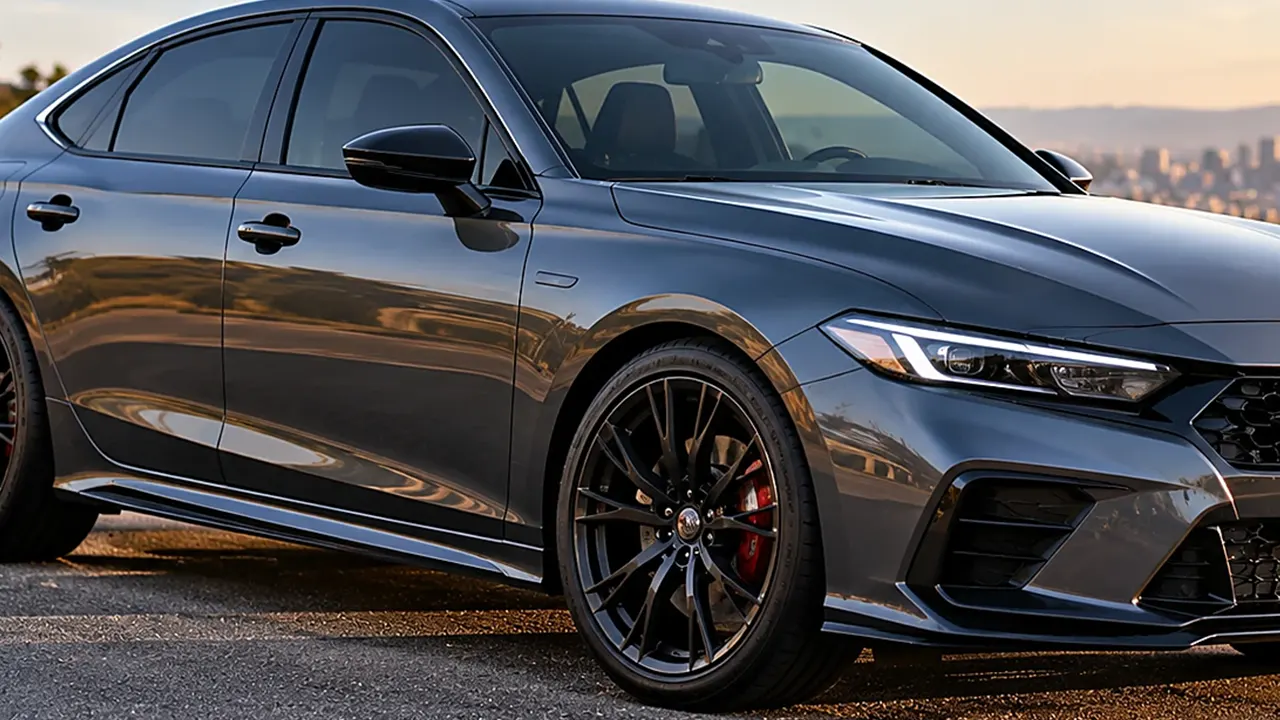
Finish matters as much as pattern. Silver wheels remain visible against dark paint. Black wheels can connect with dark trim, though some spoke detail may become harder to see. Try both in photographs of your own car, keeping the lighting and camera position similar.
Once you like the appearance, have a qualified specialist confirm the package. Diameter alone does not settle width, offset, brake clearance, load capacity, mounting, or the matching tires. A wheel that looks right on another model is only a visual reference, not proof of fit.
3. Keep Tires Appropriate and Well Presented
The tire finishes the wheel’s outline. A sensible wheel-and-tire combination looks more convincing than an unsuitable fit chosen only to expose more rim. Have worn, damaged, or mismatched tires assessed, and use the vehicle’s recommended specifications and pressures. If you change the package, a specialist should check tire size, load and speed requirements, and any vehicle-system implications. Keep dressing off the tread. There is no appearance benefit worth compromising the tire’s job, and the pressure printed on the sidewall is not the vehicle’s recommended inflation setting.
4. Reduce Chrome Selectively
Start with one line of trim. Dark window surrounds can connect the glass area with black mirror caps; a dark lower grille can tie in with existing bumper details. You may like that combination while keeping a silver badge or wheel finish. It does not have to be an all-or-nothing blackout.
A chrome delete can use film, replacement trim, or refinishing, depending on the surface and commitment you want. Compare the finishes in daylight, and keep cameras, sensors, lights, and moving parts clear. Saving the original trim where practical gives you another option later.
5. Follow the Rear Body Line With a Small Spoiler
A modest trunk lip can make a sedan’s rear outline look more deliberate. On a hatchback, the equivalent detail needs to work with the roof and hatch shape. Look at the side profile as well as the rear: a piece that looks restrained head-on may project much farther than you expect.
For a daily car, begin with the smallest design that creates the line you want. Verify the exact body-style fit and attachment, including any drilling, hatch movement, brake-light visibility, and camera clearance. Appearance alone does not establish an aerodynamic benefit.
6. Add a Front Lip if It Fits Your Everyday Routes
A front lip can visually sharpen the bottom of a rounded bumper. It works best when its finish relates to something already on the car, such as the grille or side trim. An isolated glossy strip below otherwise matte pieces can look like an afterthought.
Think about the places you drive before choosing its depth. Your garage ramp, a familiar steep entrance, and ordinary parking stops are more relevant than a photograph on a perfectly flat show floor.
Use a design with suitable model-specific mounting instructions. Cooling openings, tow points, service access, and ground clearance still need room. A secure fit is part of the finished appearance; follow the specified attachment rather than improvising with random screws or tape.
7. Use Side Skirts to Connect the Front and Rear
Side skirts make the most visual sense when they continue a lower line that already exists at the bumpers. Compare their depth and finish with the front lip and rear treatment. Deep skirts beside otherwise standard bumpers can leave the middle of the car looking heavier than either end. Before paint or final fitting, have the pieces test-fitted for alignment, door movement, jacking access, drainage, and the specified attachment. Long trim makes uneven gaps easy to notice, so good fitting matters more than an elaborate shape.
8. Try One Graphic Before a Full Wrap
A small stripe can do a lot when it follows the car’s shape. A line along the lower side gives a different impression from two broad stripes across the hood. Decide which view you want to emphasize, then compare a mockup from the front, side, and rear.
Keep the graphic understandable at a glance. If you choose a red accent, repeat it sparingly rather than adding another unrelated color to the mirrors or wheels. There should still be quiet space around the design.
Film needs a suitable surface and a removal plan. Repaired or deteriorating paint deserves an installer’s assessment, and the exact film has its own care requirements. Keep graphics away from required identifying information and visibility-critical areas. A wrap changes the appearance of the surface; it does not repair it.
9. Coordinate the Mirror Caps
Mirror caps sit high enough to become a noticeable accent. Matching them to dark window trim can connect the upper part of the car; painting or wrapping them in a new bright color makes them a feature of their own. Choose which role you want before ordering.
Check the exact mirror version, including indicators, cameras, and folding movement. A cover with bulky edges or visible gaps can look less finished than the original cap. Sometimes keeping the original color is the more convincing choice.
10. Let the Grille Work With the Bumper
A grille’s pattern needs to suit the other openings around it. A strong mesh pattern may look good with a simple lower intake, while adding several competing patterns can make the front unnecessarily busy. Cleaning or replacing a damaged original grille may be enough. If you choose a replacement, use a compatible version that preserves the provisions for cooling, cameras, radar, active shutters, and plate mounting where relevant. The vehicle and part instructions determine any checks needed afterward; an unfamiliar material or finish should not be assumed to work in front of a sensor.
11. Refresh the Lights You Already Have
Clear, working lamps help an older car look cared for without introducing a new styling theme. Clean the lenses with suitable products and find out whether cloudiness, moisture, or damaged mounts need repair. Polishing is not the answer to every lamp problem.
Keep required colors, functions, and illumination intact. Dark lens film and an unverified bulb conversion can create problems that a parked daytime photograph will not show. A suitable replacement assembly needs more than a matching electrical plug.
12. Consider Tint for the Whole Side Profile
Tint can make the glass area look more uniform, especially beside coordinated window trim. A professional installer can help you compare suitable treatments for the existing glass and the rules applying to each window. Judge visibility after dark and in wet weather as well as the daytime appearance. Keep cameras and sensors with the clear view they require. Choose tint because the finished result suits how you use the car, rather than simply selecting the darkest example in a photograph.
13. Simplify the License Plate Area
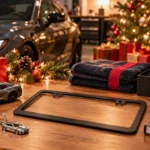
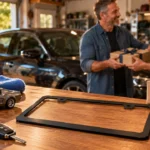
A large dealer name or a busy border can draw attention away from a carefully chosen rear design. A plain frame is a small, easy-to-understand change. Black license plate frames can connect with a dark lower bumper; a restrained silver finish can echo the wheels.
For a clean look, compare slimline frames with the plate actually installed. The amount of visible border matters more than the word “sporty” in a listing. Keep required information, stickers, lighting, and cameras clear, and confirm the opening and mounting fit.
A carbon-fiber-look pattern introduces another texture. Use it if that texture belongs with the rest of the car; otherwise a plain finish may be easier to integrate. The pattern alone is not evidence of genuine carbon-fiber construction.
14. Keep the Exhaust Outlet in Proportion
Look at the bumper opening before choosing an exhaust tip. An outlet that sits neatly within it can finish the rear; an oversized piece may become the only detail you notice. Cleaning a suitable original outlet is worth trying first.
Any replacement needs the correct attachment and clearance from heat-sensitive parts. Avoid loose decorations and do not alter emissions equipment for a cosmetic change. Work beyond suitable trim belongs with a qualified installer; a louder system is not proof of a performance improvement.
15. Lower the Car Only if the Tradeoff Suits You
You can leave this step out. A coordinated car can look sporty at its original ride height, particularly when the wheel design and lower trim already work together. If you carry passengers, use rough roads, or enter a steep driveway, the original clearance may be worth keeping.
If reducing the wheel gap remains part of your plan, discuss a vehicle-specific package with a qualified suspension specialist. Alignment, suspension travel, tire clearance, and any required driver-assistance checks belong in the complete job. Do not cut springs or choose a generic lowering figure for its appearance alone.
How to Make Your Car Look Sporty on a Budget
Spend on the condition of the car before adding parts. If you have a small budget, cleaning the wheels, replacing damaged trim, removing unwanted decoration carefully, and fitting a simple frame can create a coherent starting point. Save larger purchases until you know what still looks wrong.
| Project | Relative spending commitment | What the budget needs to include |
|---|---|---|
| Cleaning and basic appearance care | Lower, if you already own suitable supplies | Compatible products, cloths, and treatment of existing damage |
| A frame or small trim detail | Usually a smaller purchase | Actual fit, necessary hardware, and finish |
| Localized film or graphics | Varies with area and complexity | Surface preparation, application, and future removal |
| Spoiler, lip, or skirts | Moderate to substantial | Test fitting, mounting, possible paintwork, and installation |
| Wheels and tires | Substantial as a complete package | Correct tires, fitting, balancing, and vehicle checks |
| Suspension or full body treatment | A larger project | Professional installation, related work, and ongoing practicality |
These are planning categories, not market quotes. A repaired bumper, unusual wheel specification, or complex film application can change the cost substantially. Get a price for the complete job, rather than comparing the cheapest advertised component with a fitted package.
Before buying, ask what the next expense will be. A bare spoiler may need painting. New wheels may require a different tire package. Film may need professional removal later. Decide whether you would still choose the part after adding those costs.
When ordering online, compare photographs of the exact version, written compatibility information, installation instructions, and return terms. A generic picture labeled “universal” gives you little help with fit. If the seller cannot explain the mounting method, pause the purchase.
Avoid changing several unrelated details at once. One completed change lets you judge whether the next item is still necessary. That is especially useful when you are deciding between restoring the original finish and replacing a part entirely.
Adapt the Look to Your Body Style
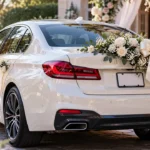
A white daily-driver sedan. Suppose it already has black window trim and silver wheels. One direction is to keep the silver, add a modest trunk lip, and simplify the plate area with a plain dark frame. That keeps the wheels visible and adds a quiet line at the rear. Black wheels would be a different direction, not an automatic next step.
A compact hatchback. Its short body can become visually crowded quickly. A simple wheel pattern and a restrained hatch spoiler may be enough. If you want a colored accent, try it as a small side graphic before repeating it across the mirrors, grille, and wheels. Look at the car from several angles; a graphic occupies a much larger share of a small side panel.
A dark SUV or crossover. Work with the height and proportions you already have. A wheel finish that remains visible against the body, restored lower trim, and a few matching details can create a purposeful appearance. You may prefer the vehicle’s existing ground clearance once you picture it loaded for an ordinary trip.
An older car with a limited budget. Give the original design a fair chance. Repair loose trim, assess cloudy lamps, and clean up damaged wheel covers or worn finishes first. A restrained, period-appropriate wheel design can belong more naturally than a collection of unrelated racing accessories.
These are hypothetical styling combinations, not tested fitment packages. Use them to compare directions for your exact car. The fit and mounting requirements for exterior accessories still determine which parts can actually be installed.
A useful test is to remove one proposed item from your mockup. If the remaining design looks clearer, you have probably found something you do not need to buy. That is an easier decision to make before painting, drilling, or paying an installer.
Build the Look in an Order You Can Evaluate
First, photograph the car and choose the overall direction. Make a short list of the details that support it and a separate list of repairs. Keep the original photographs so you can compare the result without relying on memory.
Next, complete the cleaning and repairs that affect the appearance. Check the car again before ordering new styling parts. You may find that a restored wheel finish or cleaned lower bumper changes the priorities.
Then try one smaller detail that fits the direction. It might be a simple frame, a corrected trim mismatch, or a restrained graphic. Check it in daylight and in ordinary parking conditions. “Removable” should still come with a suitable attachment and removal method for the surface.
Leave wheel packages, body attachments, and suspension changes until you have the fit information and complete installation budget. Ask the installer what can be checked before painting, drilling, or other work that limits your options.
After fitting, inspect the car while stationary: doors and hatch should open normally, fasteners should be secure, and plates, lights, cameras, and sensors should remain unobstructed. Have any required professional checks completed before driving. Take new photographs from the same positions as the originals.
Keep a record of the exact parts and care instructions, especially for film, refinished surfaces, and specialized hardware. A finish that needs different cleaning products should not be treated with whatever is already in your wash bucket.
Common Choices That Make the Result Less Convincing
Too many accents compete with each other. If every grille insert, mirror cap, rim edge, and badge uses a different finish, simplify the smaller details before adding another feature. A coordinated result can still be colorful; it just needs a clear hierarchy.
Poor attachment is visible. Lifted film, uneven gaps, crooked stripes, and loose trim make an otherwise good design look temporary. Spend time on preparation and fitting, and reject a part that cannot be installed properly.
Don’t buy decorative performance claims without evidence. A textured pattern is not proof of carbon fiber, an aggressive shape is not proof of aerodynamic benefit, and a wider wheel is not proof of improved handling. Buy appearance for appearance when that is the goal.
Also check the conditions of a lease, insurance policy, warranty, or finance agreement before larger changes. Those terms vary. Keep records and original parts when practical, but don’t assume that returning the car to its original appearance erases every consequence of the work.
Frequently Asked Questions
Can a car look sporty without lowering it?
Yes. Wheel design, consistent finishes, clean trim, a restrained spoiler, and a tidy plate area can change the appearance at the original ride height. Choose those first if clearance and comfort are priorities.
Are matte or gloss black details better?
Match the surrounding finishes and your care preferences. A gloss cap beside matte trim may look deliberately contrasted or accidentally mismatched. Compare real samples in daylight rather than relying on product names.
Do I need to change the interior too?
No. An exterior project can stay outside. If you want the cabin to feel consistent, start with cleanliness and secure, compatible everyday items. Keep airbag areas, controls, visibility, and properly fitted floor mats clear of decorative interference.
Can removing badges help?
It can simplify the body, but find out how the badge attaches first. Adhesive, locating pins, and existing paint condition change the job. Removal may reveal holes, residue, or a color difference, so don’t start by pulling on an unfamiliar badge.
How do I know when to stop adding parts?
Compare the finished car with the direction you chose at the beginning. If the remaining purchases add another theme rather than solve a visible mismatch, leave them out. Drive and care for the completed changes before expanding the project.
For a first step, choose one detail that already fits the rest of your car. A correctly fitted, unobtrusive frame is enough if the plate area is what looks unfinished. Larger changes can wait until you have a clear reason for them.