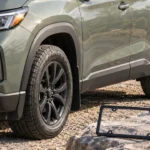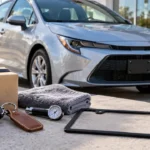
The best front license plate holder is the mount that fits your exact vehicle, holds the plate in the required position, and stays clear of sensors, cameras, and the grille. There is no genuinely universal winner: a factory bracket may be the cleanest choice on a car designed for one, while a tow-hook mount or a no-drill bracket may suit a vehicle with no factory holes. Start with the bumper and mounting points, not the word “universal.”
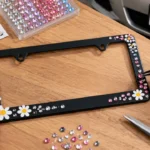
Before shopping, make sure you mean a holder or bracket rather than a frame. A bracket attaches the plate to the vehicle or adapts the mounting location. A frame is a border that surrounds or retains the plate. Some products combine both functions, but a decorative frame alone will not solve a missing or awkward mounting point.
Holder, bracket, and frame: what is the difference?
Product listings use these terms loosely, so look at the shape and installation method rather than trusting the name. A holder may be a flat carrier panel, a molded tray, or a complete assembly with hardware. A mounting bracket connects that holder or plate to the bumper, grille, tow-hook receiver, or another vehicle point. A license plate frame sits around the plate edges and can be added for appearance or edge retention.
| Part | What it does | What it usually does not do by itself |
| License plate holder | Supports or retains a plate on a vehicle-specific or general mounting surface | Guarantee that the vehicle has compatible holes or a clear mounting area |
| Mounting bracket | Connects the plate or holder to a vehicle mounting point and may change its position | Fit every bumper, year, trim, or plate format |
| License plate frame | Adds a border around the plate and may retain its edges, depending on construction | Act as a vehicle adapter when no suitable mounting point exists |
Some catalog descriptions call a complete bracket-and-frame assembly a “front license plate holder.” That is fine as long as you check what arrives in the box. Confirm whether it includes a backing plate, fasteners, spacers, clips, or only a frame. If you need an adapter to reach the car’s mounting points, buying a frame by itself will leave the original problem unsolved.
Start by checking whether your vehicle needs a front plate
Front-plate requirements are not the same everywhere. In the United States, the law depends on the state where the vehicle is registered; in other countries, the governing rules may be national or regional. Check the current official transport or vehicle code source for your registration location before installing or removing a mount. A seller’s note saying “street legal” cannot establish the rule for every jurisdiction.
New York is one example where the statute requires a set of plates displayed one on the front and one on the rear, securely fastened, and says the view must not be obstructed. Its Vehicle and Traffic Law also addresses coverings and devices that obscure identifying information. That is a New York rule, not a nationwide summary. If you drive across borders or recently moved, check the requirements where the vehicle is registered and any applicable local rules.
If no front plate is required where your vehicle is registered, you may still want a holder for a show plate or a clean way to mount a decorative plate on private property. Keep display-only accessories separate from road use. A front mount can also be a permanent visual change, and drilling or adhesive can affect paint, bumper trim, or a lease return. Decide whether you need a road-use mount, a removable show setup, or simply no mount at all.
Identify the mounting points already on your car
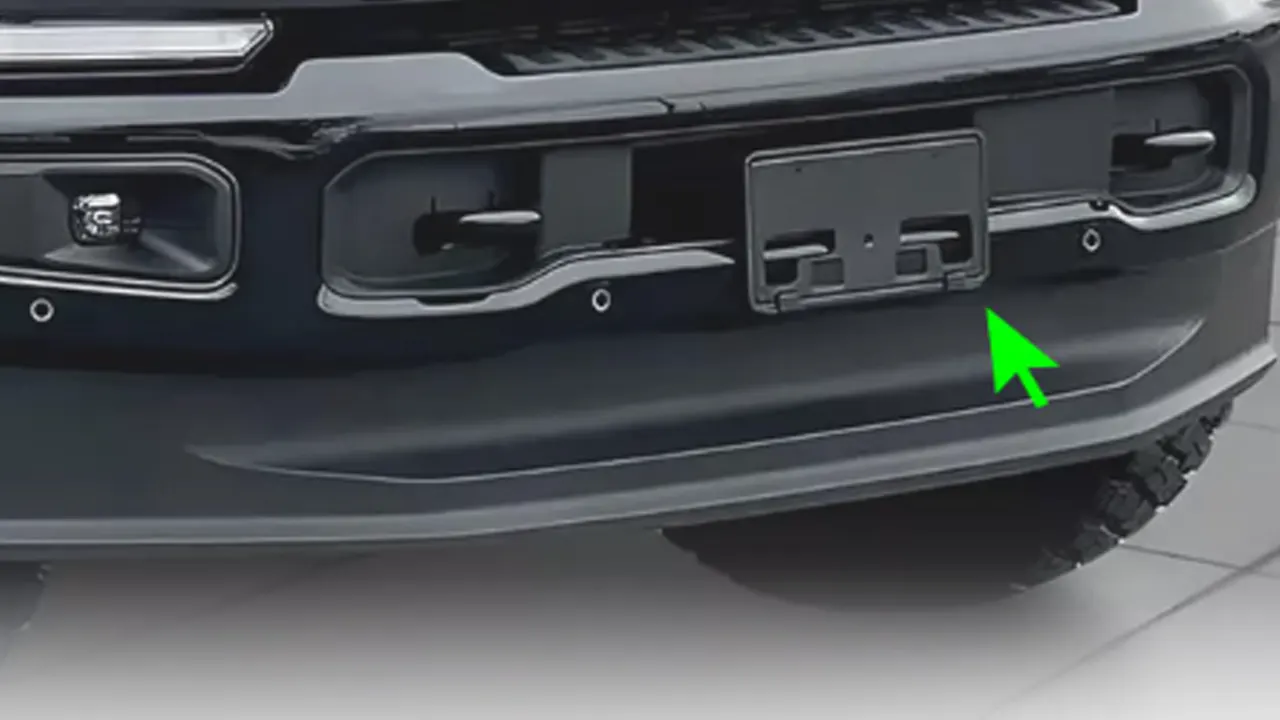
Look at the front bumper before choosing a holder. Some vehicles have two threaded holes or a recessed pad; others arrive with a dealer-installed bracket, a removable tow-hook cover, a grille opening, or no obvious plate location. The mounting surface may be flat, curved, angled, or partly covered by a trim piece. A listing that fits “most cars” may still rely on a very specific kind of surface or fastener.
Check the owner’s manual and, when available, the vehicle maker’s parts catalog. The original bracket is often the lowest-guesswork option because it is designed around the bumper, plate position, and model-year trim. This does not mean every OEM bracket is the best-looking or easiest to remove; it means the intended location and attachment method are usually clearer than with a generic part.
Write down the year, make, model, trim, and front fascia style. Mid-cycle updates can change the grille or bumper even when the vehicle name stays the same. Performance trims, off-road packages, parking packages, and regional versions can also have different openings. If the mount attaches behind a grille or to a hidden point, compare the exact part instructions with your fascia rather than relying on a broad model name.
Choose the mounting style that matches the bumper
Factory or OEM bracket
A factory-style bracket is usually the first option to investigate when your vehicle has a designated plate pad or existing holes. It follows the intended mounting area and may sit flush with the bumper. It can be a good fit when you want a straightforward installation and the correct part number is available for your year and trim.
Its limitations are equally practical: it may require drilling if the bumper has no holes, the design may be large or visually prominent, and a model-specific bracket can be less flexible if you later change vehicles. Confirm the exact vehicle application and whether the kit includes the right fasteners. A photo of a bracket on a similar model year is not enough if the bumper design changed.
Bumper bolt-on bracket
A bolt-on bracket uses existing bumper holes or a prepared mounting pad. It can be simple and stable when hole spacing, screw type, and surface shape match. Check whether the plate sits at the intended angle and whether the fasteners enter a supported area rather than loose trim. If the existing holes are damaged, a new bracket may not fix the underlying issue.
Measure the distance between mounting points from center to center and compare it with the bracket’s slot range. Confirm the screw diameter, thread type, length, and head clearance from the vehicle documentation or original hardware. A screw that is too long can reach components behind a bumper; do not substitute hardware based only on appearance.
Tow-hook receiver mount
A tow-hook mount threads into a dedicated receiver on some vehicles and can place the plate off-center. Drivers often consider it when they want to avoid drilling the bumper. It may be removable and can work well when the vehicle has a compatible receiver and the mount is engineered for that exact application.
Check the receiver thread, adapter depth, orientation, and plate clearance. A mount that screws in is not automatically secure if it can rotate, loosen, or contact a sensor. Off-center placement may be restricted or impractical in some locations, and it may cover a parking sensor or airflow opening. If the vehicle has a cover in that location, verify the manufacturer’s instructions before removing it or loading the mount.
Grille or mesh-mounted bracket
Grille mounts attach to a grille or behind a mesh opening, often using bolts, clamps, or straps. They can avoid drilling a painted bumper, but the grille is not a universal structural mounting point. Plastic slats, active shutters, honeycomb openings, and mesh inserts behave differently. A clamp that fits one grille can crush, scratch, or block another.
Before choosing this style, inspect the back side of the grille if you can do so safely. Look for shutters, wiring, heat exchangers, cameras, sensors, and enough space for fasteners. Confirm the mount is intended for the grille material and opening. Do not attach a plate by routing a cable tie around a thin visible slat unless the instructions specifically support that method; repeated movement can damage the grille or let the plate shift.
No-drill clips or adhesive mounts
“No-drill” describes the installation method, not a guarantee of damage-free removal or long-term fit. Clip systems may hook to a trim edge, grille, or body seam. Adhesive systems depend on surface preparation, temperature, moisture, shape, and the adhesive specified for the mount. A removable-looking bracket can still leave residue, lift a finish, or fail if installed on a textured or contaminated surface.
Read the installation and removal directions before buying. Check whether the kit is approved for your paint or trim surface, how it handles water and temperature changes, and whether the attachment area is large enough for the plate’s leverage. If you lease the vehicle or want to preserve the factory finish, ask the dealer or an experienced installer before applying adhesive or prying on trim.
Quick-release or removable systems
A quick-release mount can be useful if you have a legitimate need to remove the plate for track events, car washing, or display changes. The convenience depends on the latch or fastener design and how often you use it. Look for a clear locking method, a repeatable plate position, and instructions for checking the connection. A removable mount is not theft-proof just because it has a release mechanism.
Consider the small parts, too. If a fastener can be lost during removal or the mount requires a special tool, keep that tool with the vehicle. Check that the plate can be removed without scraping paint or stressing the wiring and trim. Don’t leave a required road plate in the cabin while driving; follow the rules where the vehicle is registered.
Use this fit checklist before ordering
Fit claims should be tied to a specific vehicle and installation. Before you buy, confirm the following details:
- Vehicle application: year, make, model, trim, and bumper or grille version.
- Plate format: width, height, hole count, and whether the plate has a raised edge or special fastener location.
- Vehicle-side connection: existing holes, receiver thread, grille geometry, clip edge, or adhesive surface.
- Mounting geometry: hole spacing, slot adjustment, bracket depth, and plate angle.
- Clearance: parking sensors, cameras, radar, lights, grille shutters, tow-hook access, and bodywork.
- Hardware: screw type and length, washers, caps, spacers, locking parts, and any required tools.
- Use and removal: permanent road use, occasional removal, show use, winter driving, or frequent washing.
- Local requirements: front-plate display, legibility, position, and restrictions on covers or obstruction.
A seller should be able to show the mounting points and the installed position, not just a plate attached to a plain board. Ask for a photo from the front and side if the angle or clearance is hard to judge. For a vehicle-specific mount, look for an explicit year-and-trim fitment list and instructions that match your fascia.
Check sensors, cameras, airflow, and bodywork
A plate is a flat panel placed in a busy area of the front fascia. Its holder can block a camera view, sit in front of a parking sensor, overlap a radar area, cover an active grille shutter, or project into airflow. The effect depends on the vehicle and equipment layout. A mount that clears one trim package may interfere with another, so don’t assume the plate can be moved anywhere that looks open.
Use the vehicle manual to identify sensor locations and warnings. If a mount sits near an advanced driver-assistance sensor, follow manufacturer instructions or ask a qualified service professional. Do not test the system by guessing that a warning light will appear if something is blocked. Some systems may not give a clear warning for every obstruction or may behave differently under different conditions.
Look for metal-on-paint contact, sharp bracket corners, and hardware that can move against the bumper. Keep the surface clean during installation, and use only the supplied protective pads or spacers where the instructions call for them. Thick improvised foam can trap moisture, shift, or prevent the bracket from tightening correctly. If the bumper is curved, choose a mount shaped for that contour instead of forcing a flat plate carrier against it.
Does the holder work with your plate format?
Many US passenger vehicles use the familiar rectangular plate format, but plates and mounting arrangements vary by country and vehicle class. If you drive an imported vehicle, use a novelty display plate, or shop from an international seller, compare the physical plate size and hole position. A US front holder may not suit a Japanese, European, motorcycle, trailer, or other regional plate even if the product title says “universal.”
Check both the carrier dimensions and its visible opening if a frame is built into it. The plate should sit flat, the fasteners should align without pulling it sideways, and required information must remain clear. If the holder also accepts a separate frame, confirm the frame’s inner opening and plate channel. A frame designed for one country’s proportions can overlap another plate’s text or stickers.
For a decorative frame around an already-mounted plate, compare the plate dimensions and frame opening using the license plate frame size guide. A frame is a separate choice from the front holder. If you want one, choose it after confirming the holder position and visibility so the combination does not interfere with either.
Drilling, leasing, warranties, and paint
Drilling can be a reasonable installation method when the vehicle maker provides a template or designated mounting area. It is a poor place to improvise. Before making holes, confirm what sits behind the bumper, use the correct fastener and depth, and make sure the mounting area can carry the plate without distorting trim. If the car has no factory plate pad, an installer may be able to identify a safer attachment point.
On a leased car, the main question is not only whether drilling is technically possible. You also need to know the lease-return condition, the dealer’s expectations, and whether the bumper can be restored without visible marks. Check your lease terms and ask the leasing company or dealer before drilling, applying adhesive, or removing factory trim. Save any original bracket and hardware if you take it off.
Warranty language also varies by vehicle and component. Do not assume that every aftermarket mount voids a vehicle warranty, or that it can never affect a claim. The practical concern is whether installation damages a component or creates a problem linked to the work. Keep instructions and receipts, and use a qualified installer when the mount requires access behind the bumper or near electronics.
Installation habits that prevent a crooked or rattling plate
- Dry-fit first. Hold the holder and plate in the intended position and check alignment, height, angle, sensor clearance, and body contact.
- Read the vehicle instructions. Confirm approved mounting locations and fastener details. If the information is unclear, ask before drilling or prying trim.
- Protect the surface. Clean dust and grit from the contact area. Use the specified pads or spacers, not improvised materials that change the fit.
- Start fasteners by hand. This helps catch cross-threading and lets you adjust alignment before tightening.
- Tighten evenly. Secure the mount without crushing plastic, bending the plate, or stripping a screw hole. More force is not a substitute for a matching thread.
- Check the installation twice. Look from straight on and from the side. Confirm the plate stays put, reads clearly, and does not touch a moving panel or sensor area.
- Recheck after driving. After the first drive and later maintenance checks, look for movement, loosening, fresh scuffs, or unusual sounds.
If the bracket flexes, the plate vibrates, or the fasteners will not tighten, stop and find the cause. Adding another washer or tightening harder may hide a mismatch rather than fix it. Inspect for damaged mounting holes, missing spacers, unsupported trim, or a bracket that does not match the vehicle.
When an OEM bracket is better than a universal holder
A vehicle-specific OEM bracket is often the sensible choice when the car has a designed recess or plate pad, when the front sensors leave little room, or when you want a predictable fit without adapting a generic mount. It can also keep the plate close to the bumper’s intended contour. Confirm the part number against your year, trim, and market; “OEM style” is not necessarily an original manufacturer part.
A universal holder makes more sense when its mounting method genuinely matches your setup, when the vehicle spans several model applications, or when adjustability is useful. But the word “universal” should trigger more questions, not fewer. Find out what surfaces it attaches to, what plate sizes it supports, and what adjustment range it has. If the listing cannot answer those questions, it is not a reliable fitment source.
Choose an aftermarket mount only when you can verify its vehicle-side attachment and clearance. If compatibility depends on a bracket that is sold separately, account for that before comparing price. The lowest-cost holder is not a bargain if it needs another adapter, requires unplanned drilling, or cannot sit flat on your bumper.
Common mistakes that cause a poor fit
- Confusing a frame with a holder. A trim frame may not include a vehicle attachment or backing plate.
- Buying by model name only. Year, trim, market, and bumper design can change the fit.
- Assuming no-drill means no-risk. Clips and adhesives can still mark paint or damage trim when removed.
- Moving the plate to any empty-looking area. Sensors, cameras, shutters, and legal placement may constrain the location.
- Forcing the plate to match the bracket. Misaligned holes or a curved surface can bend the plate and loosen fasteners.
- Using generic screws without checking length. Hardware can reach beyond the intended mounting surface.
- Over-tightening to stop vibration. Rattle may indicate a mismatch, missing spacer, damaged hole, or unsupported mount.
- Believing “street legal” without checking your location. Plate rules vary and can change.
Quick recommendations by situation
| Your situation | What to investigate first | Main tradeoff |
| Factory holes or plate pad already present | Correct OEM bracket or a bolt-on mount made for those points | Simple fit, but may be visually prominent |
| No holes and you want to avoid drilling | Vehicle-specific tow-hook, clip, or approved adhesive system | Fit and removal depend heavily on the exact vehicle and attachment surface |
| Grille-mounted plate desired | Bracket designed for the grille type and verified clearance | May affect grille, airflow, or sensors if poorly placed |
| Frequent removal | A purpose-built quick-release mount with a clear locking method | More parts to inspect and keep track of |
| Lease return or pristine bumper matters | Ask the dealer or lease provider about approved non-permanent options first | Removable methods can still leave marks or residue |
| Imported or non-US plate format | Holder designed for the actual plate and mounting geometry | “Universal” US listings may not match dimensions or holes |
Frequently asked questions
What is the difference between a front license plate holder and a bracket?
A holder supports or retains the plate, while a bracket connects the plate or holder to the vehicle and may adapt the mounting position. Many products combine both, so check the included parts and installation method.
Is a universal front license plate holder really universal?
Usually the term means the product adjusts across some range of vehicles or plate holes, not every bumper and grille. Check the exact vehicle application, attachment surface, plate size, hole spacing, and clearance before buying.
What is the best no-drill front license plate holder?
The best no-drill option is the one designed for your vehicle’s actual tow-hook receiver, grille, trim edge, or adhesive surface. There is no one no-drill design that works across all installations. Verify removal instructions and sensor clearance as well as the installation method.
Can a front license plate holder block parking sensors?
It can, depending on the plate position and vehicle. Check the owner’s manual and the sensor locations for your exact trim. If the mount sits close to cameras, radar, or parking sensors, use vehicle-specific guidance or consult a qualified installer.
Can I install a front plate holder without drilling?
Sometimes. Options include an existing factory bracket, tow-hook receiver mount, grille mount, clip, or adhesive system. Each depends on the car’s design and can have tradeoffs in appearance, clearance, removal, and finish protection.
Can I drill holes in my bumper for a license plate mount?
Only after confirming the approved location, what is behind the bumper, and the correct fastener depth. If you are unsure or the vehicle has no mounting template, ask a dealer or qualified installer rather than guessing.
Do I need a front license plate holder?
That depends on the rules where the vehicle is registered and whether your car already has a suitable mounting point. Check current official local guidance. If a front plate is not required, you may not need a road-use holder at all.
Can I use a license plate frame instead of a holder?
A frame alone is not a substitute for a vehicle mounting bracket unless it includes a compatible way to attach the plate to your car. The frame surrounds or retains the plate; the holder or bracket connects it to the vehicle.
Will a holder damage my paint?
It can if grit becomes trapped, a sharp edge rubs, an adhesive is unsuitable, or the bracket moves. Keep contact surfaces clean, use the specified pads, and inspect for movement. No installation method can be called damage-free for every paint and trim surface.
Is a tow-hook license plate mount legal?
That depends on local requirements for plate position, orientation, visibility, and secure attachment. Check the rules for the vehicle’s registration location and make sure the mount does not block sensors or other equipment.
How do I stop a front plate from rattling?
Check for loose fasteners, a missing spacer, unsupported bumper trim, damaged holes, or a plate and bracket that do not match. Tighten only to the product or vehicle instructions. If the plate keeps moving, correct the fit rather than adding force.
Can I leave the front plate holder off if I do not use the plate?
First confirm whether a front plate is required where the vehicle is registered. Removing a factory bracket may also leave holes or affect trim. Keep the original parts and follow vehicle and local requirements before changing the setup.
Make the mount fit the car, not the other way around
Compare the holder with your exact bumper, trim, plate, and mounting points. A factory bracket is often the simplest starting point when one is available; a no-drill or removable option can work when its attachment method is designed for your vehicle. The right choice is the one that mounts securely, keeps the required plate information visible, avoids sensitive equipment, and does not force you to modify parts you did not intend to change.
If your front plate mount is sorted and you want a separate decorative border, choose a frame that matches the plate format and leaves the entire required display clear. A correctly sized US license plate frame can complement the setup, but it will not replace a bracket when the vehicle needs one.