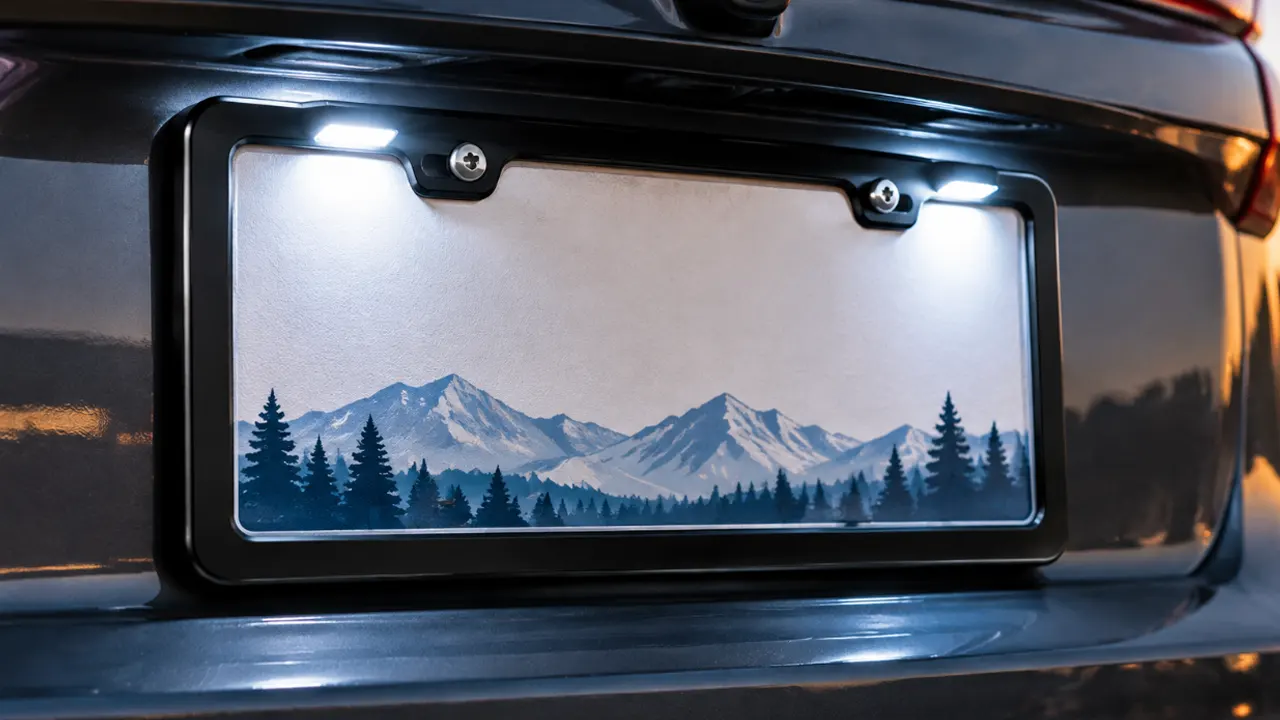
An LED license plate frame has two jobs: sit securely around the plate and connect to the vehicle’s electrical system. The mounting is usually straightforward; the wiring is the part that depends on the exact frame and vehicle. Some frames use a vehicle-specific plug, some are hardwired, and others run on a separate battery or controller. Follow the diagram supplied with your model—wire colors and connection points are not universal.
Before you begin, identify whether the LEDs are meant to illuminate the plate, add a decorative border, or operate as an additional brake or turn signal. Those functions are not interchangeable. If you only need help with the screws and frame orientation, see the existing license plate frame installation steps. For fit, compare your plate and mounting area with the license plate frame size guide.
First, identify the LED frame and its wiring
Read the product label and installation sheet before taking anything apart. Confirm the frame’s intended function, required power source, connector type, and whether it is designed for your vehicle or is a universal hardwire kit. A white plate lamp, an RGB accent frame, and a frame with integrated brake or turn functions may look similar in a product photo, but their wiring and legal considerations can be quite different.
Also check the vehicle application. A plug-and-play harness should match the specified connector and model year; a hardwired frame needs a wiring diagram that identifies the correct circuit. Don’t choose a wire because its insulation happens to be red, black, or white. Colors can change between products and vehicles, and a similar-looking wire may serve a different function.
If the instructions are missing, the connector does not match, or you cannot identify the frame’s intended function, pause and get the correct manual or help from a qualified installer. Guessing can damage the frame, a fuse, or the vehicle’s electrical system.
What you’ll need
Gather the frame’s supplied hardware and wiring diagram, a screwdriver or socket that fits the existing fasteners, and a small trim tool if the vehicle’s service procedure calls for one. You may also need the specific connector, sealing materials, or cable ties listed by the frame manufacturer. Use a multimeter only if you know how to test vehicle circuits safely and can follow the vehicle wiring diagram.
Park on level ground, switch the ignition off, keep the key away from the vehicle, and let nearby exhaust or lighting components cool. Read the vehicle owner’s or service manual for battery-disconnection steps before touching wiring. Some vehicles have procedures for preserving settings or handling electrical components; don’t substitute a generic internet sequence for the manufacturer’s instructions.
How to install an LED license plate frame
1. Test-fit the frame before connecting anything
Hold the frame against the plate and mounting surface. Check that the screw holes line up, the plate sits flat, and the LED frame’s wire exit can reach its intended route without being stretched. Make sure the border doesn’t cover plate characters, registration decals, an existing plate lamp, a camera, or another sensor. If the frame needs a different bracket or vehicle-specific adapter, resolve that before wiring.
Do not cut or drill an issued license plate to make a wire fit. Use a routing opening designed for the vehicle or frame, or choose an approved alternative installation method. If there is no safe path, stop rather than forcing the wire through a sharp or pinching gap.
2. Remove the plate or old frame carefully
Support the plate while loosening the fasteners so it doesn’t fall or scrape the paint. Keep the screws and any spacers in order, and inspect the mounting area for corrosion, damaged threads, or a bent bracket. If you find a problem that prevents the frame from sitting flat, fix that first; tightening harder will not correct a poor fit.
Disconnect the battery only when the frame or vehicle instructions call for it, and use the vehicle’s specified procedure. For a plug-in kit, follow the kit’s steps for isolating the circuit and handling the connector. Never probe, splice, or unplug a connector while guessing what it does.
3. Mount the plate and frame
Arrange the plate and frame in the order shown in the product instructions. Some frames sit over the plate; others use a bracket or a specific stack of washers and spacers. Start each fastener by hand so it doesn’t cross-thread, then tighten them evenly. The assembly should be secure without crushing a plastic frame, bowing the plate, or stripping the vehicle’s mounting points.
Leave final tightening until you know the wire can exit freely and the frame is level. Avoid letting the frame press against a lamp lens or sit where opening the trunk, hatch, or tailgate will pull on it.
4. Route and protect the wire
Follow the route shown in the kit instructions, keeping the cable away from sharp metal edges, hot exhaust parts, moving hinges, suspension components, and places where a trunk or hatch can pinch it. Leave enough slack for normal movement, but secure extra cable so it cannot flap, rub, or hang below the vehicle. Use a grommet, edge guard, or seal only where the vehicle or kit instructions call for one and where it is suitable for that opening.
Don’t trap the wire between the frame and plate, under a screw head, or behind a panel clip. A wire can look fine at rest and still be cut when the hatch closes. Open and close the hatch slowly while checking the route before fastening trim back in place.
5. Connect the plug-in harness or hardwire it as specified
For a vehicle-specific plug-in harness: match the connector to the port shown in the manual, align it without forcing it, and confirm its locking tab engages. Some kits require pins to be inserted into a supplied connector body; check each pin’s position against the diagram and gently confirm it stays seated. A connector that nearly fits is not the correct connector.
For a hardwired frame: use the product’s diagram and the vehicle’s wiring information to identify the designated power and ground points. Connect only to the circuit specified by the frame manufacturer. Don’t assume the running-light, tail-light, or license-lamp wire is the right choice for every vehicle, and don’t tap brake, reverse, or turn-signal wiring unless the product is explicitly designed for that function and its instructions show how.
Use the connector and weather-protection method specified for the kit. Keep splices insulated and secure; avoid loose twists, household connectors, or a connection that can collect water. If the instructions call for an inline fuse or a particular harness, use the specified component—never replace a blown fuse with a higher-rated one. If the diagram is unclear or the circuit is difficult to access, an automotive electrician is the safer next step.
6. Restore power and test every function
Reconnect the battery or vehicle connector in the order given by the vehicle and frame instructions. Before reinstalling all trim or tightening the frame fully, switch on the exact lighting function that should activate the LEDs. Check that the frame lights consistently, the original rear lights still work, and any remote or controller operates as described by its manual.
Look at the plate from behind the vehicle in a dim area. If the frame is intended to illuminate the plate, the plate should remain legible and the light should not be blocked by the frame or mounting position. A decorative glow is not a substitute for a required plate lamp. If the frame has additional brake or turn functions, test those only as directed and confirm that the vehicle’s original signals continue to work normally.
Switch everything off and inspect the wire route once more. Check that no cable is stretched, pinched, rubbing, or close to a hot surface, then finish securing the fasteners and trim. After a short drive, recheck the frame and accessible wiring for looseness or movement.
What changes on a motorcycle?
Motorcycles often have a different plate bracket, smaller clearance, and a different rear-light harness from cars. The frame may move with the fender or sit close to the tire, exhaust, or suspension, so a route that works on a car may be unsafe on a bike. Use a frame and harness intended for the motorcycle’s make, model, and year, and follow the motorcycle service manual for battery access and connector identification.
Check clearance with the suspension and rear wheel in mind, not just while the bike is parked. If you can’t verify that the wire remains clear of the tire, chain, exhaust, and moving suspension through normal travel, have a motorcycle technician handle the installation.
Common problems after installation
The LEDs don’t turn on. Switch the vehicle off before checking anything. Confirm the connector is fully seated and that the ground and power connections match the kit diagram. If a fuse has blown, find the cause before replacing it; repeated fuse failure is a reason to stop and get the circuit checked.
The lights flicker. A loose connector, poor ground, damaged insulation, or wire pulled taut can interrupt power. Inspect the route with the ignition off and repair the connection using the method specified by the manufacturer. Don’t keep driving with exposed or intermittently shorting wiring.
The plate is still dark or unevenly lit. The product may be decorative rather than a plate-illumination lamp, may be mounted in the wrong orientation, or may not work with the vehicle’s existing lighting circuit. Check the product’s stated function and instructions; don’t assume that any LEDs around a plate satisfy the vehicle’s lighting needs.
A warning appears or another light stops working. Turn the vehicle off and review the installation. A warning, blown fuse, burning smell, hot wire, or failure of an original lamp means the circuit should not be left powered. Don’t bypass the warning or install a larger fuse to make the new frame work.
Lighting and visibility matter
In the United States, federal vehicle-lighting requirements address license plate lamps and the placement and operation of vehicle lighting equipment. The current federal standard defines a license plate lamp as a lamp used to illuminate the rear plate and includes requirements concerning mounting and obstruction. That standard is not a blanket approval for every aftermarket LED frame or every decorative color and function. Keep the required plate and vehicle lighting unobstructed, and check your state and local rules before using colored, flashing, or signal-integrated lighting.
Frequently asked questions
Can I install an LED license plate frame without wiring?
Only if that particular model is battery-powered or uses another self-contained power source. A frame designed to connect to the vehicle needs its specified harness or hardwired connection; the mounting screws alone do not power it.
Are LED frame wire colors standard?
No. Use the diagram for the exact frame and vehicle. Never identify a circuit by color alone.
Can I connect the frame to the brake-light wire?
Only when the frame is designed to provide a brake-light function and its instructions specify that connection. A plate-illumination or decorative frame should not be treated as a brake-light accessory.
Can an LED frame replace the factory license plate light?
Don’t assume so. Confirm the frame is designed and approved for that role, and verify that the installed lighting still illuminates the plate as required. If the vehicle manual or local rules are unclear, keep the original lamp functioning and ask a qualified installer.