A license plate frame usually rattles because the screws are loose or mismatched, the lower edge is unsupported, the frame or plate is warped, or the vehicle bracket is moving. Hold the plate while reproducing the noise: if the sound stops, work on the plate assembly; if it continues, inspect the hatch trim, camera, wiring, bracket, or body panel instead. Tightening harder is not a diagnosis and can crack the frame or strip the vehicle mount.
Find the Rattle Before You Remove Anything
Rattle can appear when you close the trunk, drive over rough pavement, idle, or play bass-heavy audio. Reproduce the condition while the vehicle is stationary whenever possible. Press the lower plate corners, then the frame bars, bracket, camera housing, and nearby trim one at a time. A change in sound tells you which interface is moving.
If the sound occurs only on the road, record when it happens: speed, surface, engine rpm, audio level, hatch position, and temperature. Do not ask another person to reach outside a moving vehicle. Use the stationary tests first and inspect for shiny rub marks, loosened caps, fretting dust, cracked plastic, or displaced foam.
| Symptom | Likely source | First check |
|---|---|---|
| Buzz at certain bass notes | Plate or lower frame edge touching the body | Press lower corners while playing the same audio passage |
| Clack when closing the hatch | Loose screws, unsupported plate, or moving bracket | Hold the assembly during a controlled close |
| Rattle remains when plate is held | Interior trim, camera, handle, wiring, or bracket behind the plate | Remove the plate and repeat the stationary test |
| Noise began after installation | Wrong screw length, missing washer, bent frame, or hard contact | Compare new hardware and stack height with the previous setup |
| Rust dust or polished marks | Repeated metal contact or corroding hardware | Inspect rear face, screw seats, plate edge, and vehicle paint |
The Most Common Causes
Loose or incorrect fasteners. A screw can feel tight because it has bottomed out before clamping the plate. The wrong thread may bind without seating. A small head can pull into an oversized slot, while a missing washer leaves uneven support.
Only two upper mounting points. Many vehicles provide two usable upper holes. The lower corners remain free to vibrate unless the plate, frame, bracket, or isolation system supports them.
A warped plate or frame. Tightening a non-flat assembly pulls some areas against the body while leaving others under spring tension. Those gaps can snap together over bumps or with sound pressure.
A moving vehicle bracket. The plate and frame may be secure to a plastic bracket that is loose on the bumper. Adding pads to the plate does not fix the bracket-to-vehicle joint.
Decorative caps and emblems. Screw caps, hinged covers, attached emblems, and inserts can create their own buzz. Test them separately.
Nearby vehicle components. Camera housings, plate lamps, trim clips, wiring, trunk liners, and hatch panels often sit near the plate and can be mistaken for frame noise.
A Step-by-Step Fix
- Protect the finish. Wash loose grit from the plate and painted recess before removal. Place a clean towel below the work area.
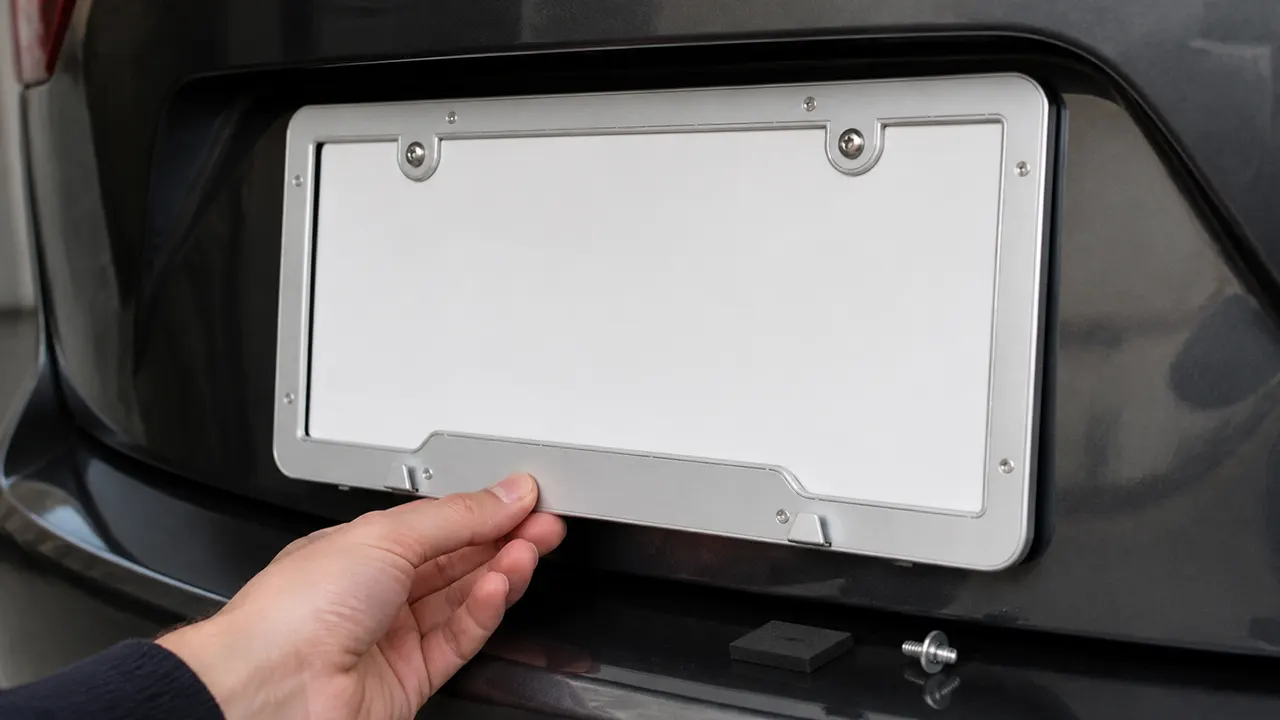
- Support the plate. Hold it while removing the screws so it cannot swing into the paint.
- Inspect every layer. Check the frame, plate, bracket, screw caps, washers, and rear contact points for bends, cracks, burrs, wear, and corrosion.
- Verify the screws. Confirm thread type, usable length, head size, and whether the screw seats before bottoming out.
- Correct flatness. Replace a cracked or badly warped frame. Flatten the plate only if you can do so without damaging its reflective face or characters.
- Add isolation where movement occurs. Use small automotive-grade pads, washers, or a designed silicone surround at stable contact points.
- Keep drains open. Do not create a continuous foam dam that holds water and salt.
- Reassemble evenly. Start all screws by hand, align the plate, and tighten alternately until secure.
- Repeat the test. Close the hatch, play the same audio, and press nearby parts to confirm the original sound is gone.
- Recheck after use. Inspect the screws and pads after several drives and washes.
Where to Put Anti-Rattle Pads
Place pads at confirmed contact points, usually near unsupported lower corners or between the plate and a rigid bracket. They should support the assembly without covering characters, registration tabs, screw holes, lamps, cameras, or drainage. Use the smallest amount that solves the movement.
Do not stack soft foam until the plate floats. Excess compression lets screws loosen, makes the frame bow, and traps dirt. Household sponge tape may absorb water, soften in heat, leave adhesive residue, or deteriorate outdoors. Use material intended for automotive exterior exposure and compatible with the paint and plastics it touches.
Two Screws vs Four Screws
Four genuine vehicle mounting points give each corner direct support and often reduce movement. Do not drill the vehicle simply because the frame has four holes. Hidden wiring, sensors, corrosion protection, and body structure can be damaged. If the vehicle provides only two upper mounts, a flat frame, correct screws, lower pads, clips, or a silicone surround can stabilize the bottom edge.
Our 2-hole vs 4-hole frame guide explains the mounting tradeoff without assuming more screws are always better.
How to Protect Paint While Fixing the Noise
Rinse before wiping so grit does not become abrasive. Deburr or replace any frame with sharp rear edges. Use clean isolation pads only on sound paint, and follow the pad supplier’s surface-preparation instructions. Keep adhesive away from fragile clear coat, decals, textured plastic, and drainage openings unless compatibility is confirmed.
Do not overtighten the frame to force it flat. That can drive the corners into paint, dish the plate, crack plastic or composite, and strip threaded inserts. If the vehicle paint is already worn through, address the corrosion risk before covering the area again.
When Silicone Is the Better Fix
A wraparound silicone frame can isolate the full plate edge and is useful when the bare plate or rigid border is the confirmed noise source. It also reduces hard contact during installation. Check that its channel fits the plate, its lip does not cover required information, and its lower drains remain open. Remove it periodically to clean trapped grit.
Compare this approach with rigid frames in our silicone vs metal guide.
When the Frame Is Not the Problem
Remove the plate and frame, secure the loose screws so they cannot move, and repeat the stationary test. If the sound remains, investigate the vehicle bracket, interior trim, camera, plate lamp, wiring, hatch latch, spare-wheel area, and nearby panels. For a new vehicle or a model with a published service bulletin, a dealer can check model-specific procedures.
Stop and seek professional help if the mount is cracked, the threaded insert spins, wiring is exposed, a camera or sensor is affected, or body repair is required. A frame accessory should not become a reason to drill unknown structure or remove safety-related components.
Frequently Asked Questions
Why does my license plate rattle with only two screws?
The upper edge is clamped while the lower edge remains free to vibrate. Flat parts, correct fasteners, small lower isolation pads, clips, or a silicone surround can support it without adding holes.
Can I use double-sided tape?
Automotive-grade exterior tape can isolate a verified contact point, but it must be compatible with both surfaces and placed so it does not trap water. It also makes later removal harder. Pads or designed supports are often easier to service.
Will tightening the screws stop the noise?
Only if loose clamping is the cause. Stop when the assembly is secure. If a screw has bottomed out, uses the wrong thread, or the lower edge is unsupported, more torque can create damage without stopping the rattle.
Can a license plate frame damage paint?
Yes. Burrs, hard corners, trapped grit, corrosion products, and repeated movement can mark the finish. Clean the interface, smooth or replace defective parts, and isolate confirmed contact points.
Why did the rattle return after washing?
Water may have moved a pad, softened unsuitable adhesive, carried grit into the contact area, or exposed a loose fastener. Remove the assembly, dry it, inspect the pad material and drains, and retest.