If your license plate frame screws keep loosening, start by checking screw fit and the mounting point. The correct screw must match the thread, reach enough usable thread, clamp the plate-and-frame stack before it bottoms out, and tighten into an undamaged insert or bracket. Only after those basics are right should you add a removable threadlocker or locking nut.
Repeatedly tightening the same faulty joint usually makes matters worse. You can strip a plastic insert, damage a threaded nut, crack the frame around a mounting hole, or make the screw harder to remove later.
Find out what is actually loose
Hold the frame, plate, and vehicle bracket separately while you inspect them. A rattling plate does not always mean the screw has rotated backward.
| What you notice | Likely cause | Best next check |
| The screw head has moved away from the frame | Loss of clamp load or screw rotation | Check thread match, engagement, tightening method, and vibration |
| The screw feels tight but the frame still moves | The screw may have bottomed out before clamping the stack | Compare usable hole depth with the combined plate, frame, washer, and screw length |
| The screw turns without tightening | Stripped threads or a loose mounting insert | Remove the assembly and inspect the vehicle-side attachment |
| Only the lower edge flaps or taps | A two-hole installation or unsupported plate edge may be moving | Check whether the vehicle provides approved lower mounting points or whether pads are appropriate |
| The screw stays tight but noise continues | Plate-to-frame or frame-to-vehicle contact | Look for clearance, warped parts, trapped grit, and missing isolation pads |
| A decorative cap is loose | The cap or its retainer may be the problem, not the mounting screw | Inspect the cap system separately before changing the screw |
Mark the screw head and the adjacent frame with a removable reference line after installation. If the two marks separate during use, the screw has rotated. If they stay aligned while the assembly becomes loose, settling, compression, damaged threads, or movement elsewhere in the bracket is more likely.
Use the correct thread and screw type
License plate mounting hardware is not universal. Vehicles may use machine screws in threaded inserts, self-tapping screws in plastic brackets, screws that enter clip nuts, or through-bolts with nuts. Similar-looking screws can have different diameters, pitches, and thread forms.
Start with the original vehicle screw when it is serviceable, or confirm the replacement in the owner’s information, service instructions, or with the vehicle manufacturer or dealer. Thread a candidate screw by hand for the first several turns. It should enter smoothly without being forced or wobbling excessively.
Stop if the screw binds immediately. A mismatched pitch can damage a usable insert and leave you with a mounting repair instead of a hardware change. The license plate frame screw size guide explains why vehicle thread and usable length should be verified together.
Choose a length that clamps without bottoming out
Adding a frame increases the stack under the screw head, so the original screw may no longer provide enough engagement. A longer replacement can solve that problem, but too much length creates another one: the tip can reach the bottom of a blind insert before the head clamps the frame.
A bottomed-out screw can feel tight at the driver while the frame remains loose. Applying more torque may damage the insert. An Audi service bulletin published through the US National Highway Traffic Safety Administration specifically warns that screw length depends on the combined thickness of the plate and decorative frame, and instructs technicians to use a shorter screw if it bottoms out rather than applying excessive torque.
Before installation, compare:
- the thickness of the frame, plate, washers, cap base, and any bracket layers;
- the usable depth of a blind threaded hole;
- how much thread engagement the mounting system requires; and
- whether the screw tip could contact wiring, sensors, painted panels, or the bumper behind the bracket.
Do not copy a screw length from another vehicle merely because the thread diameter looks similar. Trim level, model year, front bracket, rear insert, and added frame thickness can change the available depth.
Seat the frame flat before tightening
A screw cannot hold a stable joint if the parts rock, bridge over a raised feature, or sit on debris. Remove grit and corrosion from the contact area, then check whether the plate and frame lie flat without forcing them into position.
Look for these common problems:
- a warped plate or frame;
- a screw cap base installed at an angle;
- a thick logo rail interfering with the screw head or driver bit;
- an uneven vehicle bracket;
- a raised burr, molding gate, or damaged hole edge; and
- a washer or spacer trapped partly outside the mounting recess.
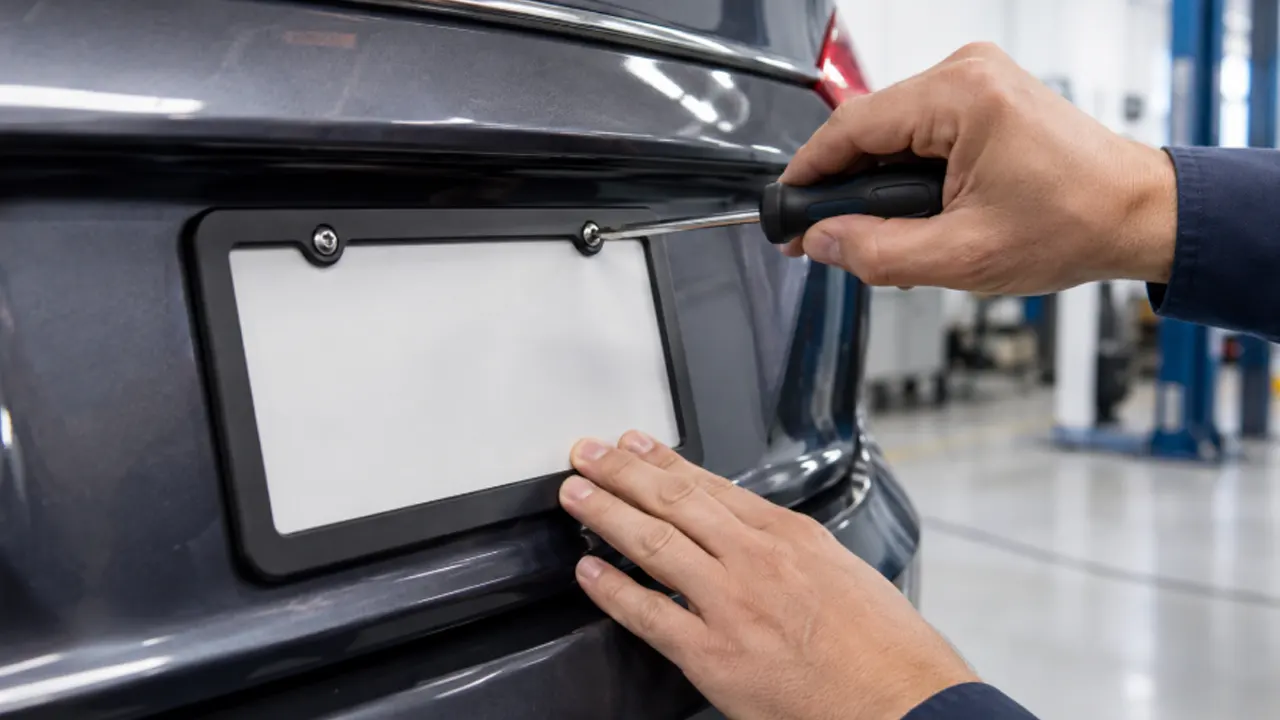
Start every screw by hand and leave it slightly loose until the frame is aligned. Then tighten the screws gradually in an alternating pattern. This prevents one corner from being pulled down while another corner remains loaded or misaligned. The full license plate frame installation procedure covers plate visibility, alignment, and safe removal as well as fastening.
Do not solve every joint with more torque
There is no single correct torque for all license plate screws. The safe value depends on the screw, thread, vehicle insert, bracket material, washer, lubrication, and frame construction. A self-tapping screw in plastic cannot be treated like a machine screw in metal.
Use a hand driver unless the vehicle instructions specify another method. Tighten until the assembly is seated and secure, then stop. An impact driver or high clutch setting can strip a plastic boss before you feel a clear warning. If the screw keeps turning, remove it and inspect the mounting point rather than trying to force it tighter.
Overtightening can also crush a plastic frame or cap base. Once that material settles or creeps, clamp load may drop and the screw can appear to have loosened. A flat washer can distribute head pressure when it is compatible with the design, but it does not repair damaged threads or guarantee resistance to vibration.
Add the right locking method only when the joint allows it
Once the thread, length, mounting insert, and seating are correct, a locking method can add resistance to vibration. The choice depends on whether you have a blind threaded hole or access to the rear of a through-bolt.
| Locking method | Where it can help | Important limit |
| Removable liquid threadlocker | Compatible metal-to-metal threaded fasteners that need future service | Use the product manufacturer’s instructions; cure and compatibility vary, and some products are unsuitable for plastics |
| Nylon-insert lock nut | Through-bolts where the rear side is accessible | Needs correct thread engagement through the locking section and may not suit repeated reuse |
| Prevailing-torque screw or patch | Controlled production kits designed around a specific mating thread | Must be validated for installation torque, reuse, coating, and vehicle insert |
| Flat washer | Distributes load under a screw head or nut | It is not, by itself, a positive locking feature |
| Rubber or foam isolation pad | Reduces plate movement, tapping, or paint contact in a suitable location | It does not secure damaged threads and should not cover sensors, drainage, or required plate information |
For a serviceable metal fastener, a low- or medium-strength removable threadlocker may be suitable when its technical data covers the materials and conditions. Apply only the specified amount to clean threads and allow the required cure time. Henkel’s product guidance distinguishes removable low- and medium-strength grades from high-strength products that can require heat for removal.
Avoid treating threadlocker colors as a universal code across every brand. Read the label and technical data for the exact product. Do not use permanent high-strength compound simply because the screw has loosened before, and do not substitute cyanoacrylate household glue. Future plate replacement should not require heat or a destructive repair near painted bodywork or plastic trim.
Repair a damaged mounting point instead of hiding it
Threadlocker cannot restore stripped threads, and a larger screw is not automatically a safe repair. If an insert spins, pulls out, or no longer grips the correct screw, identify the original mounting construction first.
The proper repair may involve replacing a clip nut, threaded insert, plastic bracket, or manufacturer-specified fastener. Access and repair methods vary by vehicle. Drilling a new hole or installing an oversized self-tapper without checking what is behind the panel can damage paint, wiring, sensors, or the bumper structure.
If the vehicle-side insert moves with the screw, or the mounting surface is cracked, have the bracket inspected by a qualified technician. The goal is to restore a sound attachment point—not to make the visible screw head feel tight.
Control movement in two-hole installations
Many frames use only the upper mounting points because the vehicle provides no usable lower attachment. The screws can remain tight while the lower edge vibrates against the plate or body surface.
First confirm that both upper screws are correctly fitted and that the frame is not warped. Then check whether the vehicle has approved lower mounting points. Do not drill into the vehicle just to use every opening in a four-hole frame.
When no lower fastener is available, small nonabrasive isolation pads may reduce tapping and movement if they are placed on a clean, suitable contact area. They should not push the frame out of alignment or create a thick compressible stack under the screws. For a detailed diagnosis, see the license plate frame rattle guide and the comparison of two-hole and four-hole frames.
Use this installation and recheck sequence
- Remove the frame and inspect the screws, plate holes, frame holes, bracket, clips, and inserts.
- Confirm the correct screw thread and the usable length for the complete stack.
- Replace damaged hardware or repair the vehicle-side mounting point before reassembly.
- Clean the mating surfaces and make sure the plate and frame sit flat.
- Start all screws by hand without cross-threading.
- Add a compatible removable locking method only if the joint design and product instructions support it.
- Align the plate and tighten gradually with a hand tool. Stop when the assembly is seated and secure.
- Check that registration information, tabs, and required plate features remain visible.
- After an initial drive and car wash, inspect the screw reference marks, frame movement, and cap fit.
- Recheck during routine vehicle care, especially after rough-road use or if rattling returns.
If a screw loosens again after the joint has been corrected, record which position moved and how quickly. A repeated failure at one hole points toward a local insert, alignment, or bracket problem. Several screws moving together suggests a broader vibration, installation, or hardware-selection issue.
What B2B buyers should specify in a hardware kit
A retail or dealer kit should not imply universal screw fit unless the supported vehicles and mounting systems are documented. Separate the frame specification from the vehicle fastener specification and make the compatibility limits clear.
Ask for:
- screw diameter, pitch, length, head style, drive, material, and finish;
- the intended mating insert, clip nut, plastic boss, or through-bolt arrangement;
- washer, cap base, spacer, nut, and isolation-pad details;
- the total plate-and-frame stack used for validation;
- installation tool and tightening instructions;
- threadlocker or prevailing-torque feature, including removability and reuse limits;
- corrosion and appearance requirements tied to a defined test;
- vehicle and model-year coverage with known exclusions;
- packaging that keeps hardware from scratching the frame; and
- change control for screw supplier, coating, dimensions, or locking feature.
Security heads can discourage quick removal, but they do not prevent loosening when the fit is wrong. Review license plate frame security screw options only after the basic joint is correct. If you are developing a branded frame-and-hardware program, include the vehicle scope and installation method in your custom license plate frame inquiry.
FAQ
Why do my license plate screws keep coming loose?
Common causes include the wrong thread, too little engagement, a screw that bottoms out, damaged or spinning inserts, uneven seating, compression of plastic parts, and vibration. Confirm which part is moving before adding a locking product.
Should I use threadlocker on license plate screws?
A removable grade can help on compatible metal threaded fasteners after the screw fit and mounting point are proven sound. Follow the exact product instructions. Do not assume it is safe for plastic threads, painted surfaces, or every fastener coating.
Can I use red threadlocker on license plate screws?
High-strength products are usually a poor default for a plate that must be removed for registration, repair, or resale. Some require substantial heat for disassembly. Choose a serviceable solution specified for the exact fastener and substrate.
Will a lock washer stop a license plate screw from loosening?
A washer may help distribute load, but common washer types do not correct mismatched threads, bottoming, stripped inserts, or a moving bracket. Treat the washer as one part of the joint, not a universal fix.
Why is the frame loose even though the screws feel tight?
The screws may be bottoming in blind holes, the frame may be bridging over an obstruction, a spacer may be missing, or the vehicle-side insert may be moving. Remove the assembly and inspect the stack instead of tightening harder.
How often should license plate frame screws be checked?
Check them after initial installation, after the first drive and wash, and during routine vehicle care. Inspect sooner if you hear rattling, see a screw-head reference mark move, or notice the frame lifting from the plate.