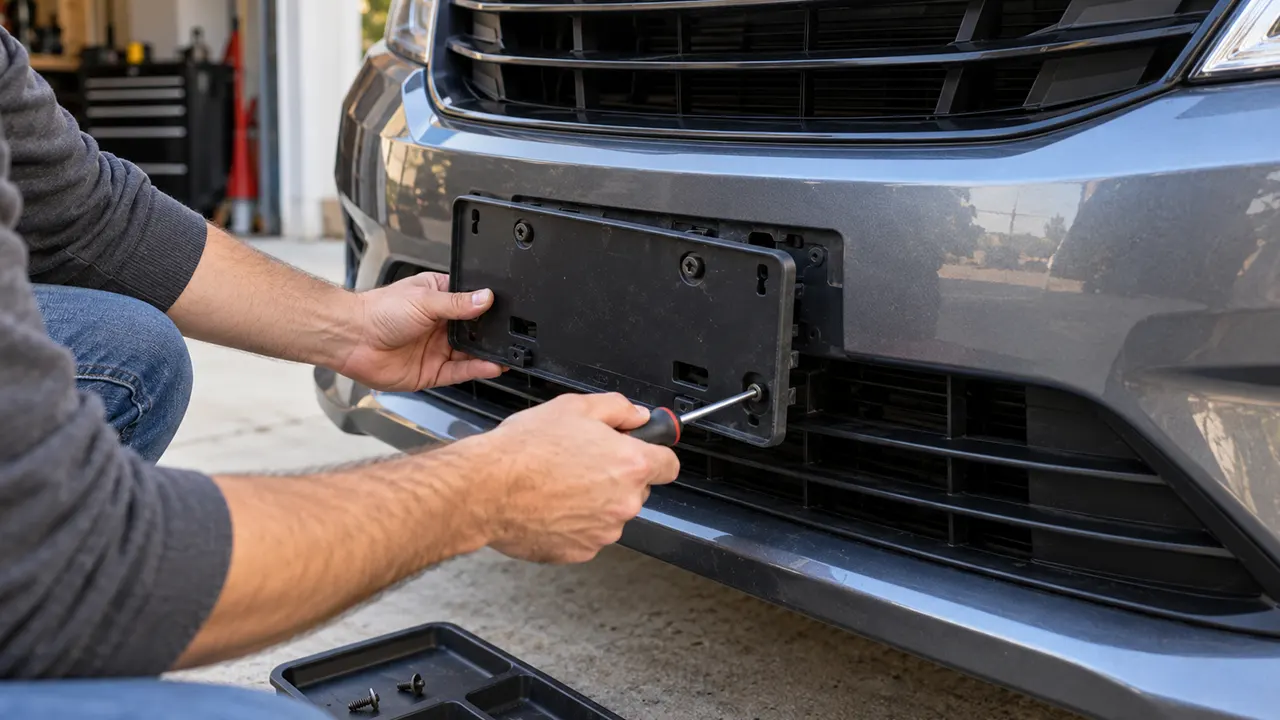
To remove a front license plate bracket, take the plate off, identify how the bracket attaches to the vehicle, and follow the removal method for that attachment. Screws, plastic retainers, metal rivets, adhesive tape, and removable grille mounts need different approaches. Support the bracket as it releases and stop if the bumper flexes, a fastener spins, or an unidentified attachment remains. A bracket can use more than one retention method.
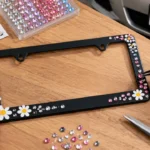
Before starting, decide how the plate will be displayed afterward. Removing a bracket does not remove existing bumper holes or settle front-plate requirements. If your real goal is to replace dealer advertising around the plate, you may only need to change the decorative frame.
Make Sure You Are Removing the Right Part
A license plate frame is the border around the plate. A mounting bracket or holder connects the plate assembly to the vehicle. Depending on the design, the bracket may sit directly behind the plate, extend beneath the bumper, clamp to a grille, or attach to a tow-eye socket.
Removing the plate screws may release the frame and plate while leaving the bracket firmly attached. That is normal. Those screws do not necessarily hold the bracket to the bumper.
Look at the assembly from the side and below, using a light rather than pulling it forward. Some holders have a front shell covering a separate base. Others conceal their vehicle-side fasteners behind the plate.
If you only want a different border, the instructions for removing a license plate frame address that smaller task. Leave a sound mounting bracket in place unless you have a reason and a suitable method to remove it.
Photograph the Attachments Before Choosing Tools
Wash loose dirt from the area and dry it so you can see the hardware and panel edges. With the car safely parked, take a front view, a side view, and close photographs of each visible attachment. If accessible without dismantling unfamiliar trim, photograph the underside too.
A screw usually has a recognizable drive recess. A plastic retainer may have a separate center pin. A blind rivet often has a smooth head with a small central mark. These are clues rather than a complete identification: decorative caps, corrosion, paint, and damaged heads can obscure what is underneath.
Do not scrape a fastener simply to reveal its identity. Remove a cap only when you know how it releases. Check a vehicle-specific parts diagram or repair procedure if the attachment remains unclear.
Also photograph the gap between bracket and bumper. A strip of foam or tape may indicate adhesive, but it can also be a protective pad. A bracket that looks adhesive-mounted can still have hidden screws. Record what you see before deciding that peeling is the next step.
| Attachment clue | What it may be | Removal direction |
|---|---|---|
| Recognizable drive recess | Screw or bolt | Use the correct bit and vehicle-specific access |
| Separate center in a plastic head | Push-pin or expanding retainer | Identify its release design before lifting or pushing |
| Smooth metal head with a central mark | Blind rivet | Check the service procedure; drilling may require professional access |
| Tape or foam behind the base | Adhesive or protective pad | Confirm whether other fasteners are present |
| Arms or clamps through the grille | Grille-mounted holder | Release the documented clamp without stressing grille members |
| Arm entering a tow-eye opening | Tow-socket mount | Follow that mount’s locking and removal instructions |
Use Vehicle-Specific Illustrated Information
An illustrated repair procedure can reveal attachments that are invisible in a front photograph. Match the model year, bumper version, and installed bracket. A similar-looking car may use a different holder after a facelift or in another market.
For a documented example of mixed retention, Tesla’s Model S structural bracket procedure shows screws, bolts, a separate shell, and an adhesive-backed base. It demonstrates why removing visible plate screws alone may not free the mounting assembly.
Use these visual examples to understand the differences, then obtain the correct instructions for your vehicle. Do not borrow their dimensions, fastener lengths, tightening values, or panel access steps for an unrelated bumper.
Prepare the Work Area and the Remounting Plan
Park on a level surface with the vehicle secured and the engine off. Have a clean surface or padded tray ready for the plate and bracket. Keep removed hardware organized by location, particularly when the plate screws and bracket fasteners look similar.
Use the tools specified by the actual attachment. A correctly fitting hand driver is a better starting point than a powered driver for small screws in plastic. Have adequate light so you can watch the surrounding panel as the fastener moves.
Protect nearby paint with a method compatible with its finish. Dirt trapped under a protective cloth or tool can still mark a panel. Do not apply tape to peeling, recently repaired, wrapped, or otherwise uncertain surfaces without confirming suitability.
Decide whether the bracket will be replaced, reinstalled, or removed permanently. Check applicable front-plate requirements and the permitted mounting arrangement before leaving the car without its normal holder. A plate resting inside the windshield is not something to assume meets the required display.
Remove the Plate and Decorative Frame First
Support the plate while releasing its fasteners. Keep track of caps, washers, spacers, and any backing piece. Once the final screw releases, the plate and frame may separate unexpectedly.
Place the official plate somewhere clean and secure. Avoid bending it to reach a hidden bracket screw. If it is trapped in tabs or a clip-on holder, use that holder’s documented release method.
With the plate out of the way, inspect the bracket again. You may now see screws, rivets, retaining slots, or a separate cover. Compare this view with the parts diagram before loosening anything further.
If a decorative frame is the only part you intended to replace, this is the point to stop removing parts. Check the new frame’s opening and hardware fit, then reinstall the plate on the existing sound bracket.
Removing a Bracket Held by Screws or Bolts
Find all the vehicle-side fasteners, including those beneath a lower lip or behind a cover. Seat the correct bit fully and loosen each fastener with controlled hand pressure. Watch whether it turns out normally or spins together with an insert.
Support the bracket as the last fastener comes out. If there are several, release them in a way that prevents the bracket from hanging and dragging against the bumper. Keep different lengths and locations separate.
Do not keep turning a spinning screw in the hope that it will eventually release. A loose insert, captive nut, or damaged plastic thread may need access from behind. Pulling the bracket forward while turning can enlarge the hole or distort the panel.
If the head starts to strip, stop before it becomes harder to remove. A seized or damaged fastener is a separate extraction problem. A technician can assess access and repair the mounting point without using the bumper as a lever.
When every identified screw is removed, test only for gentle free movement. Continued resistance can mean adhesive or another fastener remains. It is not evidence that the bracket simply needs a stronger pull.
Plastic Retainers and Push-Pin Fasteners
Plastic retainers can resemble screws or rivets but use different release mechanisms. Some have a center that lifts; some require another action; some are intended to be replaced after removal. Identify the design from the parts or service information.
Use the designated release point and a suitable tool. Pulling on the outer head while the center remains locked can break the retainer or damage the hole. Likewise, turning a molded cross shape does not always mean the fastener unscrews like a metal screw.
Keep the bracket supported while releasing each retainer. If the plastic is brittle, cracked, or distorted, plan to obtain the correct replacement rather than relying on a damaged fastener during reinstallation.
Do not substitute an unrelated push pin because it fits through the visible hole. Panel thickness, expansion range, head size, and retention all affect whether it holds correctly. Save a readable part identification or an intact example for comparison.
How to Handle a Riveted Front Plate Bracket
A blind rivet is not normally removed by unscrewing it. Removal may involve separating its head and releasing the remaining body using a procedure suitable for the fastener and panel. That operation is different from drilling a new hole through the bumper.
Before any drilling, identify whether the fastener is metal, plastic, or a different retainer. Confirm the rivet specification, the material it passes through, and the clearance behind it. The visible head alone does not give you a safe universal drill-bit size or depth.
A drill can slip, spin the rivet, heat surrounding plastic, enlarge the mounting hole, or reach something behind the fascia. Protective masking does not eliminate those risks. If you cannot establish the exact procedure and access, have a body shop or qualified technician remove the rivets.
Do not copy an installation-hole dimension from a service bulletin and treat it as a removal instruction. Installation and head removal are different operations, and the relevant dimensions may not be interchangeable.
Once removed, the rivets generally need appropriate replacements if the bracket goes back on. The remaining bumper holes will still exist. Plan that result before starting instead of expecting the bracket to leave a smooth, unmarked panel.
Removing an Adhesive-Mounted Bracket
First confirm that adhesive is the remaining attachment. A bracket with hidden screws or clips may feel firmly bonded even when the tape is not the main resistance. Check the full perimeter and the manufacturer’s assembly information.
Follow the specified separation method for the bracket and finish. Work gradually through the adhesive layer using the approved approach rather than levering the base away from the painted panel. Keep any tool from contacting or scraping the visible finish.
Do not assume heat is required or that a household hair dryer is suitable for every coating. Paint condition, plastic trim, wraps, and protective film can change what is acceptable. Use heat only where the relevant instructions permit it.
Separate heat use from chemical cleaning. Adhesive removers can have temperature restrictions or flammable ingredients. Never heat an area wet with a remover, and follow the product’s own ventilation and handling directions.
If the paint begins lifting or the fascia distorts, stop. The remaining bond may require professional separation, and continuing can turn an accessory removal into refinishing work.
Cleaning Adhesive After the Bracket Comes Off
Treat residue separately from the bracket removal. Choose a remover explicitly compatible with the actual surface, and test it as directed in an inconspicuous comparable area. Cured factory paint, repaired paint, vinyl wrap, and matte finishes are not interchangeable.
Apply a controlled amount according to the label. Give it the specified time to work, then lift softened residue gently with a clean cloth. Change to a fresh cloth area as adhesive transfers rather than spreading glue across the bumper.
Avoid metal blades, abrasive pads, and strong household solvents. A plastic scraper can also mark paint if it is hard, dirty, or pushed forcefully. If gentle cleaning does not work, ask a detailer to assess the remaining material.
Wash and dry the area as the cleaner’s instructions require. A visible outline can be a finish difference rather than leftover glue. If the surface is smooth but the outline remains, additional solvent may accomplish nothing.
Grille Clamps, Quick-Release Holders, and Tow-Eye Mounts
For an aftermarket grille holder, identify its maker and exact release instructions. A clamp may grip from behind the grille or use a locking feature hidden by the plate. Support the assembly before releasing that feature so it does not drop onto the bumper.
Do not pry against grille slats or pull a clamp through an opening while it is still locked. Plastic grille members can flex or crack. Active shutters and other components may also sit behind the visible grille, making blind tool access unsuitable.
A quick-release mechanism may still have a security fastener. Remove or release that feature in the prescribed sequence. “Quick release” describes a particular design, not permission to pull every removable-looking holder forward.
For a tow-eye mount, follow the product’s instructions for loosening its locking arrangement and removing the vehicle-side arm. Do not assume thread direction or use the plate as a handle to apply leverage.
Preserve the vehicle’s original tow-eye cover and recovery equipment. Refit the cover if appropriate after the mount is removed. The plate holder itself is not a recovery attachment.
Inspect the Bumper and Mounting Points
After removal, inspect the exposed surface before deciding how to finish it. Look for existing holes, damaged inserts, scratches, dents, adhesive residue, and contact marks. Compare with your photographs so you do not mistake old damage for something that happened during removal.
A bracket can conceal an uneven finish or a previous repair. Do not immediately polish or fill the area before understanding what you see. Damaged paint, distorted holes, and loose inserts need different treatment.
Clean loose dirt gently and keep removed hardware away from the exposed paint. Do not probe holes with a long screwdriver to determine what lies behind them. Use the vehicle’s parts information or professional inspection for that question.
If the bumper contains nearby cameras or sensors, make sure removal has not disturbed their mounting or surrounding trim. An accessory coming off normally should not require recalibration by assumption, but any disturbed equipment or new warning deserves vehicle-specific assessment.
What to Do About the Holes Left Behind
Screw and rivet holes do not disappear when the bracket is removed. You can consider a compatible cosmetic plug, a replacement bracket that uses the intended mounting points, or professional bumper repair, depending on your goal.
A plug should suit the hole and panel rather than being forced into place. It is a cosmetic choice, not a structural repair or a blanket guarantee of sealing. Confirm clearance behind the opening before fitting any insert.
If you want the bumper restored to a continuous painted finish, ask a body shop about a repair appropriate to that material and coating. Household filler, random screws, and improvised sealant can create additional work later.
Do not hide damaged mounting points behind a new accessory and assume the attachment is sound. If the plate must be remounted, the bracket needs proper retention at the vehicle, whether or not the holes are visible from outside.
Choosing What Goes Back on the Vehicle
If you need a replacement bracket, choose by exact vehicle application and the approved mounting arrangement. Check plate position, bracket shape, hardware, nearby sensors, and available clearance.
A decorative frame is a separate decision. U.S. license plate frames can change the border around a compatible plate, but the frame does not create a sound mounting point where a bracket has been removed.
Confirm that the combined plate, frame, washers, and bracket fit the specified fasteners. Additional thickness changes how much screw engagement remains. Tightening harder cannot compensate for a mismatched thread, damaged insert, or screw that bottoms out.
If you intend to reuse the original bracket, inspect it before putting it back. A distorted base, broken retaining feature, or damaged gasket may prevent a secure fit even when the fasteners can be tightened. Check whether the service instructions require new adhesive pads or replacement retainers after removal. Do not assume tape that has been peeled off will provide the original attachment again. Keep the original mounting layout in your photographs so the replacement parts return to their intended positions.
Before driving, check that the official plate is securely displayed in the required position, with its identifying information visible. Inspect the assembly for movement and interference with nearby equipment. Do not leave a partially detached bracket in place for the next trip.
When Professional Removal Makes Sense
Get help if rivet drilling is required without clear access, fasteners are seized or spinning, the attachment is unknown, paint is lifting, or the fascia must be removed. A wrapped or recently repaired bumper also deserves advice from the installer or repairer before adhesive separation.
Give the technician the bracket’s identity, vehicle details, photographs, and your desired result. Say whether you want it reinstalled, replaced, or removed permanently. That affects which hardware and finish work need to be planned.
Ask whether the work includes correcting damaged inserts, replacing single-use retainers, cleaning residue, and dealing with exposed holes. Removing the visible bracket and restoring the bumper are not automatically the same service.
If you stop partway through, keep the removed pieces and do not drive with a loose assembly. A clear record of what has been released makes professional completion easier and reduces the temptation to improvise the final attachment.
Frequently Asked Questions
Can I remove the bracket by taking out the plate screws?
Only if those screws are also the vehicle-side attachment, which you must confirm. Often they release the plate and frame while separate hardware or adhesive holds the bracket.
Will removing the front bracket leave holes?
A bracket attached through the panel with screws or rivets normally leaves those existing openings. Adhesive-only designs can leave residue or reveal finish differences instead. Inspect the actual mounting before deciding.
What size drill bit removes license plate rivets?
There is no safe universal answer from the rivet’s visible head. Identify the fastener and use the vehicle-specific procedure, including depth and access requirements. Have a technician do the work if those details are uncertain.
Can I pull off an adhesive holder by hand?
Do not force it away from the panel. Confirm all other fasteners are released and use the specified adhesive-separation method. Stop if paint or the bumper surface moves with the holder.
Can a new plate frame replace the bracket?
A frame surrounds the plate; the bracket connects it to the vehicle. A frame alone does not repair mounting holes or replace the bracket’s attachment function.
Is it okay to drive without a front bracket?
That depends on how the required plate is displayed and the applicable rules. Plan a compliant mounting arrangement before removal rather than assuming that removing an accessory changes plate-display requirements.