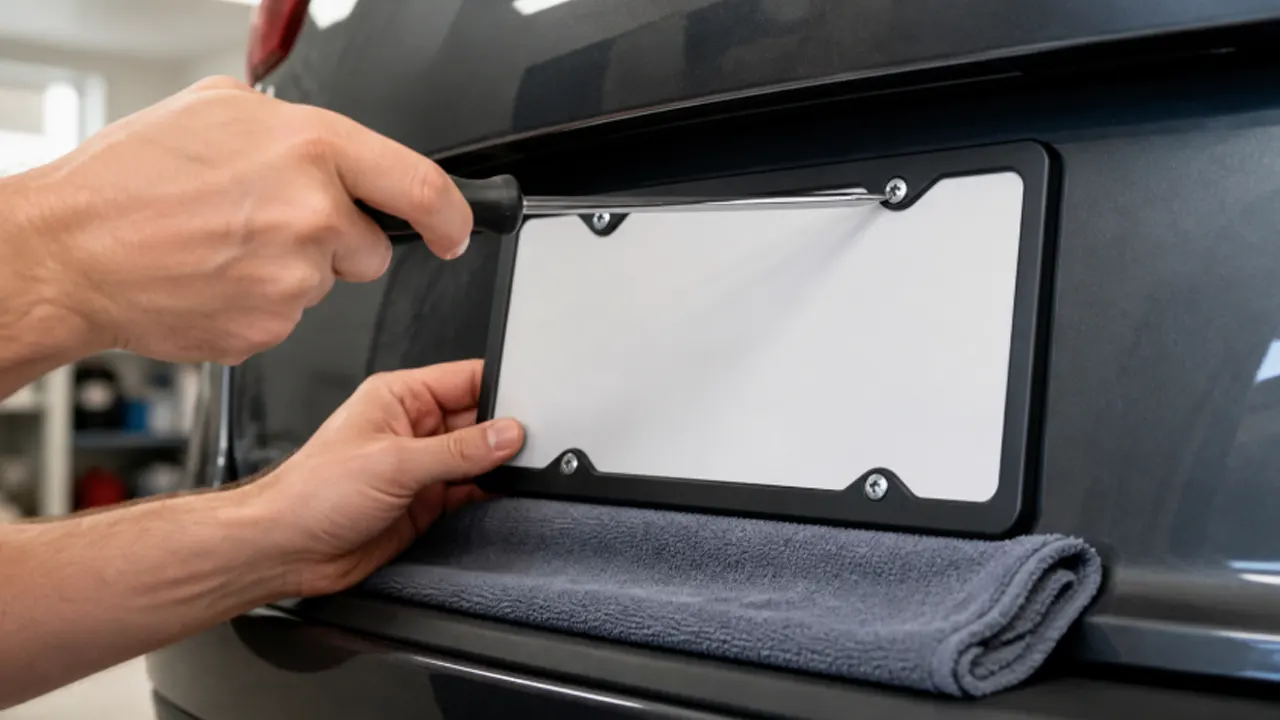
To remove a license plate frame, support the plate with one hand, expose the fasteners, loosen them with the correct driver, and lift the frame and plate away in their original order. Installation reverses that sequence, but the final fit matters: the frame should sit flat, stay clear of painted surfaces, and leave every required plate detail visible.
The job is usually simple. Damage happens when you guess at a screw head, pry off a cap from the wrong side, let the plate swing against the paint, or keep turning a fastener that is already spinning in its mount.
Before You Start, Identify the Assembly
Look at the complete stack before touching a screw. A vehicle may have a decorative frame over the plate, a plate inside a separate mounting bracket, or a frame and plate secured directly to the vehicle. Some fasteners are hidden under snap-on caps. Others pass through plastic tabs, threaded inserts, or clip nuts.
Take a quick photo. It gives you a record of the layer order, fastener locations, washers, spacers, and plate orientation. This is especially useful when you are removing dealer-installed hardware that may not match the vehicle’s original setup.
Tools You May Need
- A screwdriver or bit that fully matches the fastener head
- A non-marring plastic trim tool for removable screw caps
- A clean microfiber towel to protect the paint and hold loose parts
- A small container for screws, washers, caps, and spacers
- Penetrating lubricant only when appropriate for the fastener and surrounding finish
Do not start with a power driver. Hand tools give you better control and make it easier to feel a cross-threaded, seized, or spinning fastener.
How to Remove a License Plate Frame
- Park securely. Switch off the vehicle, set the parking brake, and work where you can see each fastener clearly.
- Protect the contact area. Hold a folded microfiber towel below the plate so a dropped screw or swinging plate cannot strike the paint.
- Remove screw caps correctly. Find the cap’s release edge or notch and lift gently with a plastic tool. If the cap design is unclear, stop and check the specific cap instructions. The detailed article on removing license plate frame screw caps covers the common cap styles.
- Support the plate and frame. Keep one hand on the assembly while loosening the upper fasteners. This prevents the lower edge from swinging into the vehicle.
- Loosen each fastener by hand. Keep the driver square to the screw head and use steady pressure. Alternate between fasteners if the frame begins to twist.
- Separate the layers. Once all fasteners are free, lift away the frame, plate, washers, and spacers. Keep them in order.
- Inspect the mounting points. Check for damaged threads, cracked tabs, rust, dirt, trapped grit, or marks caused by movement.
When a Screw Will Not Come Out
Stop if the driver slips, the screw head begins to deform, or the insert behind it spins. More force can turn a minor problem into a damaged bracket or body mounting point.
| What You See | Likely Issue | Best Next Move |
| Driver jumps out of the head | Wrong bit size or damaged head | Clean the recess, confirm the driver type, and reseat it squarely. |
| Screw turns but does not back out | Spinning clip nut, insert, or plastic mount | Stop turning and access or stabilize the rear mount if the vehicle design allows it. |
| Fastener will not move | Corrosion, thread damage, or thread-locking compound | Use the vehicle-specific service procedure or have a technician remove it. |
| Decorative cap will not release | Hidden hinge, tab, or one-piece cap | Identify the cap style before prying harder. |
How to Install a License Plate Frame
- Confirm fit before fastening. Place the frame over the plate and check that it does not cover required numbers, letters, stickers, or jurisdiction names.
- Clean the mating surfaces. Remove grit from the plate, frame, bracket, and nearby bodywork with a finish-safe method.
- Rebuild the stack in the correct order. Align the vehicle bracket, any approved spacers, the plate, and the frame. Do not add thick pads or washers unless they suit the mounting design.
- Start every screw by hand. Turn each fastener several threads before tightening. If it binds immediately, back it out and correct the alignment.
- Tighten evenly. Bring the fasteners down gradually, alternating sides. Follow the vehicle or bracket manufacturer’s torque instruction when one is provided.
- Perform a movement check. Press lightly at the corners. The assembly should not buzz, rock, or touch painted bodywork.
- Check visibility and vehicle functions. Stand behind the vehicle and verify plate visibility, lighting, camera view, tailgate operation, and sensor clearance.
Two-Hole and Four-Hole Installations
A two-hole frame relies on the upper fasteners and needs adequate support at the lower edge. A four-hole frame can control movement at all corners, but only when the vehicle or bracket provides four compatible mounting points. Do not drill new holes simply because the frame has four openings.
If a two-hole assembly rattles, diagnose the contact point before adding material. The license plate frame rattle guide explains how to separate loose-fastener noise from frame-to-plate or plate-to-body contact. If the existing screws are unsuitable, compare the mount before selecting a replacement with the license plate frame screw size guide.
Installation Mistakes That Cause Most Problems
- Using a nearly correct driver: it can round the head and make future removal difficult.
- Overtightening: this can distort a frame, crack a plastic tab, strip a threaded mount, or bow the plate.
- Allowing direct paint contact: a frame edge or trapped grit can move with vibration and leave marks.
- Assuming every hole should be used: unused decorative holes do not justify drilling the vehicle.
- Ignoring plate coverage: a frame that fits physically may still obscure information that must remain visible.
- Using one screw specification for every vehicle: thread type, diameter, length, and head style are mount-specific.
What Volume Buyers Should Approve Before Ordering
For a dealer program, retail kit, or private-label order, installation should be treated as part of the product specification. A frame that looks correct in a rendering can still create service calls if the fastener pack, lower support, or edge clearance is wrong.
| Approval Item | What to Confirm |
| Vehicle coverage | Exact target vehicles, brackets, plate formats, and mounting-hole patterns |
| Frame geometry | Plate opening, outer profile, hole locations, rear tabs, and edge clearance |
| Hardware | Thread type, usable length, head diameter, finish, washers, caps, and included tools |
| Installation result | No paint contact, no rattle, no plate bowing, and no interference with cameras or closures |
| Instructions | Layer order, cap operation, fastener cautions, and vehicle-specific exclusions |
Approve the assembled sample on the intended mount, not just the loose frame. The license plate frame size guide can help you define the dimensional checks, and you can discuss a custom frame and installation kit once the vehicle scope is clear.
Frequently Asked Questions
Can I remove a license plate frame without removing the plate?
Usually not. The same fasteners commonly hold both parts, so the plate and frame come away as one stack. Some decorative surrounds use separate clips, but you should confirm the design before pulling.
Should I use a drill or impact driver?
Start by hand. A powered tool can strip a head, cross-thread a mount, or overtighten the assembly before you feel resistance.
What if the screw spins but does not come out?
The nut, insert, or bracket behind it may be turning. Stop and inspect the rear mounting point or follow a vehicle-specific service procedure.
How tight should license plate frame screws be?
Tight enough to secure the assembly without bending the frame or plate. Use the vehicle or bracket manufacturer’s torque value when one exists; there is no safe universal torque for every mount.
Can I install a four-hole frame on a two-hole vehicle?
Yes, if the upper mounting points align and the lower edge remains stable without contacting paint. Leave the lower holes unused unless the vehicle has compatible approved mounting points.