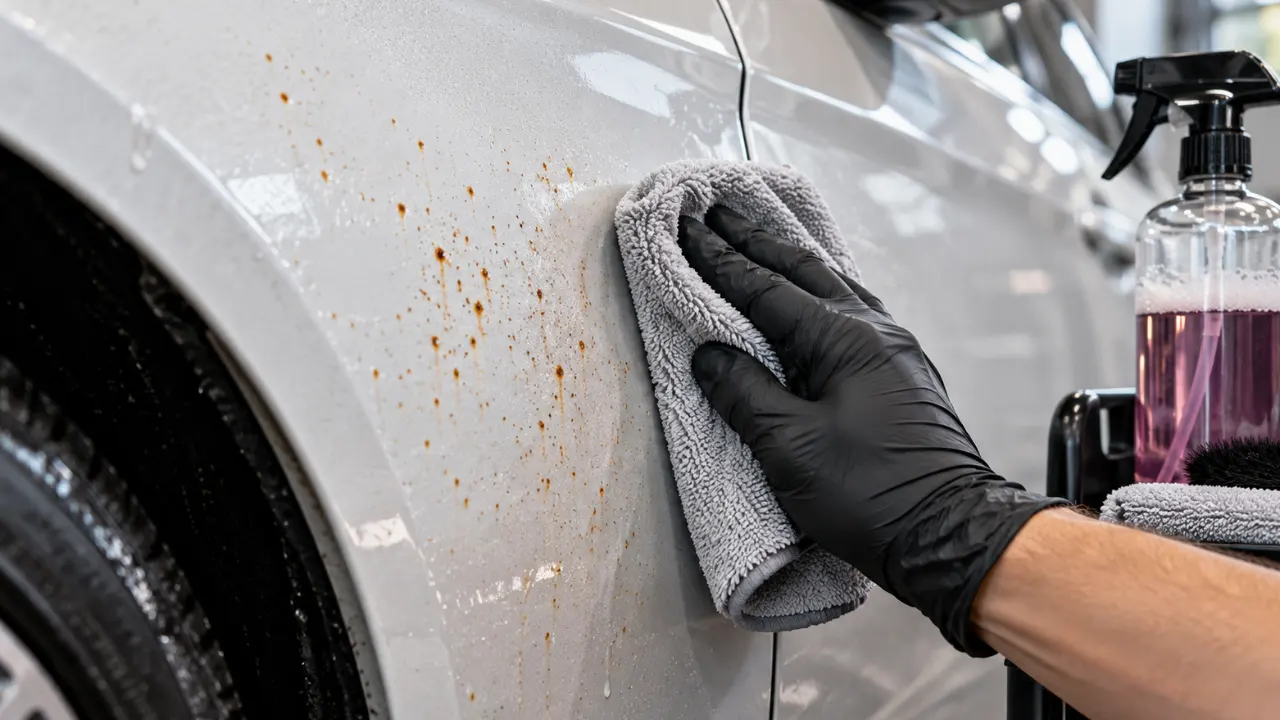
To remove rust stains from car paint, first establish whether you are looking at contamination on a sound finish or corrosion where the coating has failed. Wash the area, inspect it when dry, and use a product explicitly compatible with the paint and intended contamination. Follow its application and rinsing instructions, then check both the remaining mark and the source.
Do not treat blistered paint, exposed corroding metal, or a rusting seam as an ordinary stain. A cleaner may improve the appearance of a deposit, but it cannot replace missing metal or restore a failed paint system. When the distinction is unclear, have a qualified detailer or body shop assess the area before stronger treatment.
Rust-Colored Marks Do Not All Mean the Same Thing
Orange or brown spots may be external contamination, a trail from a nearby corroding part, or visible corrosion at a damaged coating. Other deposits can also resemble rust. Color is a useful observation, not a complete diagnosis.
A series of small specks on otherwise sound paint suggests a different problem from a raised blister spreading from a chip. A vertical trail below a screw or trim edge gives you a place to inspect, but it does not prove that the first visible component is the source.
Note where the marks appear and whether they return after cleaning. Photograph the whole area and a close view before treatment. A detailer can use that context more effectively than a description saying only that the car has orange dots.
Avoid scraping with a blade or digging with a fingernail to identify the mark. An inspection should not create the paint damage you are trying to distinguish from contamination.
Use the Pattern to Decide What to Check Next
| Observation | Possible issue to investigate | Sensible next step |
|---|---|---|
| Small scattered orange specks | External iron-containing contamination or another deposit | Inspect the sound finish and assess a compatible targeted cleaner |
| A streak below a fastener or accessory | Deposits carried from a corroding component | Inspect the source and surrounding attachment before cleaning again |
| A mark centered on a stone chip | Exposed substrate and possible corrosion | Have coating damage assessed rather than relying on stain removal |
| Raised, lifting, or cracked paint | Failure beneath or within the finish | Stop cosmetic treatment and seek repair advice |
| A recurring mark from a seam | Hidden source, trapped contamination, or corrosion | Ask for inspection of the seam and relevant access |
| Brown material on a painted plastic panel | Surface contamination or a nearby metal source | Identify the deposit; do not assume the plastic panel itself is rusting |
These are inspection prompts, not diagnoses made from a photograph. A vehicle can have more than one condition at the same time. Sound paint elsewhere does not establish that the area around a chip or fastener is sound too.
Inspect the Paint Before Choosing a Product
Look at the clean, dry area in useful light. Check for chips, lifting clearcoat, cracks, swelling, pitting, previous repair edges, and a mark that appears to come from beneath a coating. Record anything that changes the surface rather than only the color.
Identify any special finish or added layer. Matte paint, wrap film, protective film, repaired paint, and a coated surface may have specific cleaning restrictions. A product’s approval for ordinary painted bodywork does not automatically establish compatibility with every layer now on the car.
Check nearby surfaces as well: plastic lamps, rubber, unpainted trim, badges, glass, and decorative finishes. The product can reach them during application or rinsing even if the stain itself is on paint.
If you cannot identify the finish or the panel has an uncertain repair history, ask the product maker or a suitable professional. Do not use a strong cleaner as a test of whether the surface is durable enough to survive it.
Find the Source of a Rust Trail
Follow the pattern upward or toward the adjacent joint without dismantling unfamiliar parts. Check visible fasteners, a plate bracket, trim attachments, and other nearby metal components. A deposit can be carried onto paint from something that is not part of the painted panel itself.
Look for an insecure accessory, retained dirt, or a location that stays wet. Do not assume the frame body is the culprit merely because the trail appears near the license plate. Screws, another mounting part, or a damaged panel edge can require a different response.
If access requires removing a plate assembly, support it and use the appropriate procedure. Keep hardware organized and stop when a fastener spins, seizes, or the mount begins to move unexpectedly. The plate-frame removal sequence helps distinguish the surround from the mounting system behind it.
Consider recent work around the vehicle as part of that history. If drilling, grinding, or metal work occurred nearby, tell the person assessing the marks and identify when you first noticed them. Do not assume that this proves the source, but do not omit it either. Before any further work, ask how the finish and nearby components will be protected and how loose debris will be collected. Keep that discussion separate from deciding which cleaner to use on the marks already present.
A hidden seam or inaccessible component deserves a professional inspection. Cleaning the visible trail repeatedly without addressing a continuing source can leave you doing the same cosmetic work while the underlying problem progresses unnoticed.
Wash Away Ordinary Dirt First
Use a suitable automotive wash method to remove loose grit and ordinary grime before targeted treatment. Rinse first so a cloth or sponge does not drag particles across the finish. Choose clean materials appropriate to the surface.
Work on a cool panel in suitable conditions. Avoid direct heat or weather that causes the cleaner to dry before the instructed rinse. Make sure you have water and the necessary materials ready before applying a product with a limited working period.
Rinse off the wash product and dry as appropriate for inspection or the next product’s instructions. Some targeted cleaners have particular application conditions, so do not assume that either a dripping wet panel or a completely dry one is always correct.
Inspect again. A mark that disappeared during ordinary washing did not need a stronger treatment. If a stain remains, the cleaner panel lets you assess its shape and the coating around it with less guesswork.
Choose a Cleaner for Paint Contamination, Not Every Product Called Rust Remover
Check the label for the exact intended use and compatible surfaces. A product for loosening seized fasteners, treating bare metal, cleaning a toilet, or converting corrosion is not automatically a cleaner for intact automotive paint.
Iron-fallout products are one category used for external iron-containing contamination. For example, SONAX describes its Iron+Fallout Remover as intended for rust-bloom residue and industrial dust on painted surfaces, including painted plastic. That is a specific product description, not proof that all rust-colored damage on all finishes can be cleaned away.
Read restrictions, safety information, dilution if relevant, dwell instructions, rinsing, and repeat-treatment guidance for the exact formulation. Different products from the same manufacturer can have different chemistry and uses. A familiar brand name is not enough to identify the correct bottle.
If the label does not support your finish and task, do not improvise. Ask the manufacturer or choose professional assessment. A controlled suitable treatment is preferable to testing several unrelated chemicals in succession.
Test Compatibility Before Treating the Visible Area
Follow the product and finish maker’s test guidance. Where a test is appropriate, use a small representative location with the same known finish, not an unrelated unpainted surface hidden elsewhere on the car.
Use the intended concentration, application, and rinse method. Let the area return to the condition needed for inspection and look for an unwanted change in gloss, color, texture, or coating integrity. Stop if the surface softens, hazes, lifts, or otherwise changes unexpectedly.
A successful small test reduces one uncertainty; it does not guarantee that every part of a repaired or aged panel will respond the same way. Keep the treated area limited to what is needed and inspect as you proceed.
Do not continue adding products over a reaction. Rinse or respond as the safety and product instructions require, then seek advice. Combining a second cleaner with the first can create a new compatibility and safety problem rather than correcting the original one.
Apply a Targeted Treatment in a Controlled Area
Protect yourself and surrounding surfaces as the product instructions require. Keep application controlled, especially near trim, lamps, seals, open joints, and equipment. Do not overspray the whole rear of the car because the stain is below one screw.
Apply only under the specified conditions and use the stated working time. There is no universal dwell period for every iron or rust-stain product. Do not leave a cleaner on longer because the mark looks stubborn or a video used a different formulation.
Use only the agitation method permitted for the product and finish. A gentle compatible tool is not the same thing as a coarse pad, steel wool, or a stiff household brush. If the mark resists the suitable process, stop and reassess rather than increasing pressure automatically.
Watch the area during treatment so product does not dry unnoticed. A color-changing reaction, where a product is designed to show one, is not a complete diagnosis of the panel and does not prove the paint is undamaged beneath the deposit.
Rinse Thoroughly, Dry, and Reassess
Remove the treatment as directed and rinse the affected area and nearby places where runoff collects. Keep residue from remaining around seams, accessory edges, or fastener recesses. Follow the maker’s instructions for any additional washing.
Dry with a clean material appropriate to the surface and inspect in good light. Compare the area with the starting photographs. Ask whether the deposit is gone, whether a discolored mark remains, or whether an underlying chip or damaged finish is now easier to see.
Repeat only if the product instructions support it and the condition still appears to be suitable surface contamination. Repeatedly treating an unchanged mark can become a way of avoiding the need for another diagnosis.
If you can still see a defect but no removable deposit, ask a qualified detailer or body technician to assess it. Cleaning, correction, touch-up, and corrosion repair are different jobs; finishing one does not establish that the others are appropriate.
When the Stain Is Around the License Plate
Support and remove components only when necessary to reach the affected surface or inspect the source. Photograph how the plate, frame, washers, and bracket are assembled. Do not mix hardware from different positions or substitute a longer screw without checking the mount.
Inspect both the attachment and the painted contact area. An accessory can hold dirt against paint, while a corroding fastener can produce a trail. Those conditions can occur together, so fixing one visible mark may not address the full problem.
Use separate care guidance for the official plate and frame. A cleaner intended for body paint is not automatically suitable for reflective sheeting, registration stickers, printed decoration, plating, or every plastic. The instructions for cleaning the plate and cleaning its frame keep those surfaces distinct.
Reinstall only after the area is suitably dry and any mounting fault has been resolved. Check plate visibility, nearby illumination and camera clearance, and secure attachment. A cleaner-looking assembly should not conceal a loose bracket or a damaged mounting hole.
Do Not Replace Diagnosis With Household Cleaning Experiments
Vinegar, acidic kitchen products, abrasive paste, scouring powder, and similar household remedies are not a substitute for a product explicitly suitable for the finish and contamination. Their concentration, additives, and effect on nearby materials may differ from the instructions you actually need.
Likewise, a penetrating oil can be useful for a fastener task without being the correct choice for a painted stain. Do not infer surface-cleaning suitability from its ability to loosen mechanical parts. Keep the repair and cleaning steps separate.
Avoid combining chemicals or trying to neutralize one with another household product. Follow the safety directions for the chosen cleaner and ask for appropriate help if a reaction or spill occurs. A second improvised mixture can make the situation harder to manage.
If a suitable commercial product does not support your finish, that is a reason to seek advice—not a reason to move down a list of stronger home recipes. Preserving the sound coating matters more than making the stain disappear during one session.
Clay, Polish, and Rust Converter Have Different Jobs
Mechanical decontamination may be appropriate for some bonded surface deposits, but it needs a suitable finish, method, and product. It is not a universal next step for every brown mark. Incorrect use can add marks or leave you needing further correction.
Polishing addresses particular surface conditions through its own process; it does not repair missing coating or metal. Do not polish aggressively around a chip or blister to make the corrosion look less obvious. A technician should determine whether correction is suitable and what result is realistic.
A rust converter is intended for an identified corrosion-treatment task under specified conditions. It should not be applied indiscriminately to intact paint as if it were a stain remover. The product’s intended substrate and later coating requirements matter.
When online instructions jump between these products, check whether the author is discussing surface contamination or actual body repair. A method that ends with sanding, priming, and repainting is not a gentle cleaning procedure for a sound finish.
Know When the Panel Needs Repair Instead of More Cleaning
Stop cosmetic treatment when you find blistering, coating separation, exposed corroding substrate, a spreading seam problem, or another defect suggesting the finish is no longer sound. Have the area assessed before hiding it with a decal, accessory, or more protection product.
A repair may need access beyond the visible face, preparation appropriate to the material, and a compatible coating or corrosion-protection system. 3M’s collision-repair resources describe corrosion protection as work on and beneath repaired surfaces, not simply removal of a visible orange color.
Ask the body shop to identify the affected part and the likely source. Discuss what the repair includes and what finish result can reasonably be expected. A photograph of the stain can help start the conversation, but it cannot establish the entire repair scope.
Do not assume a replacement panel is always necessary, or that a small spot always means a small repair. The condition, material, location, access, and vehicle repair requirements control that decision. Let inspection answer it rather than the stain’s apparent size.
Reduce Recurrence by Addressing the Source
If a nearby fastener or accessory is responsible, choose replacement or repair appropriate to the mounting system. Check thread, length, head, washers where used, and the vehicle’s instructions. A shiny new screw is not automatically the correct screw.
Keep the area accessible for ordinary cleaning and inspect places where dirt and moisture collect. Do not seal an unidentified seam or block a drain simply to stop a visible trail. That can conceal the source rather than resolving it.
A different frame may be appropriate if the existing one is damaged, poorly fitted, or contributing to contact problems. Choose the exact construction and fit you need; check the finish, fasteners, exposure, and complete mounting arrangement rather than relying on a material label. The explanation of frame corrosion and its sources helps separate the frame body, finish, fasteners, and surrounding parts.
After a successful clean or repair, maintain protection only as appropriate to the finish. Wax or another surface product does not replace repair of failed paint. Keep a record of what was done so a recurring mark can be investigated rather than treated as a completely new mystery.
Make a Useful Record if the Mark Returns
Take a photograph after cleaning from the same angle as the starting image. Note the location, approximate affected area, product used, and whether any hardware or accessory was removed. You do not need a complicated maintenance log to preserve these details.
When the mark reappears, compare its starting point and shape. A trail returning from the same joint may direct attention to a continuing source, while new scattered specks elsewhere may call for a different investigation. Neither pattern should be diagnosed solely from color.
Share the record with the professional assessing it. Include known paint repairs, films, coatings, parking exposure, and whether the mark changes after rain or washing. Keep observations separate from conclusions: “it returns below this screw” is more useful than insisting that the frame must be rusting.
Avoid a cycle of stronger treatment at each recurrence. If the source remains unresolved, cleaning the same spot harder is not progress. Use the new information to decide whether the next step is a different compatible cleaning method, hardware work, or a body repair assessment.
Frequently Asked Questions
Why can orange spots appear on a painted plastic bumper?
The color can come from material deposited on the painted surface or carried from a nearby metal component. It does not establish that the plastic itself is rusting. Inspect the finish and source before choosing a treatment.
Are all iron removers safe for all painted surfaces?
No general product category can settle compatibility with every finish, repair, film, or surrounding material. Use the exact formulation’s instructions and check the vehicle or finish guidance. Test where appropriate and seek advice when the surface is uncertain.
Should you remove the plate frame every time you wash?
Usually it is not necessary for ordinary visible dirt. Removal is useful when a justified inspection or trapped contamination requires access and you can reassemble the mount correctly. Avoid unnecessary disturbance of unfamiliar or damaged hardware.
Can cleaning permanently prevent the stain from returning?
Not by itself if a continuing source remains. Cleaning removes suitable deposits; hardware, trapped contamination, coating damage, or corrosion may need separate attention. Recheck the area after ordinary exposure instead of promising a permanent result from one application.
What if the rust-colored mark disappears but a chip remains?
Treat the chip as a separate condition. Removing the deposit does not restore the missing coating. Ask about an appropriate repair for that area rather than assuming that a final layer of wax has completed the job.