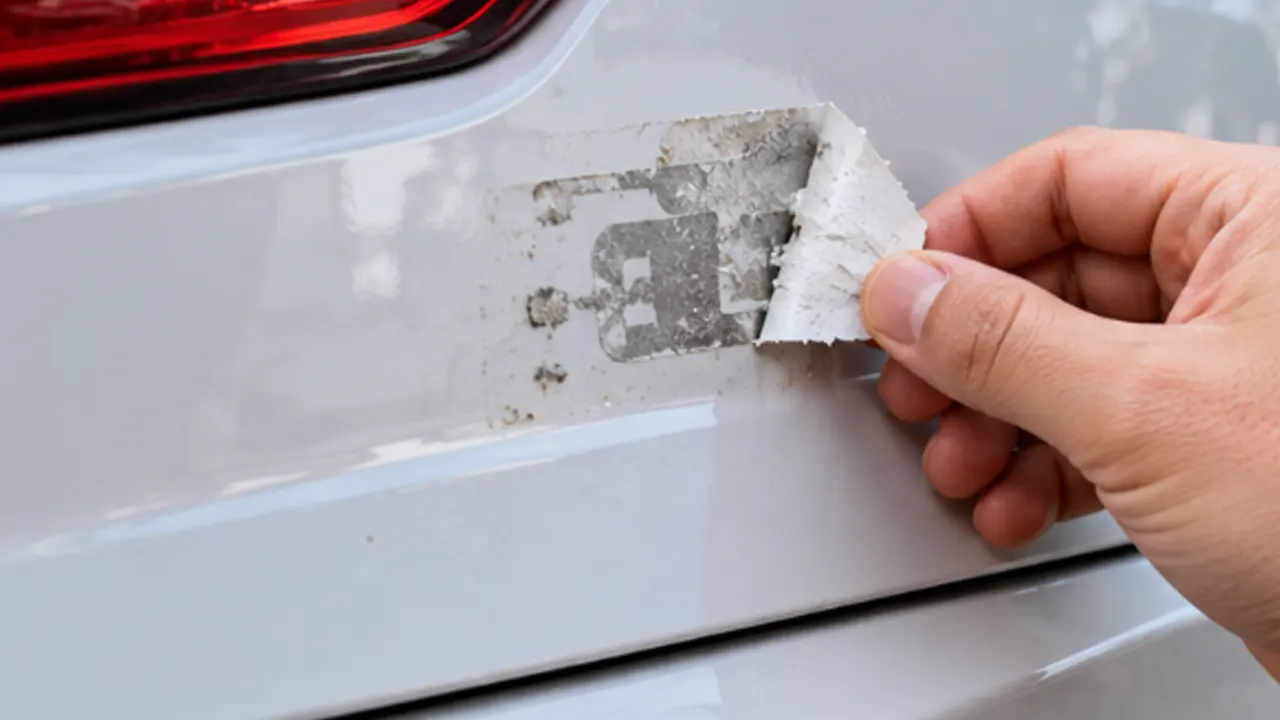
To remove a dealer sticker from your car, wash the area, gently warm the decal if the finish allows it, lift an edge with your fingernail, and peel slowly. Treat the remaining adhesive with a remover approved for that particular surface, then wash and dry the panel. If the dealer logo is a raised badge, first find out whether adhesive tape, pins, screws, or clips hold it in place. Pulling an unfamiliar badge can leave holes or lift damaged paint.
A thin vinyl decal on sound factory paint is a different job from a chrome-look emblem on an older, repainted tailgate. The safest starting point is identifying what you have and what it is attached to. You can make a car look cleaner without turning a small cosmetic change into paint repair.
Identify the Sticker, Badge, and Surface First
Look at the branding from the side. A flat dealer decal sits close to the panel and may consist of one sheet or separate vinyl letters. A raised badge has a noticeable thickness. It may have foam adhesive behind it, but thickness alone does not reveal how it is attached. Some emblems also use locating pins or mechanical fasteners.
If you cannot see how a badge is attached, ask the dealer or check the vehicle’s body repair information before removing it. Access behind the panel, when provided by the vehicle’s normal service procedure, may reveal nuts or clips. Do not dismantle interior trim just to investigate an emblem without knowing how the trim releases.
Next, identify the surface. Painted metal, painted plastic, textured trim, glass, window tint, vinyl wrap, and paint protection film need different treatment. A chemical labeled for cured automotive paint is not automatically suitable for a wrap, matte clear coat, plastic trim, or tinted window.
Check for peeling clear coat, chips around the sticker, repainting, or an unusually soft finish. Photograph the area before working, especially if you plan to ask a dealer or detailer for help. Stop if the sticker appears to be holding loose paint in place.
| What you see | Likely attachment | Sensible starting point |
|---|---|---|
| Thin, flexible lettering or decal | Pressure-sensitive adhesive | Wash, test the finish, and begin a slow peel |
| Raised emblem with foam visible behind it | Possibly adhesive tape | Confirm the attachment before separating the tape |
| Raised emblem with unexplained resistance | Pins, clips, screws, or strong adhesive may be present | Check installation information instead of pulling harder |
| Branding printed on a removable plate frame | Frame attached with plate hardware | Remove or replace the frame using the correct screws |
| Marking on a wrap or protective film | Adhesive bonded to another film | Ask the film installer about removal compatibility |
Gather Supplies That Match the Job
For a straightforward decal on sound painted bodywork, gather automotive wash soap, water, clean microfiber towels, and a consumer adhesive remover explicitly labeled for that finish. A household hair dryer may help soften an old decal, but only when the surface manufacturer permits gentle heat. Keep the product label available so you can follow its application, dwell, cleanup, ventilation, and protective-equipment instructions.
Your fingernail is a reasonable first tool for lifting a loose vinyl corner. A plastic tool can still scratch or gouge paint if its edge is hard, dirty, or pushed under pressure. Do not assume the word “plastic” makes scraping harmless. If the edge will not lift without force, change the approach or ask a detailer.
For a confirmed adhesive-only raised emblem, a detailer may separate the foam tape with suitable soft line. That method requires care around paint and is unsuitable for pinned or mechanically fastened badges. Do not buy a line, saw, eraser wheel, and powerful heat gun before you know what the job actually requires.
You do not need acetone, gasoline, lacquer thinner, a metal razor, or an abrasive household pad for routine dealer decal removal. Their risks to paint, plastics, coatings, or personal safety outweigh their convenience for this task. Pick a product by its stated surface compatibility rather than by how quickly it dissolves something in a video.
A powered adhesive-removal wheel deserves separate consideration. It is a tool with its own surface restrictions and operating instructions, rather than a general substitute for slow peeling. If a brittle decal appears to need machine removal, ask an experienced detailer to assess the paint and panel material. That is especially sensible on repainted parts or plastic bumper covers where you do not know the coating history.
Step 1: Wash and Inspect the Area
Park out of direct sun and allow a hot panel to cool. Wash the decal and a generous area around it using normal automotive washing methods. Rinse grit away before moving a cloth across the paint. Dry with a clean towel so you can see the decal edge and the condition of the surface.
This first wash also helps separate dirt from damage. Road film around a sticker can look like adhesive. A dark outline may be grime rather than a change in paint color. You want to know what remains after a gentle clean before deciding whether heat or a remover is necessary.
Look again for chips and lifting paint along the sticker. If the panel was repainted, ask the repairer about coating compatibility and curing before applying chemicals or heat. There is no universal waiting period that covers every paint system and repair.
Keep nearby trim and rubber seals in mind. A remover suitable for paint may affect adjacent material. Apply and control it as the label directs rather than flooding the badge, door gap, or tailgate handle.
Step 2: Test the Product on a Comparable Hidden Area
Use a small inconspicuous spot on the same type of finish to check the remover according to its label. A successful test on glass does not tell you whether it is safe on painted plastic. A test on glossy factory paint does not establish compatibility with a matte panel or vinyl wrap.
Let the test area dry and inspect it in normal light. Look for a change in color, gloss, texture, softness, or tackiness. If anything changes, stop using the product. Contact the finish or film installer before trying another chemical.
A spot test reduces uncertainty; it does not promise that all paint under an old decal is sound. Adhesive may be bonded to weak clear coat that looks normal until it is disturbed. Keep that limitation in mind as you lift the first corner.
Some professional adhesive cleaners are restricted to occupational use. A technical sheet can explain compatibility principles without making that product a suitable consumer recommendation. Choose an appropriate consumer product and follow its own directions.
Step 3: Loosen the Decal With Gentle Warmth
Try lifting a loose corner before adding heat. A recently applied sticker may peel without it. If the decal is brittle or firmly bonded, modest warmth from a moving hair dryer may help when the finish permits. Use a gentle setting and work gradually rather than heating one spot continuously.
Do not use a fixed temperature or distance copied from another vehicle as a guarantee. The decal, panel material, paint condition, and appliance all vary. Avoid overheating plastic, trim, wraps, or protective film. Stop if the surface changes appearance or the material becomes unusually soft.
Keep heat separate from chemical use. Many adhesive removers are flammable or have specific temperature restrictions. Remove the heat source, let the panel return to the product’s permitted conditions, and follow the label before applying any solvent. Do not heat a surface wet with remover.
If warmth does not make the sticker easier to lift, increasing heat is not automatically the next step. Old graphics, deteriorated paint, and multiple film layers can require professional removal. A stubborn corner is useful information about the job, not a challenge to apply more force.
Step 4: Peel Slowly and Watch the Paint
Once you have an edge, fold the loose portion back near the panel and pull slowly. Support a narrow strip close to where it is releasing instead of tugging on a long tail of vinyl. Change your pulling direction gently if the sticker starts to tear.
Watch the area where adhesive separates from the finish. If paint comes up with the sticker, stop. If the decal breaks into small pieces, work on one small section at a time after reassessing the surface. Do not scratch through the printed layer just to create a new starting point.
Separate vinyl letters often come off individually. Work systematically so you do not overlook punctuation, a small logo, or a faint clear film around the name. Photographing the lettering beforehand can help you compare the cleaned panel later.
Some adhesive will probably remain. You do not need to remove the sticker and all its glue in one pull. Trying to achieve a perfectly clean surface at this stage often encourages hard scraping or repeated rubbing. Get the decal off gently, then treat the residue as a separate task.
Removing an Adhesive Dealer Badge
For a raised emblem, proceed only after confirming it is attached solely with adhesive. Protect the surrounding finish as the finish manufacturer allows. If there is enough access, suitable soft line can be worked through the foam adhesive behind the badge while keeping it away from the painted face.
The line should separate the tape, not saw across the clear coat. Keep the badge supported so it does not swing into the panel when it releases. Avoid levering one end with a screwdriver. Pulling against the paint uses the panel as a fulcrum and can damage it.
If the line meets a firm obstruction, stop. It could be a locating pin or another attachment. Do not assume extra sawing will get past it safely. Likewise, if the badge will not move without deforming, ask a dealer or body shop to identify the retention method.
Remove remaining foam in controlled amounts using a compatible method. Thick adhesive may need several applications of a suitable remover, following its dwell and cleanup instructions. Resist the urge to rub one small area hard until it heats up.
Keep the badge if you want a reversible cosmetic change, but understand that replacement adhesive and careful alignment may be needed to reinstall it. An emblem with broken pins or damaged finish may not be reusable.
What to Do With Pins, Screws, or Holes
A mechanically attached badge is a bodywork job rather than a simple sticker peel. Screws, clips, and locating pins may pass through the outer panel. Removing the emblem can expose holes that were previously hidden.
Do not fill those holes with household sealant or cover them with an unrelated accessory. A body shop can explain suitable sealing, refinishing, or replacement trim options for that location. Water management and corrosion protection matter as much as appearance.
Do not enlarge holes or drill out unknown fasteners without the relevant repair procedure. Behind a trunk lid or tailgate may be wiring, a camera, latch components, trim, or structural features. What looks like an empty panel from outside may not be empty.
If you are deciding whether the cleaner look is worth the repair, get an estimate before removing the badge. You may prefer leaving the emblem, replacing it with a compatible part, or having the removal completed with a planned paint repair.
Remove Adhesive Residue Without Grinding It Away
Use a remover labeled for the exact finish. Apply the amount and method specified by the manufacturer. Some products are applied to a cloth; others have different directions. Give the product the stated time to work instead of immediately scrubbing.
Wipe gently with a clean section of microfiber and change to a fresh area as glue transfers. Reusing the same sticky cloth spreads adhesive and can drag dirt over the finish. Repeat controlled applications if the label permits rather than saturating a large area.
Keep remover out of panel seams and away from sensitive trim unless its label allows those surfaces. Do not mix several cleaners to speed up the job. If the first product is unsuitable or ineffective, clean it off as directed before seeking advice about another approach.
Once the residue releases, wash the treated area according to the product instructions and dry it. Inspect before applying wax, sealant, or another finish treatment. Follow the coating maker’s care directions if the car has a ceramic coating or specialty finish.
A clean surface should not feel tacky. If it does, identify whether adhesive remains or whether the finish has softened. Persistent softness, color transfer, or gloss changes call for a professional assessment rather than more solvent.
Dealing With a Visible Outline After Removal
An outline does not always mean glue is still present. The finish under a long-standing decal may have aged differently from the surrounding panel. Dirt, wax buildup, clear-coat damage, and changes in color or gloss can also leave a visible shape.
Wash and inspect first. Look at the area from several angles in good light. If the surface feels smooth but the outline remains, additional adhesive remover may not help. You may be looking at a finish difference rather than residue.
Avoid automatically sanding or machine-polishing the spot. Polishing removes some finish and can be inappropriate for thin paint, matte coatings, damaged clear coat, or films. A qualified detailer can judge whether a careful correction is suitable. Some color differences cannot be removed by cleaning.
Do not promise yourself that the mark will disappear after a few days in the sun. Its cause determines what happens next. If you want an even finish, ask for an assessment before using a more aggressive product.
Special Cases: Glass, Wraps, and Older Paint
A dealer decal on plain exterior glass may tolerate different cleaners from painted bodywork, but the window can have tint, coatings, antenna elements, or defroster lines. Know which side the decal is on and what lies under it. Avoid blades and scraping on tint or printed electrical elements.
With a vinyl wrap or paint protection film, pulling a sticker can pull the underlying film too. Heat and solvents may change its appearance or adhesive. Contact the installer and identify the film product before beginning. A successful removal on painted metal says little about film compatibility.
Older paint deserves a slower approach. Chalky, cracked, or peeling finishes may not survive adhesive removal intact. Single-stage paint can behave differently from modern clear-coated systems, and a previous repair may introduce another variable.
On an unfamiliar used car, the absence of a repaint record is not proof of original paint. If the decal sits across a repair edge, chip, or obvious coating defect, professional help may be less expensive than repairing damage after a forced peel.
Finish the Rear of the Car With a Plain or Custom Frame
After the dealer decal is gone, you may notice that the dealer’s name remains on the license plate frame. That is usually a separate, removable accessory. Follow the vehicle’s mounting arrangement, support the plate while removing its screws, and preserve any reusable hardware.
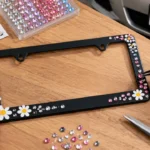
You can choose a plain frame if you want a quiet finish, or custom license plate frames if you prefer your own wording or design. Check the plate format, mounting holes, opening, and vehicle recess before choosing. A decorative border must leave the required number, jurisdiction details, and registration markings visible.
A new frame will not cover or repair damaged paint where a badge was removed. Treat the paint problem separately. The useful connection is visual: removing unwanted branding lets you decide what, if anything, belongs around your plate.
If you are reusing the existing plate hardware, check its condition and fit through the new frame. Extra thickness can change screw engagement. The instructions for removing a license plate frame can help with that separate task.
When to Hand the Job to a Detailer or Body Shop
Get help if the paint begins lifting, the badge attachment is uncertain, the panel was recently repaired, or a wrap or specialty coating is involved. A detailer may handle suitable adhesive removal and finish correction; a body shop is the better contact for holes, failed paint, or mechanical attachments through a panel.
Tell the professional what you have already used. A product name and the sequence of heat, peeling, and cleaning are more useful than simply saying the sticker is stubborn. Bring photos if the surface looked different before work started.
Before collecting a newly purchased car, you can also ask the dealer to omit or remove its decal and plate frame. Agree on what “remove the branding” includes and inspect the finish at handover. It is easier to settle that detail before delivery than after trying several home remedies.
Frequently Asked Questions
Can I remove a dealer sticker without heat?
A fresh decal with a loose edge may peel without heat. Wash first and try a gentle lift. If it resists, do not scrape harder; assess the finish and use a compatible removal method or ask a detailer.
Is rubbing alcohol safe for removing dealer sticker residue?
Not on every surface or coating. Check the vehicle or finish care instructions and the exact product’s intended uses. Do not assume a concentration recommended for glass is suitable for a wrap, matte paint, or repaired panel.
Will a plastic scraper scratch car paint?
It can. A dirty, sharp, or rigid plastic edge can mark the finish, especially under pressure. Try lifting a loose edge with your fingernail and avoid scraping an unfamiliar coating.
Why is the dealer name still visible after the glue is gone?
The remaining outline may be a difference in aging, gloss, or coating condition. More adhesive remover will not necessarily fix it. Wash, inspect, and ask a detailer whether correction is appropriate.
Can I remove a badge attached with pins?
It may be removable, but holes or other attachments can remain. Confirm the method and plan any required bodywork before removing it. Do not force it as though it were a vinyl decal.
Should I remove a dealer sticker from a leased car?
Review the lease and ask the lessor or dealer about the specific accessory. Adhesive removal can affect paint or film, and a reversible-looking change is not a guarantee of an acceptable return condition.