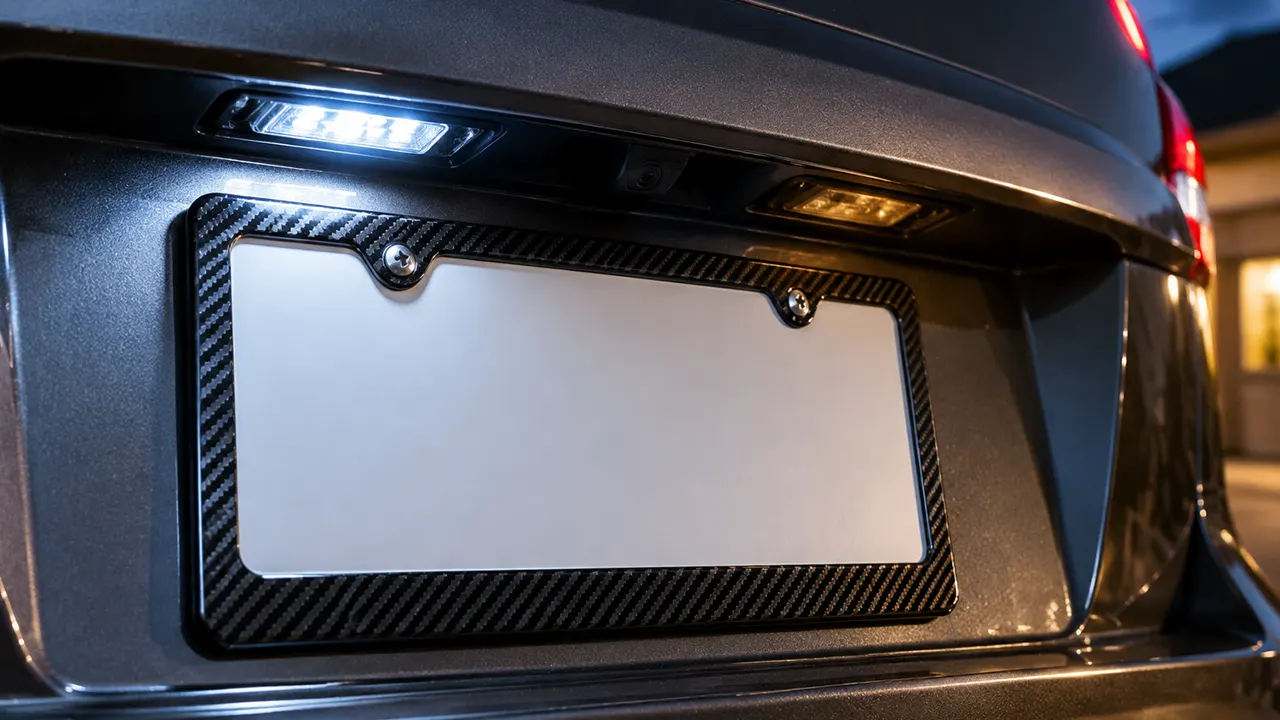
If your license plate light is not working, first switch on the exterior-light mode that normally powers it and check whether one lamp, both lamps, or only part of the plate appears dark. A failed bulb is one possibility, but a damaged socket, loose connection, moisture, supply or ground fault, wiring problem, or incompatible replacement can produce similar symptoms. Identify the pattern before buying parts.
The most useful distinction is between a lamp that does not illuminate and a working lamp whose light is blocked. A new frame, dirty lens, or displaced plate can cast a shadow without causing an electrical failure. Check that difference early, then use the correct information for your exact vehicle.
Begin With the Lighting Mode and a Clear View
Park safely and use the owner’s manual to switch on the lights that include the rear plate lamps. Daytime running lights or an automatic setting in daylight may not produce the same result as the appropriate exterior-light mode.
Look directly at the plate area with the trunk or tailgate closed normally. Opening the panel changes the position of the lamps relative to the plate, which can make the light pattern misleading.
If the vehicle has two lamps, compare them. Is one completely dark, one dimmer, or the whole plate unlit? Clean loose dirt from the outside of the lens gently if it prevents a clear view. Do not mistake a dirty lens for a failed bulb.
Take a photograph or short video of the symptom for reference, but do not use camera exposure as a compliance test. A phone can brighten a dark scene automatically. Your purpose is to record which lamp is affected and when it happens.
Use the Symptom to Choose the Next Check
Different patterns help narrow the investigation, although none proves the cause by itself. A single dark lamp often directs attention toward that lamp and its connection. Two dark lamps make a shared supply or control worth checking, but the circuit arrangement must be confirmed rather than assumed.
Flickering can arise from an intermittent connection, a damaged component, or an incompatible replacement. A problem that started after work near the plate deserves an inspection of the parts that were disturbed.
| Symptom | Checks worth prioritizing | What not to assume |
|---|---|---|
| One lamp is dark | Correct bulb or assembly, seating, local socket and connector | That a shared fuse must be responsible |
| Both lamps are dark | Correct light mode, circuit information, shared connections or supply | That both bulbs or a particular fuse have definitely failed |
| Lamp flickers | Connections, moisture, wiring movement, replacement compatibility | That a resistor will fix every LED issue |
| New bulb still does not work | Exact specification, seating, socket condition, power and ground diagnosis | That a second new bulb is the next necessary purchase |
| Lamp works but plate has a dark band | Lens cleanliness, frame border, plate and lamp position | That the electrical circuit is faulty |
| Failure began after accessory installation | Recently disturbed hardware, connectors, routing, and light obstruction | That every plate frame causes lamp faults |
Gather the Vehicle Information Before Opening Anything
Record the year, make, model, body style, trim, and market version. Lamp type and access can change between generations or lighting packages. A vehicle name alone may not identify the correct diagram.
Check whether the installed lighting is original or has been changed. A previous owner may have fitted LED bulbs, a different lamp assembly, a tailgate trim piece, or an illuminated accessory. That history affects what a replacement-part lookup tells you.
Use the owner’s manual for lighting operation, owner-serviceable bulbs, and fuse information. Electrical diagnosis may require the matching wiring diagram and service procedure. Do not use a diagram for a different year merely because the connector appears similar.
Write down when the fault started and what happened immediately beforehand: a bulb change, rear-panel repair, accessory installation, car wash, or intermittent problem during normal use. These are clues, not automatic proof of causation.
If a workshop will investigate, bring those observations. A precise symptom description is more useful than asking for a particular fuse or module based on a forum answer.
If Only One License Plate Light Is Out
Switch the lights and ignition off and allow the lamp to cool before an owner-level inspection. Follow the vehicle’s procedure to access the affected lamp, if that procedure is provided. Do not pry a sealed lens apart to see whether a bulb is inside.
For a replaceable bulb, confirm the specification and whether it is fully seated. A visibly broken filament can support a bulb diagnosis, but a normal-looking bulb does not prove the whole circuit is sound. Some damage or contact faults are not obvious by eye.
Compare accessible parts with the other side only where the vehicle uses the same arrangement. Do not swap assemblies, force connectors, or assume left and right components are interchangeable.
Inspect for loose contacts, cracks, corrosion, or signs of overheating. If the socket is damaged, fitting a new bulb alone may leave the failure unresolved. Have the socket or assembly assessed using the proper repair information.
An integrated LED lamp may not have a separate owner-serviceable light source. Confirm the intended repair rather than trying to dismantle the module. A dark LED assembly can still require diagnosis of its supply and connection before replacement.
If Both License Plate Lights Are Out
Start with the operating mode and then consult the circuit information. On some vehicles the lamps have shared wiring or control; on others, the relevant arrangement differs. There is no universal plate-light fuse number or location.
Check whether other functions are affected. Note exterior lighting faults, a camera problem, trunk-release behavior, or a warning message. Do not assume those functions share the same fuse simply because they fail together, but tell the technician about the combination.
A documented example shows why that matters. GM bulletin 16-NA-169 describes certain 2013–2016 Cadillac XTS vehicles with trunk, camera, or plate-lamp symptoms associated with water-related corrosion at a particular harness connector. It is a model-specific example of a connection fault, not a diagnosis for every car.
If both lamps failed immediately after work near the rear trim, check whether a documented connector was left unplugged or a harness was disturbed. Perform only the access and inspection the service information permits.
Avoid buying two lamp assemblies before identifying whether the circuit reaches them correctly. A shared upstream problem can leave two perfectly serviceable lamps dark.
The Bulb Was Replaced, but the Lamp Is Still Dark
Recheck the part against the exact vehicle application. Physical resemblance does not confirm the base, contacts, electrical rating, or fit inside the housing. If the new part had to be forced into place, stop and verify it.
Confirm that the socket and connector are properly seated according to the vehicle procedure. A lamp can appear installed while a lock remains disengaged or a contact is not meeting correctly.
If an aftermarket LED bulb was fitted, check its documented compatibility. Some designs have polarity requirements, but that does not mean every LED lamp should be reversed or every housing opened. Follow the replacement manufacturer’s instructions and the vehicle’s specification.
Do not repeatedly reinstall the part while the circuit is energized. Switch the system off before handling it. If the original specified equipment is available and suitable, restoring that configuration can help a technician distinguish compatibility issues from a pre-existing fault.
For the physical replacement process, use the license plate light replacement instructions. The diagnostic task is to establish why the lamp remains dark, rather than repeat the same removal steps with more new parts.
Flickering or Intermittent Plate Lights
Record whether flickering occurs constantly, only after rain, during bumps, or after the trunk or tailgate has moved. The pattern can guide an inspection, but it does not identify a faulty part on its own.
A loose terminal, damaged socket, moisture, an unsuitable replacement, or a wiring issue may cause intermittent operation. Do not select one explanation simply because it matches a popular video.
If opening the trunk changes the symptom, note it and stop repeatedly moving the panel to make the lamp work. A wiring or connector problem needs a proper repair; repeatedly flexing the area can make an existing problem worse.
If the flicker began with an LED conversion, ask whether the exact lamp is compatible with the vehicle’s control and monitoring system. Different vehicles operate and monitor lighting differently. An added resistor is not a universal answer and can introduce heat and installation concerns.
A workshop may need to check connections and electrical behavior while reproducing the documented condition. That work requires suitable access and the correct circuit information, not an improvised live-wire test.
Moisture, Corrosion, and Damaged Sockets
Look for a cracked lens, displaced seal, water inside the lamp, or corrosion on accessible terminals. A small amount of exterior dirt is different from water entering the electrical connection.
If the lamp has been wet internally, replacing the light source without addressing the entry path may not provide a lasting repair. The housing, seal, connector, and surrounding trim need to be assessed.
Do not assume a spray cleaner or grease will repair corroded terminals. The correct response depends on the connector and the condition of its contacts, wires, and seals. Some parts need replacement or a specified harness repair.
Avoid scraping live contacts or inserting metal objects to improve their grip. Switch off and follow the service procedure. If terminals are loose, burnt, or badly corroded, leave the electrical repair to a qualified technician.
Tell the repairer if the fault follows rain or washing. The observation helps them look for water entry, but it should not be used to blame a particular accessory without evidence.
Checking a Fuse Without Guessing
Use the correct manual to determine whether an owner-serviceable fuse is relevant. The plate lamps may share a circuit with other functions, and some systems use electronic control that makes a simple “plate light fuse” explanation incomplete.
Follow the manual’s inspection and replacement method. Use the specified fuse type and rating. Do not bridge a fuse with wire or foil, and do not fit a larger one to prevent repeated failure.
If a replacement fuse fails, stop replacing it. A short circuit, damaged component, or wiring problem may be present. The next step is diagnosis of the protected circuit, not a supply of spare fuses.
A fuse that looks intact does not resolve every electrical question. If further testing is needed, a technician can use the appropriate procedure to determine circuit condition. Do not probe a fuse box or connector using an unidentified test point from another model’s diagram.
Keep a record of any fuse you removed or replaced. Accurate information about what was changed can shorten the subsequent investigation and prevent confusion about a newly introduced fault.
When Wiring and Control Diagnosis Are Needed
Once a correct lamp is properly fitted and the simple checks do not identify the problem, the wiring diagram becomes important. It shows the relevant supply, return path, connectors, splices, and control arrangement for that vehicle.
A technician can then test the circuit under the correct operating command and compare results with the service information. Supply and ground checks need to account for how the circuit is designed; a measurement copied from another vehicle may be misleading.
Do not assume a particular wire color is always power or ground. Likewise, the expected behavior of a controlled lamp circuit may differ from a basic permanently powered circuit. Generic instructions to apply battery power across unknown pins can damage components.
A scan tool may be useful when the vehicle provides relevant lighting faults or control information, but a code does not automatically mean the named module needs replacing. Wiring, connections, and the lamp still need to be considered.
Ask the workshop to explain what was found and which tests support the repair. A diagnosis identifying a damaged connector or failed lamp supply is more useful than a list of parts replaced in sequence.
Check a Newly Installed Frame or Accessory Carefully
If the problem appeared after a plate frame was fitted, first distinguish obstruction from failure. A thick upper border or projecting decoration can cast a shadow while the factory lamp remains on.
Look at the light source and then the plate with the trunk or tailgate closed. If removing the obstruction restores the light pattern, you have identified a fit issue rather than proved an electrical defect.
If electrical work was part of the installation, inspect the documented connections and routing with the system safely off. A disturbed connector, trapped harness, or unsuitable connection may matter. Do not assume ordinary frame mounting necessarily touches wiring.
Incorrect hardware can also create a problem if it reaches an area it should not. Check screw length and available clearance using the vehicle’s mounting information. Do not remove more trim or push tools behind the bracket just to search blindly for damage.
A frame’s appearance or material does not diagnose a lamp fault. Base the next action on the actual obstruction, contact mark, connector condition, or test result.
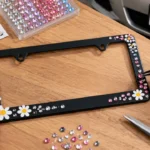
An Illuminated Frame Is a Separate Electrical Accessory
An LED license plate frame can introduce an additional lighting circuit or connection, depending on its design. Its own lights and the vehicle’s original plate lamps should be identified separately during diagnosis.
If only the accessory is dark, check the accessory’s documented supply, switching, connector, and installation instructions. Do not conclude the factory lamp circuit has failed because the frame does not illuminate.
If the original lamps stopped working after accessory wiring was added, return to the installation details and have the circuit assessed. Avoid adding further connections or bypassing protection to make both systems operate.
The guidance on installing an LED plate frame addresses the accessory workflow. It does not replace the vehicle’s wiring diagram or make an illuminated frame an automatic repair for a failed original lamp.
If the Dark Lamp Is on a Trailer
A trailer plate lamp introduces another vehicle connection and its own wiring. Identify whether the problem is limited to that lamp or includes the trailer’s running lights.
Check the documented trailer connector, lamp type, and relevant operating mode. Use the tow vehicle’s and trailer’s information together rather than looking only for a passenger-car plate-light fuse.
Do not assume wire colors, connector assignments, or grounding arrangements are identical across every trailer. An adapter or recent repair adds another item to verify.
If tow-vehicle lights operate normally while the trailer lamp is dark, the trailer still needs inspection. Conversely, an observed trailer fault does not establish that the tow vehicle is supplying the circuit correctly under the relevant conditions.
Use a qualified trailer or automotive technician when circuit testing is needed. Improvised connection changes can create faults in other lighting functions and obscure the original problem.
Stop Testing if You Find Heat Damage
A melted socket, burning smell, smoke, or visibly damaged wiring is a reason to stop operating and handling the affected circuit. Switch off safely and arrange appropriate assistance rather than continuing to swap bulbs or fuses.
Keep the failed parts and photographs where it is safe to do so, and tell the repairer what you observed. Do not clean away heat damage before it has been assessed.
If the vehicle may have an applicable recall or service campaign, check through the manufacturer or the official recall service using the correct vehicle information. A bulletin found online does not establish eligibility or guarantee free work.
A historical service document can help identify a known failure pattern, but its repair should not be copied onto an unrelated vehicle. Current vehicle-specific service information remains the basis for the work.
Give the Workshop a Useful Fault Description
When arranging diagnosis, provide the exact vehicle details, whether the lamps are original, which side fails, and the lighting mode used to check them. Mention recent bulb changes, rear-panel repairs, accessory wiring, rain-related symptoms, and any warning messages.
Describe observations rather than naming a part you have not tested. For example, you might report that both original lamps remain dark with the relevant exterior lights manually selected, while the other rear lamps work. That gives a technician a clearer starting point than a request to replace a particular module.
Bring the identification of any replacement bulb or assembly and explain what has already been inspected. It helps avoid repeating a parts change and keeps attention on the part of the circuit that still needs diagnosis.
Verify the Repair in Its Normal Installed Position
After the fault is corrected, check each factory plate lamp in the appropriate exterior-light mode. Look for flickering, warning messages, loose housings, or a remaining dark area across the plate.
Make sure the seals, connectors, and trim are properly restored. A working bulb with a cracked housing or trapped wire is not a finished repair.
Check the plate and frame with the trunk or tailgate closed. Required information should remain visible and the light path should be unobstructed. Correct a frame-fit issue separately if it remains.
If the original fault depended on rain or panel movement, tell the workshop that before collecting the vehicle. Ask how the repair was verified under the relevant conditions instead of assuming that one successful switch-on proves an intermittent fault is resolved.
Frequently Asked Questions
Why does only one plate light stop working?
The lamp, bulb, socket, or local connection may be involved. Compare the sides and use the exact vehicle procedure, but do not assume the cause without inspecting or testing it.
Do license plate lights have a separate fuse?
Some vehicles use a relevant shared fuse or circuit, while others have different control arrangements. Check the correct manual and wiring information instead of using a universal fuse number.
Why is the light still off after a new bulb?
The replacement may be incorrect or poorly seated, or the socket, connector, supply, ground, or wiring may be faulty. A new bulb does not test the rest of the circuit.
Can a plate frame make the light appear broken?
Yes, if it blocks the light path or changes the plate position. Check whether the lamp itself illuminates before treating a shadow as an electrical failure.
Does flickering mean I need a resistor?
No. Connection faults, moisture, damaged parts, or replacement incompatibility can cause flickering. Diagnose the cause rather than adding a resistor by default.
Can I keep driving while waiting to fix it?
Check the applicable lighting requirements and arrange repair promptly. Do not assume daylight operation, an application for parts, or an accessory light removes the need for the vehicle’s required plate illumination.